


在本指南中,我們將向您展示如何在幾乎任何版本的Windows上安裝Active Directory PowerShell模塊。在PowerShell中安裝Active Directory(AD)模塊可為IT專業人員提供方便且安全的遠程訪問,以管理其AD環境,而無需互動登錄其域控制器。
微軟不推薦通過互動登錄到Active Directory域控制器(DCs)中來工作在Active Directory中的這種非常普遍和滲透性的做法。這是一種基本的安全風險,也是低效的,這是其中兩個缺點。微軟建議的最佳實踐是遠程和安全地使用遠程伺服器管理工具(RSAT)套件,其中包括用於Windows PowerShell的Active Directory模塊。
安裝Active Directory PowerShell模塊
I will assist you in the installation of this rather powerful module on the varying Windows Server and Windows client operating systems. Hopefully, this guide will help you be more efficient, especially when it comes to PowerShell scripting and productivity gains.
Windows 7 (Windows Server 2008 R2)
等等…在撰寫本文時,Windows 7離開微軟支援約兩年半,對吧?是的…你是對的。沒有人應該在使用Windows 7。但是眾所周知,絕大多數企業和中小型企業肯定有一些Windows 7機器藏在幕後。
下載並安裝Windows 7的遠端伺服器管理工具(RSAT)
首先,您需要下載並安裝Windows 7的遠端伺服器管理工具(RSAT)。現在,如果您瀏覽這個官方微軟文件鏈接,您將看到Windows 7的RSAT有所描述。但無論您如何努力,都找不到下載鏈接(就是沒有…)。
簡而言之,微軟已經移除了 Windows 7 的 RSAT 套件的任何官方下載。但多虧了 web.archive.org,過去以某種方式被保留下來:您可以從this link下載該套件。
下載完成後,請雙擊它,點擊Yes安裝更新,並在許可條款上點擊Accept。
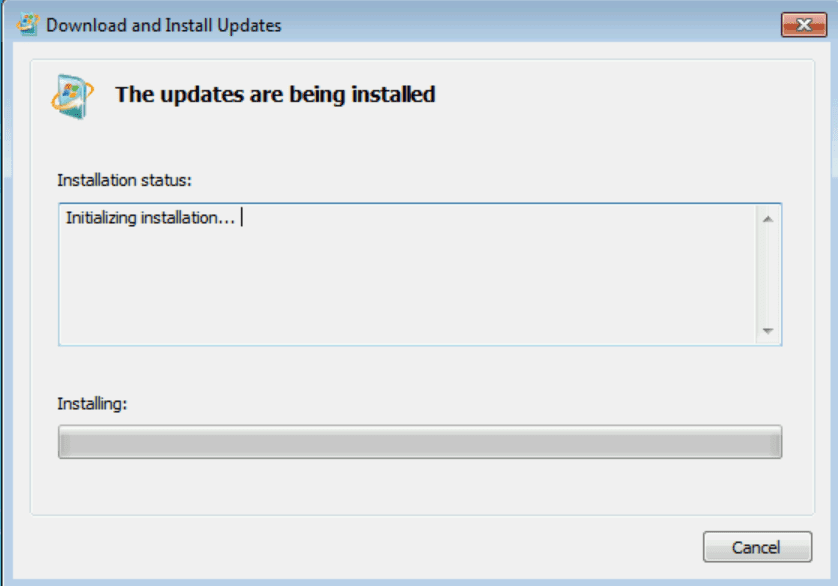
安裝完成後,您可以繼續進行下一步。
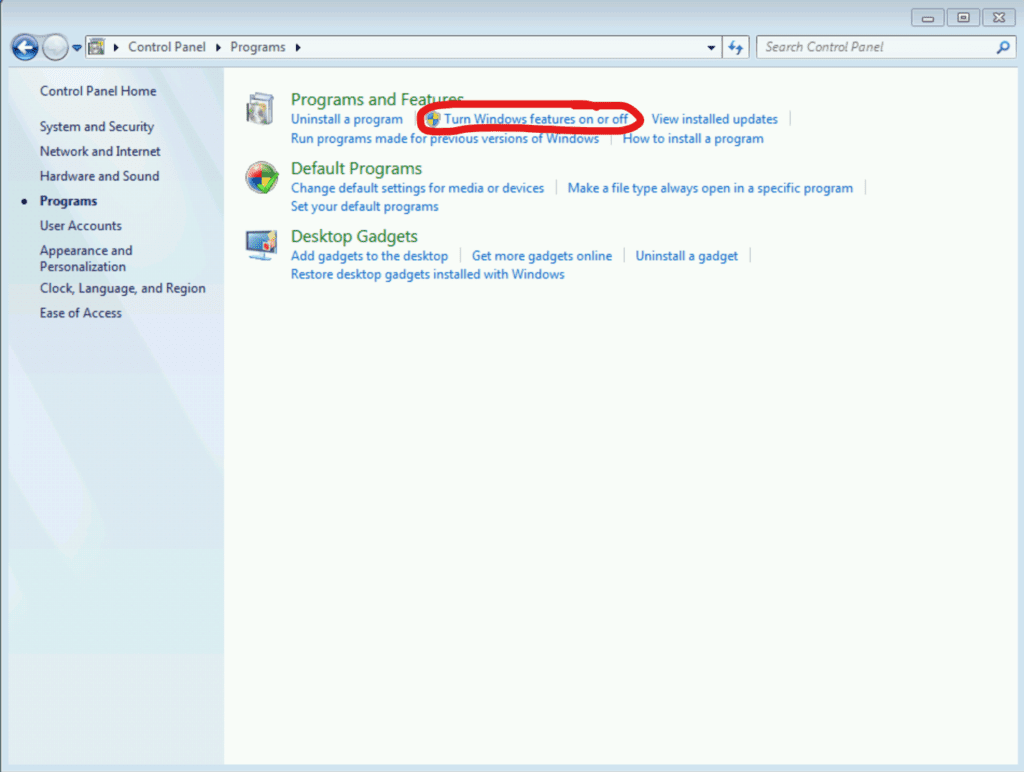
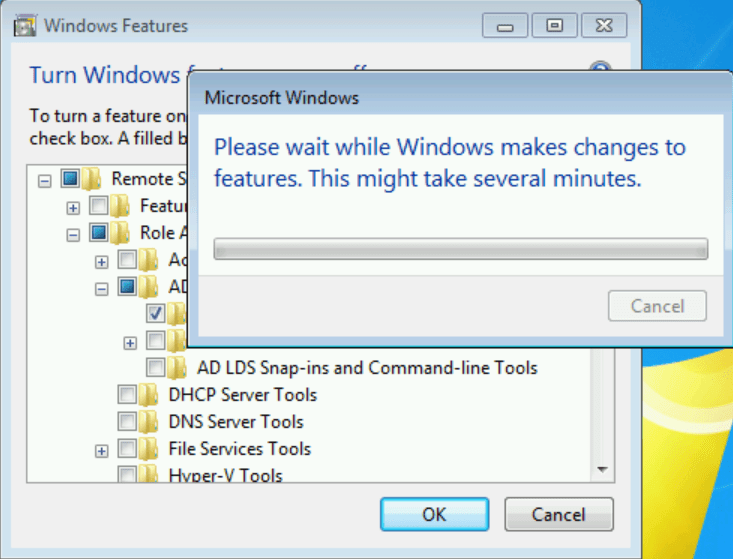
點擊開始 -> 控制面板 -> 程式,然後選擇‘打開或關閉 Windows 功能’。
展開遠端伺服器管理工具 -> 角色管理工具 -> AD DS 和 AD LDS 工具,並在‘Windows PowerShell 的 Active Directory 模組’旁勾選。點擊確定。
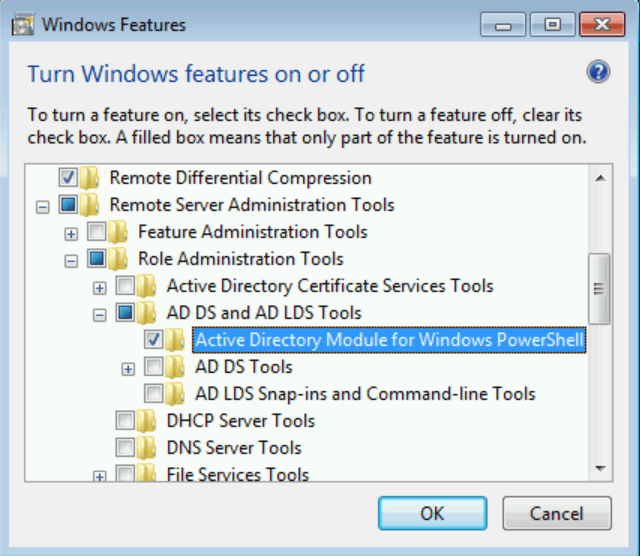
然後將開始安裝 PowerShell 模組,這可能需要幾分鐘的時間。
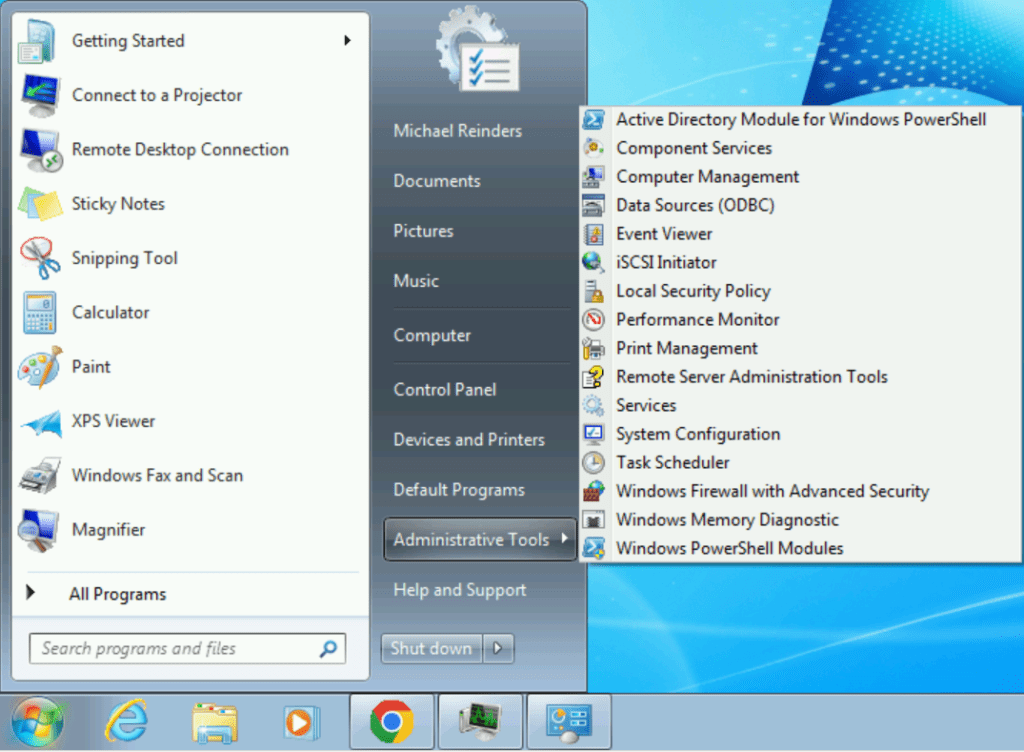
之後,它將愉快地消失。點擊開始 -> 管理工具。在頂部,您可以點擊Windows PowerShell 的 Active Directory 模組。
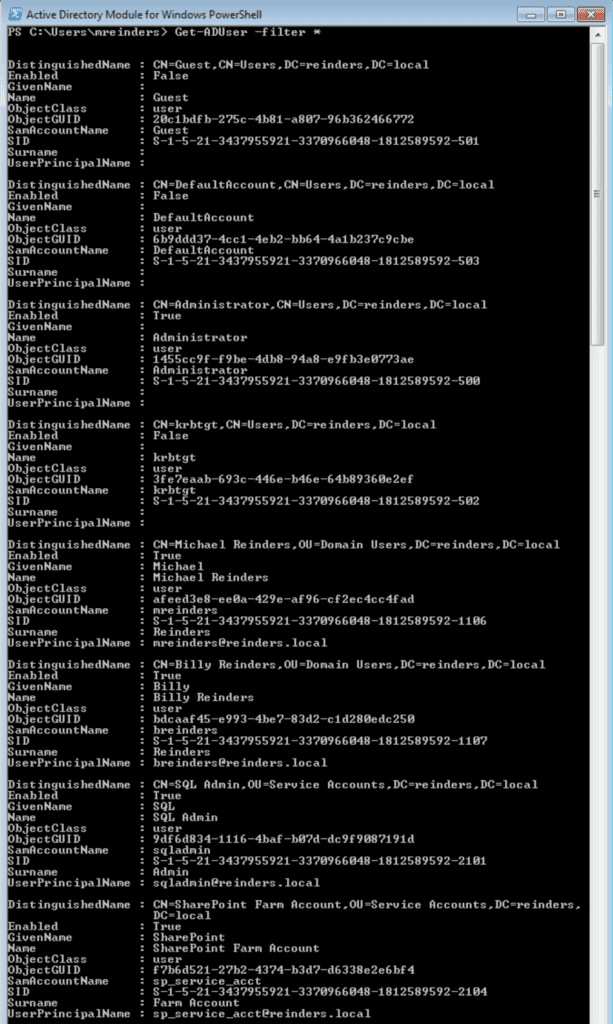
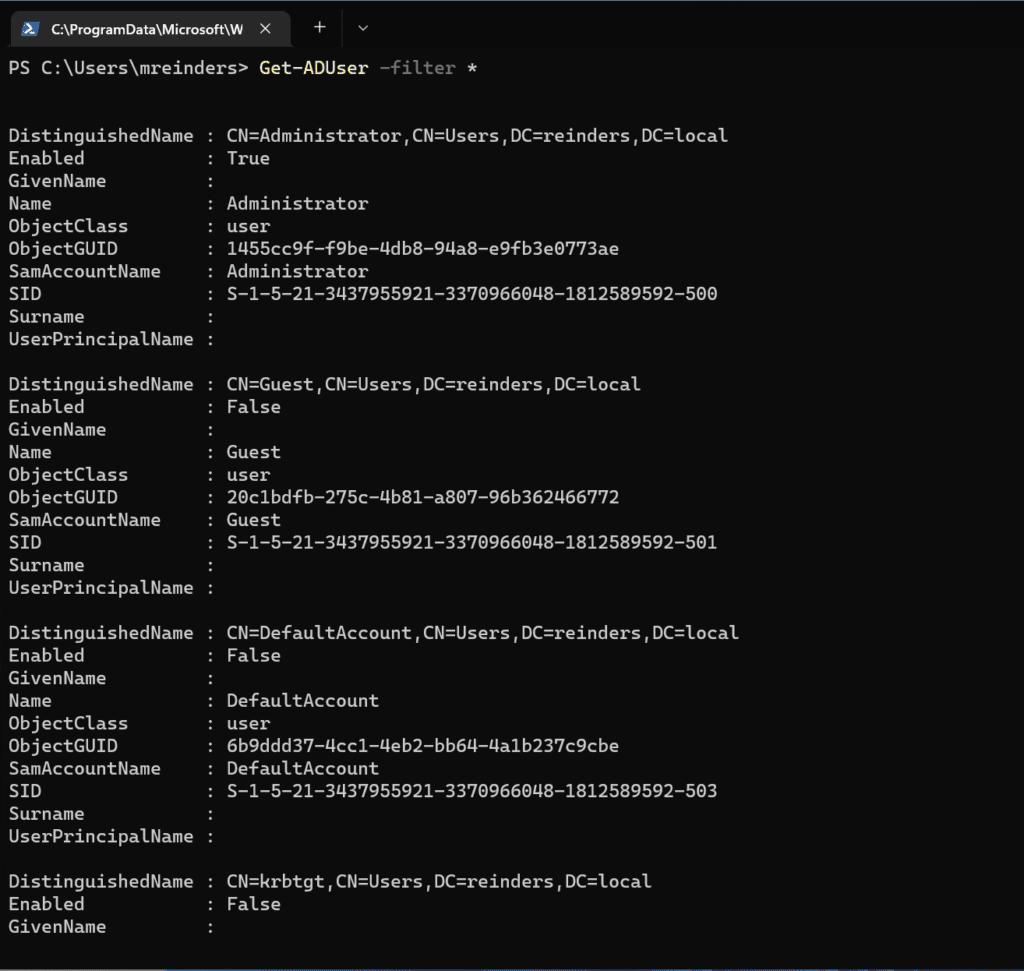
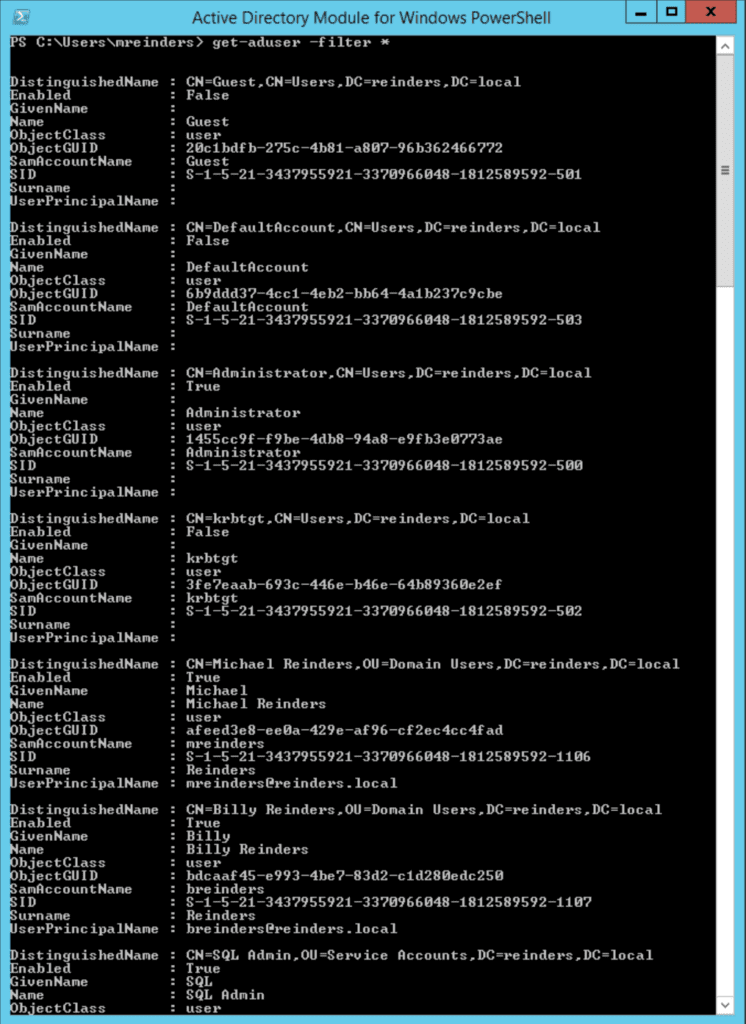
這樣就完成了。我剛輸入了Get-ADUser -filter *以測試和驗證這個模組是否運作:
Get-ADUser -filter *
如下所示,模組成功連接到我的 Active Directory 並輸出了所有實驗室用戶帳戶。太棒了!
Windows Server 2008 R2
因此,在Windows Server 2008 R2上安裝此軟體的過程相當相似。這並不奇怪,因為這個版本的Windows Server和Windows 7分享相同的程式碼庫。
以下是差異和需要執行的步驟。別擔心,這很簡單:
1. 繼續使用同一個下載來源獲取RSAT工具並安裝它們。
2. 開啟伺服器管理員並點擊“新增功能”。
3. 向下捲動並尋找遠端伺服器管理工具 -> 角色管理工具 -> AD DS 和 AD LDS 工具 -> 用於 Windows PowerShell 的 Active Directory 模組。
您也可以使用以下 PowerShell 命令安裝該模組:
Import-Module ServerManager
Add-WindowsFeature RSAT-AD-PowerShell
完成!
Windows 10
在Windows 10上,Microsoft在大幅減少安裝RSAT工具所需的時間以及相應的各種問題上取得了重大進展 – 他們將這些工具納入操作系統的組件中,並通過Optional Features使其可安裝。
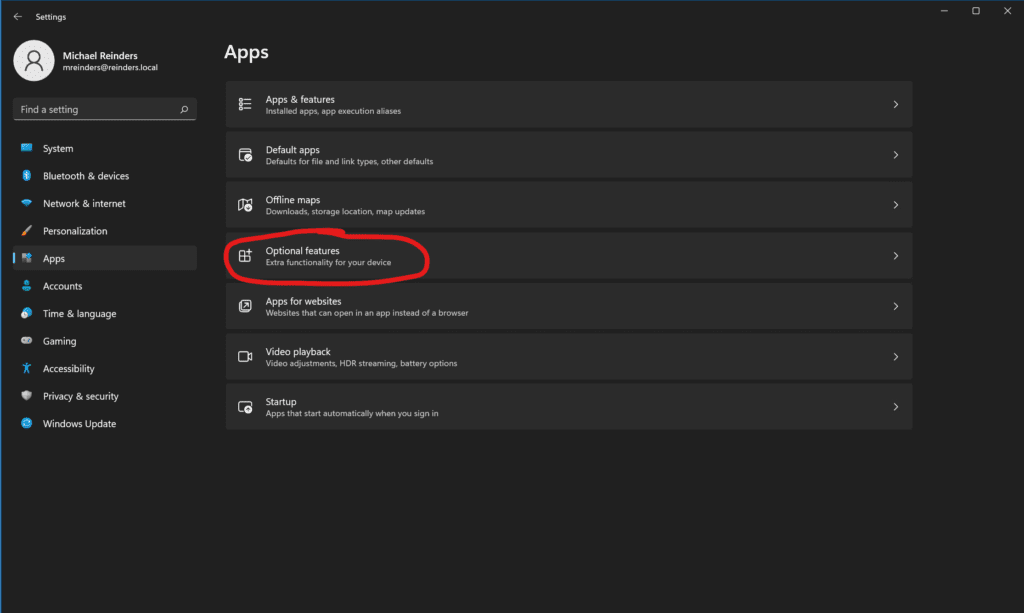
點擊開始 -> 設置 -> 應用程式 -> 可選功能。
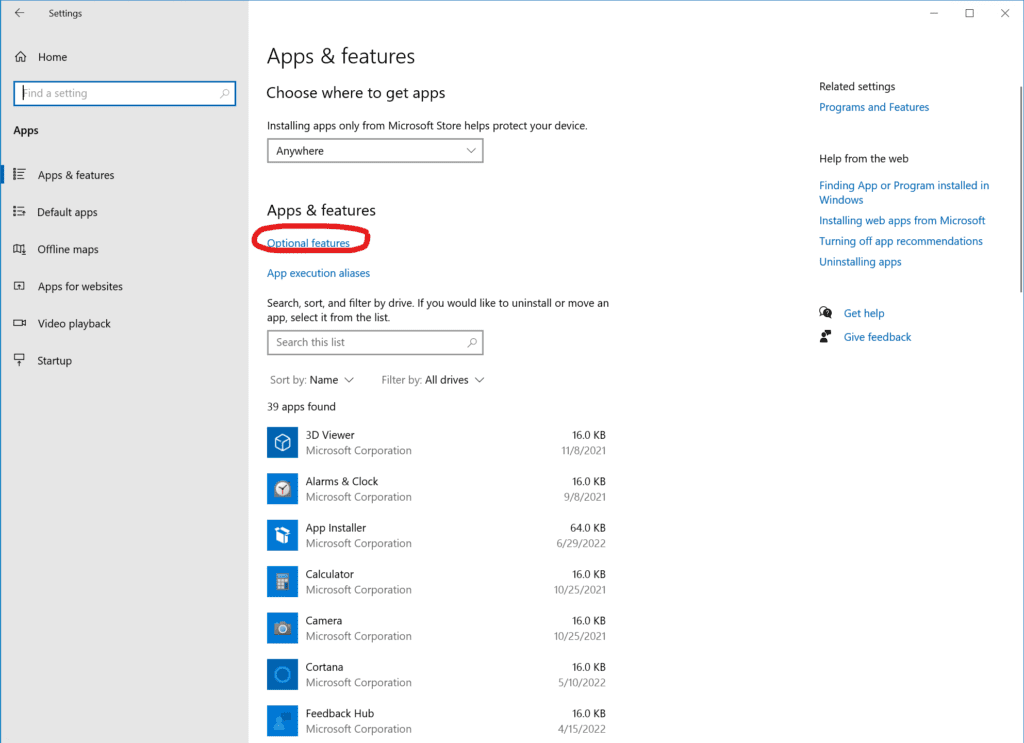
點擊頂部的“添加功能”按鈕,然後向下滾動並選中“RSAT:Active Directory域服務和輕量級目錄服務工具”
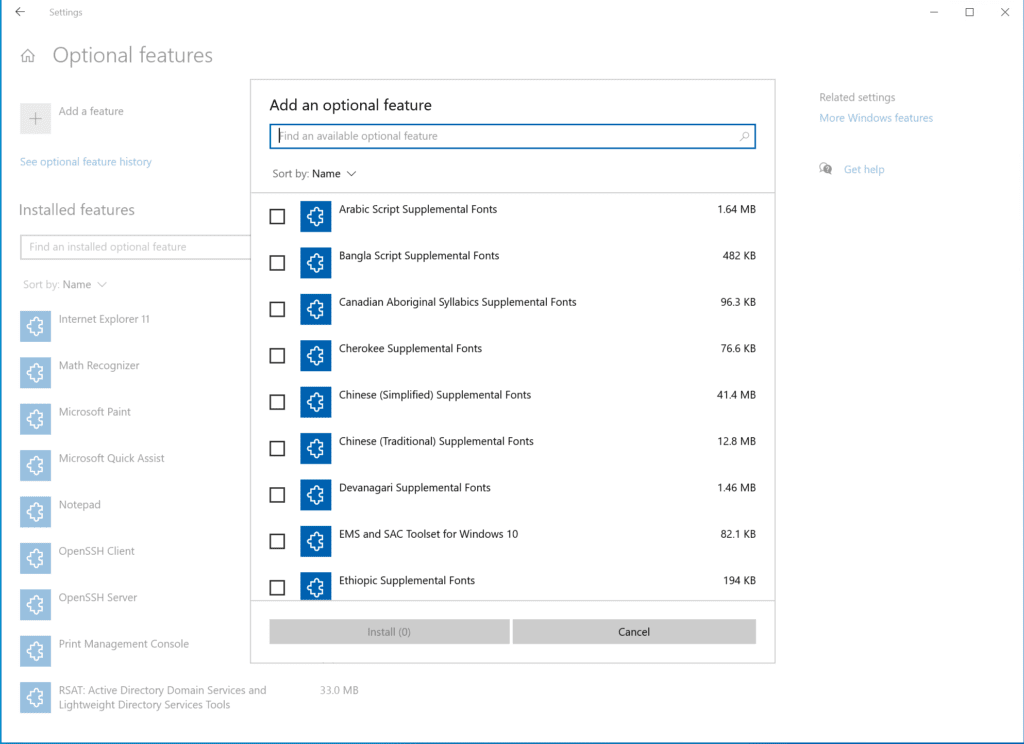
。點擊安裝按鈕,Windows 10將啟用該功能。
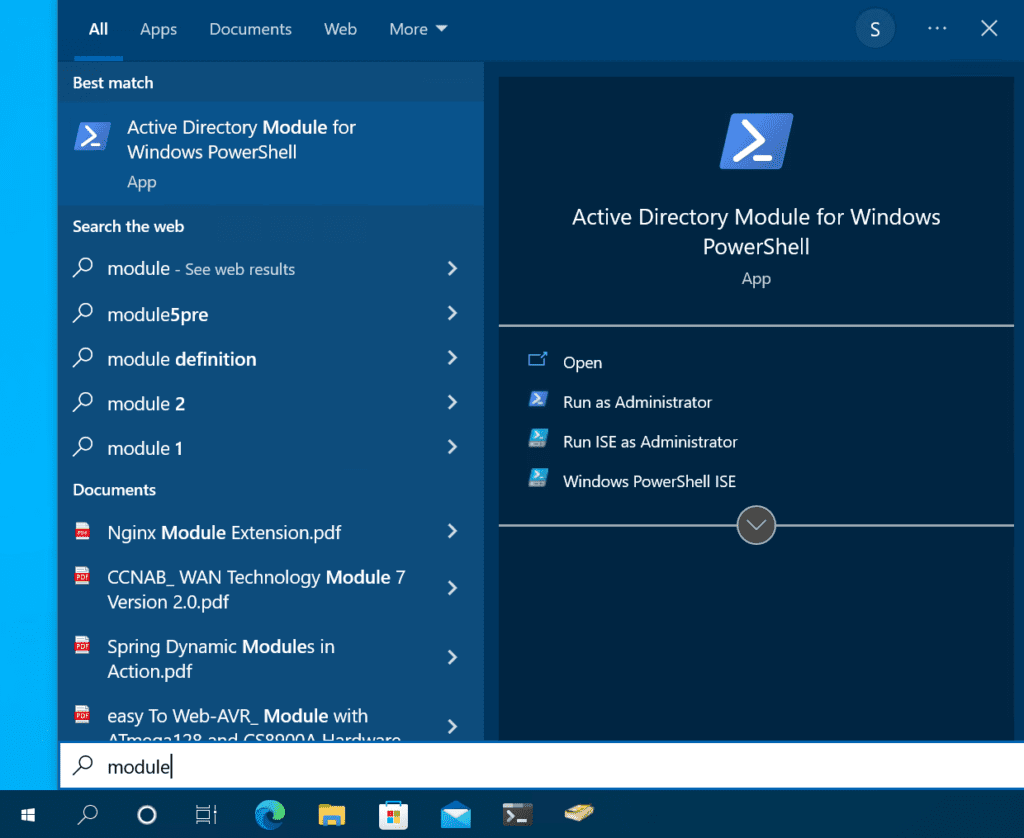
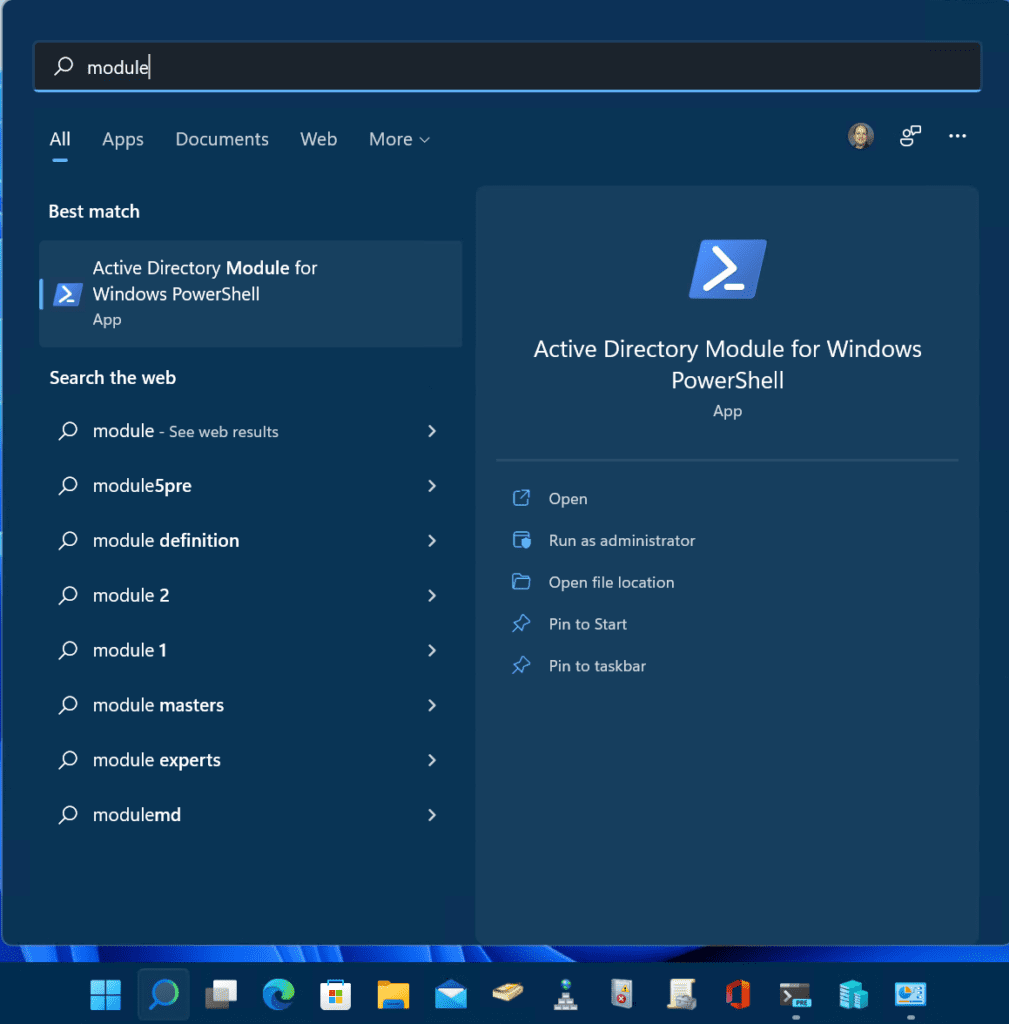
接下來,打開Windows 10 開始菜單,開始輸入“module”,你會找到“用於Windows PowerShell的Active Directory模塊”。點擊它,你就可以使用了!
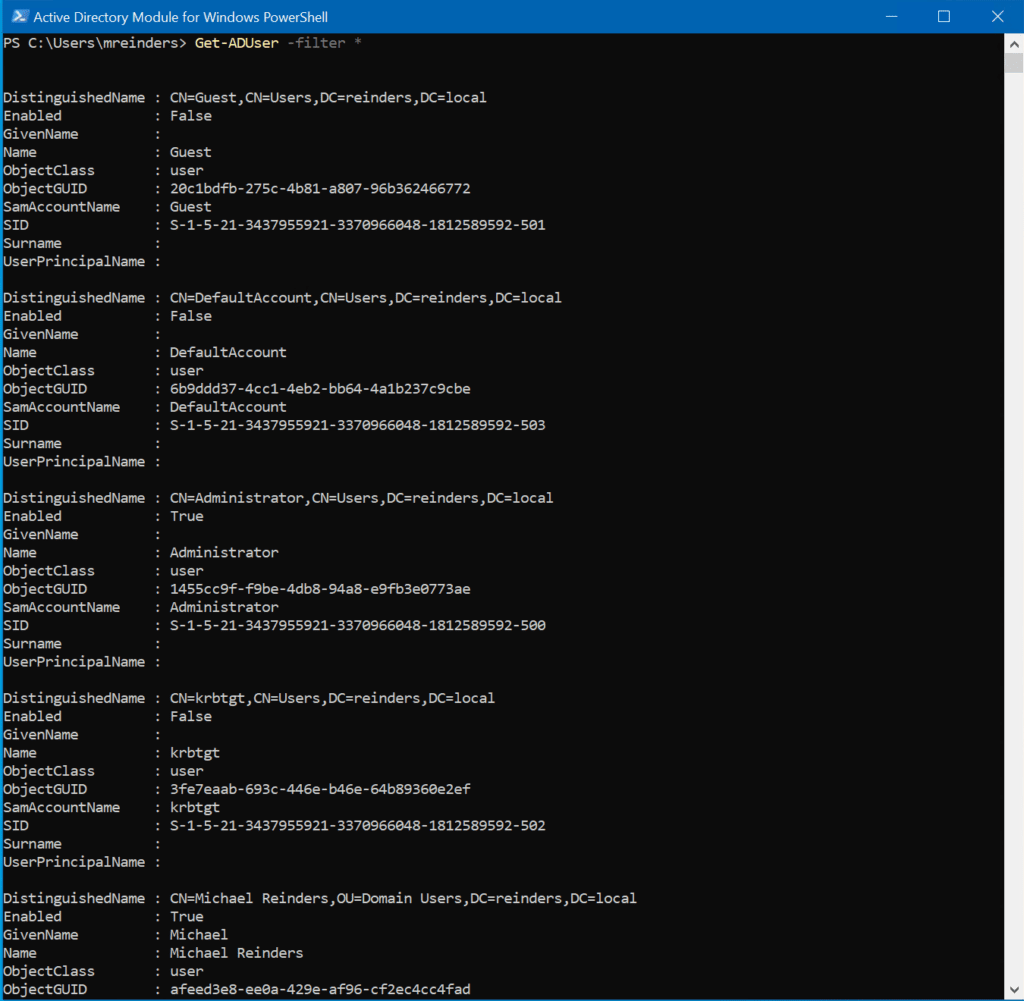
I’ll run the same Get-ADUser command, the output looks familiar, doesn’t it? ?
Get-ADUser -filter *
Windows 11
Windows 11上的過程與Windows 10非常相似,只是設置的布局已經經過一些調整。讓我們從我的實驗室中的一個Windows 11客戶端VM開始這個過程。
點擊開始 -> 設置 -> 應用程式 -> 可選功能。
點擊右上角的“查看功能”按鈕,然後向下滾動找到“RSAT:Active Directory域服務和輕量級目錄服務工具”。

點擊下一步,Windows 11將為您安裝該功能。之後,如上所述,再次點擊開始按鈕,開始輸入“模組”,就可以找到!
點擊“Windows PowerShell 的 Active Directory 模組”。我們可以使用相同的 Get-ADUser 命令來確認本地和 Active Directory 域中的權限。
Get-ADUser -filter *
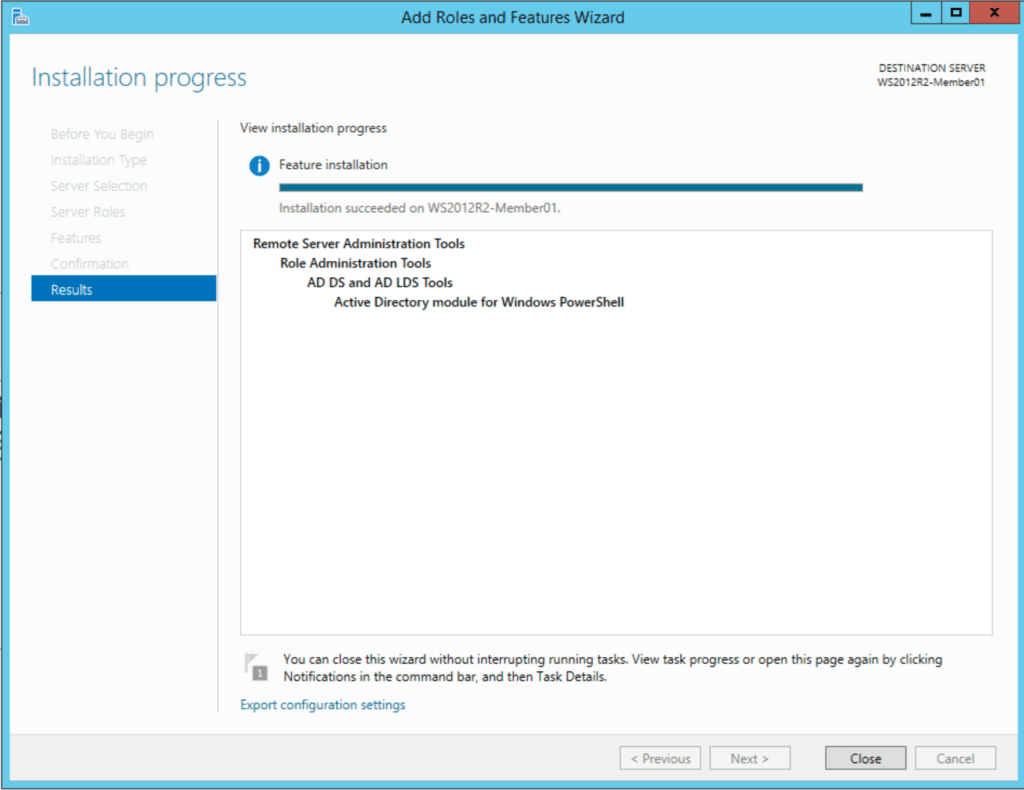
Windows Server 2012 R2(Windows Server 2016、2019、2022 和 Windows 8.1)
由於這些 Windows 版本之間的安裝過程非常相似,我將在這裡介紹一套步驟。這將涵蓋Windows Server 2012 R2、Windows Server 2016、Windows Server 2019和Windows Server 2022(這也非常適用於 Windows 8.1)。
提醒:Windows 8.1將於2023年1月終止支援,而Windows Server 2012/Windows Server 2012 R2將於2023年10月終止支援。做好準備吧!
同樣地,這些Windows版本共享相同的程式碼基礎,因此步驟非常相似。讓我們從一個全新、完全打補丁的Windows Server 2012 R2成員伺服器開始,在我的Windows Server 2022 Active Directory Hyper-V實驗室中。
讓我們繼續打開伺服器管理員,然後我們將點擊新增角色和功能。
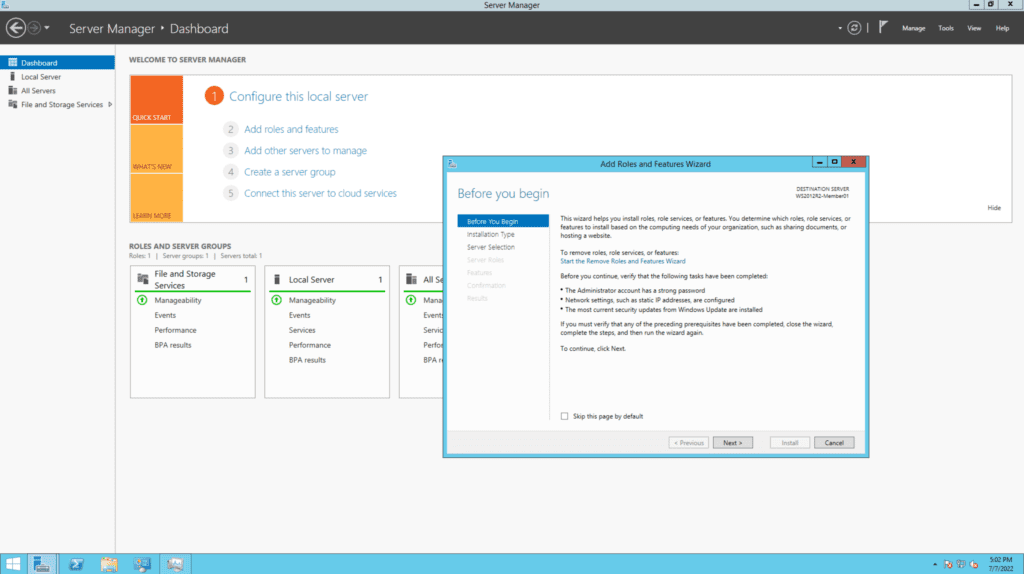
一直點擊下一步直到進入“選取功能”畫面。與之前相同,展開至“遠端伺服器管理工具 -> 角色管理工具 -> AD DS 和 AD LDS 工具 -> 並選擇用於 Windows PowerShell 的 Active Directory 模組”。

在下一畫面中,點擊安裝,完成!
點擊開始 -> 管理工具。看哪,它就在那裡。打開“用於 Windows PowerShell 的 Active Directory 模組”。讓我們再次使用相同的Get-ADUser指令。
Get-ADUser -filter *
PowerShell Core 6.0/7.x
有一些其他的生產力功能能幫助提升您作為IT專業人士的效率。這包括在PowerShell Core 6.x/7.x上安裝Active Directory模塊的方法。我將在我其中一個運行Windows 10版本21H2的虛擬機器上演示這個過程。
第一步是按照上面所述安裝RSAT工具。您可以按照上面“Windows 10”部分中提到的不同步驟進行操作。
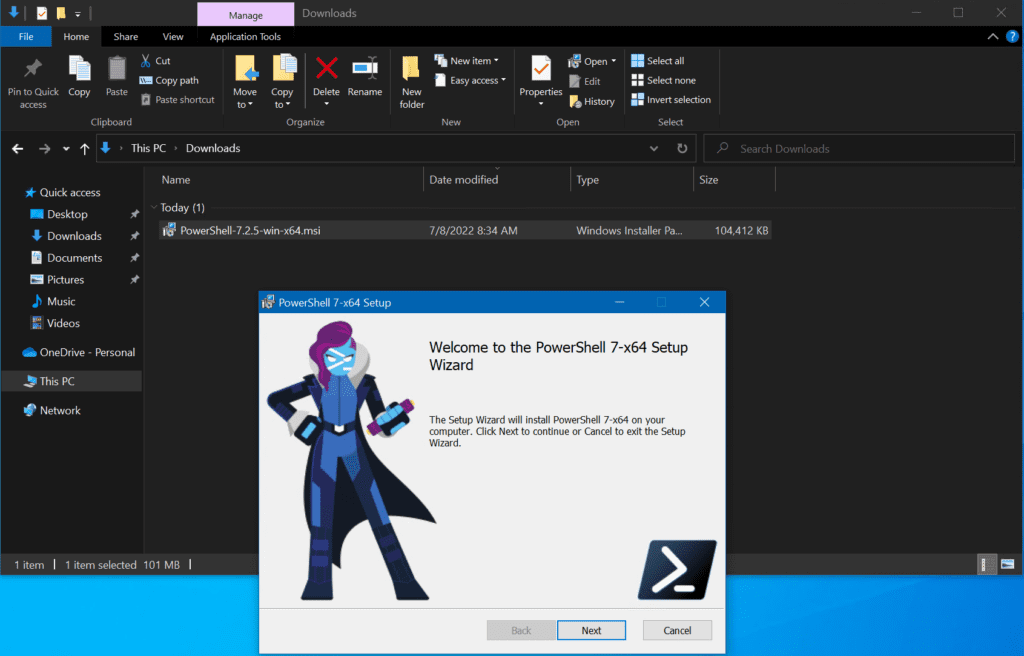
當您安裝好這些工具後,您可以安裝最新版本的PowerShell Core,在我寫作本文時,最新版本是PowerShell 7.2.5。您可以在這個頁面找到下載鏈接。
在打開安裝精靈後,點擊下一步。在“可選操作”屏幕上,您可以看到“啟用PowerShell遠程”選項。請確保勾選該選項。
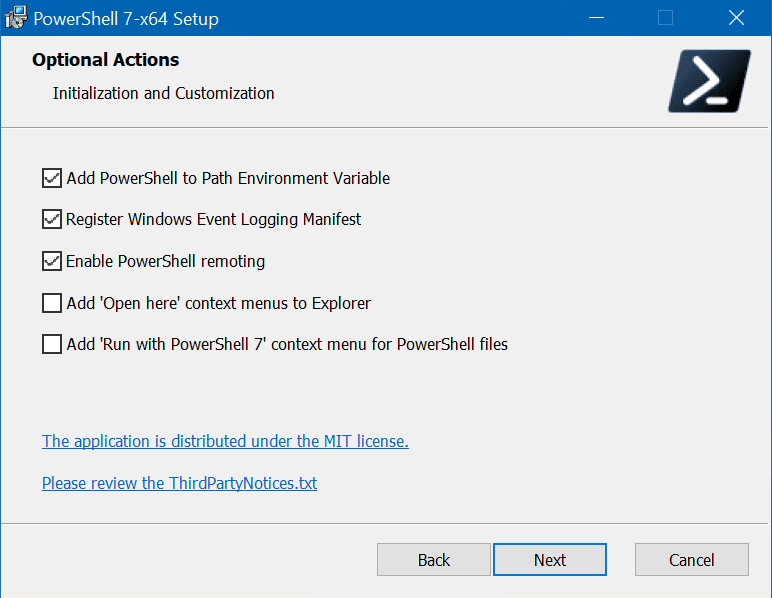
接著再點擊下一步幾次,然後點擊安裝。
安裝完成後,您可以以管理員身份從“開始”菜單中啟動它。
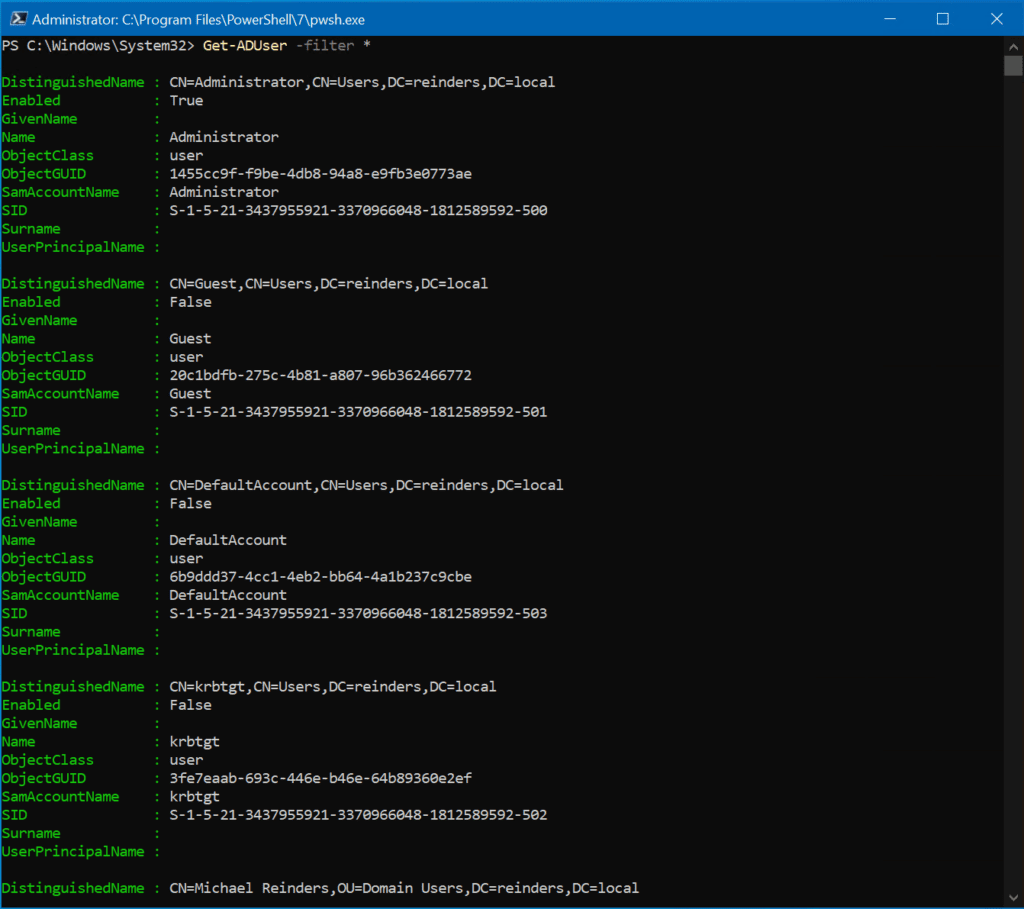
由於安裝的模塊基本上是按照安裝的PowerShell版本進行變動的,我能夠使用PowerShell(Core)7.2.5並在其中運行Get-ADUser命令。
Get-ADUser -filter *
使用 PowerShell 遠端和互動式會話
另一個非常強大的功能是,當連接到其中一台域控制器時,在客戶端電腦上啟動一個遠端、互動式 PowerShell 會話。讓我用以下命令演示如何做到:
Enter-PSsession ws16-dc1
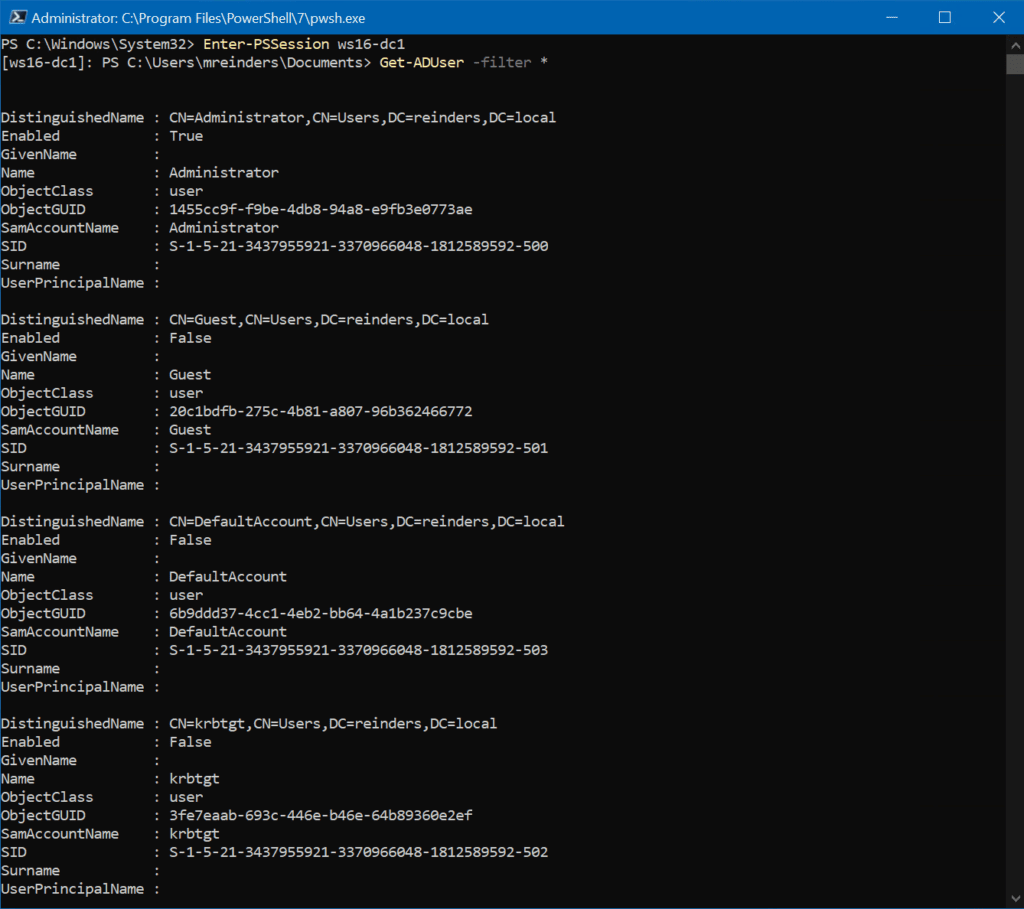
所以,如果您的 IT 安全人員出於某種原因不希望在您的客戶端機器上安裝 RSAT 工具,您仍然可以使用 PowerShell 在不必登錄到域控制器的情況下完成 Active Directory 中的任務。蠻巧妙的技巧,對吧?
我們有的下一個選項是使用所謂的隱式遠端。這允許您在本地會話中運行 AD cmdlets。但是,命令是在域控制器上遠程運行的。運行以下命令來實現這一點。
下面的第一個命令在名為 ws16-dc1 的 DC 上啟動了一個 PowerShell 會話:
$Session = New-PSSession -ComputerName ws16-dc1
接下來的命令將遠程會話中的 Active Directory 模塊導入到我們的本地會話中:
Import-Module -PSsession $session -name ActiveDirectory
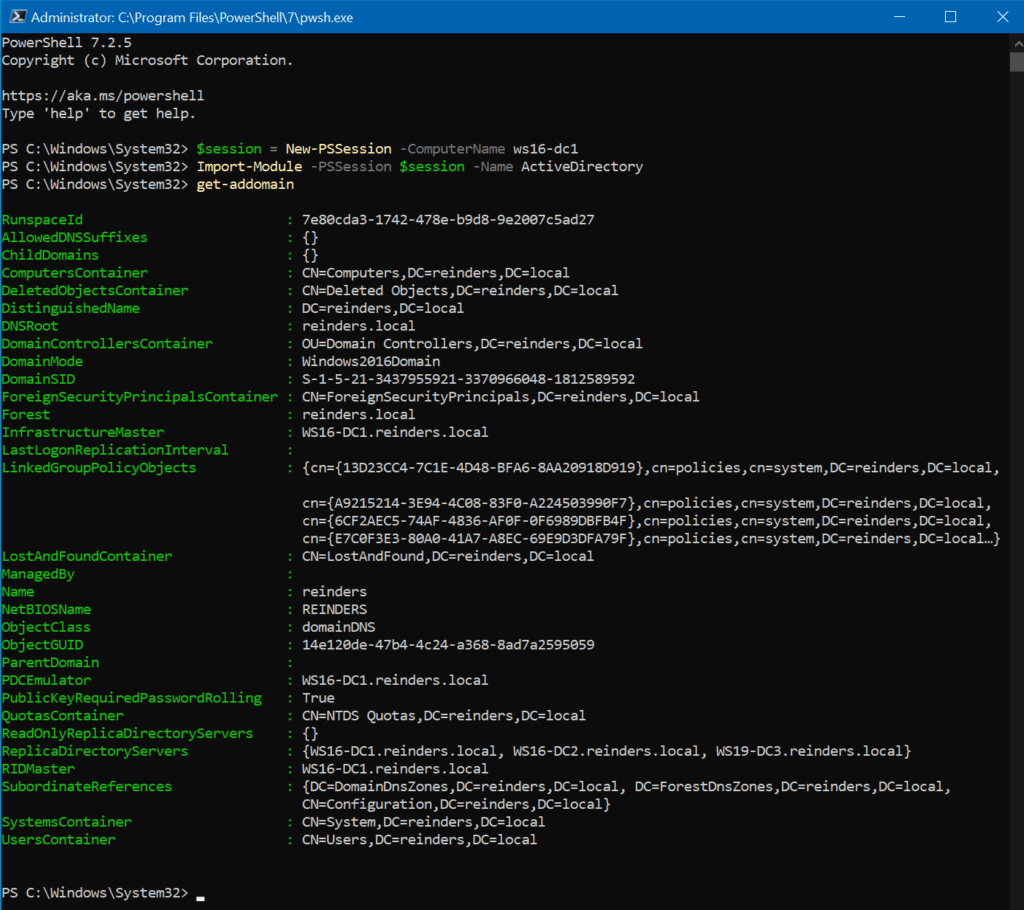
您運行的所有命令都實際上是在您的域控制器上處理和運行的。
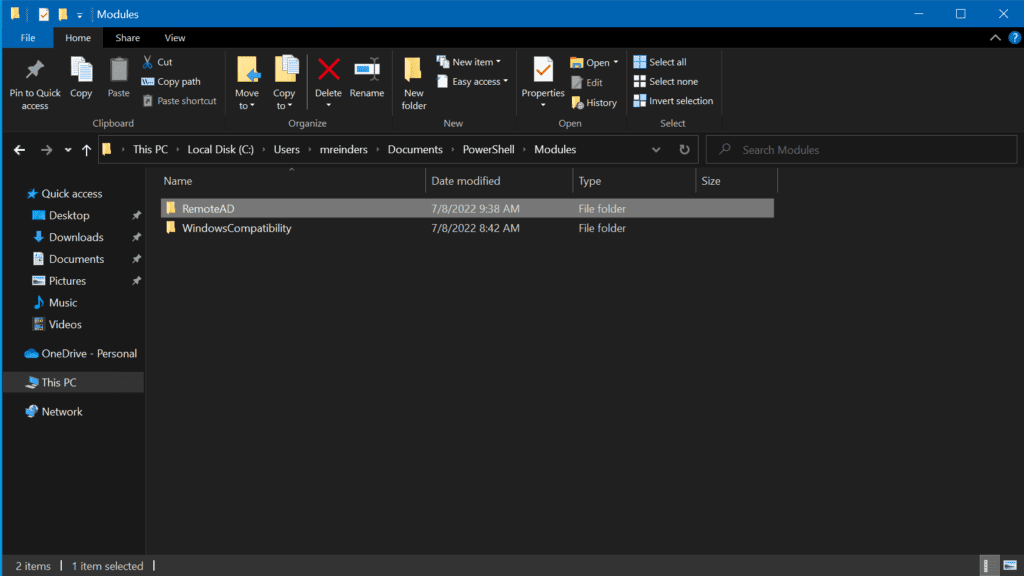
將遠端AD模組匯出到本地模組
我們可以在這裡完成的最終任務是將AD cmdlets從遠端會話匯出到本地模組。以下是範例命令,通過在您的“文件”文件夾中的PowerShell\Modules\RemoteAD下創建一個本地模組來完成此任務。
$session = New-PSSession -ComputerName ws16-dc1
Export-PSSession -Session $session -Module ActiveDirectory -OutputModule RemoteAD
Remove-PSSession -Session $session
Import-Module RemoteAD

與我們之前運行的步驟一樣,我們再次使用隱式遠程,這意味著我們使用的所有cmdlet將在我們指定的域控制器上遠程運行。本地RemoteAD模組將與DC上的cmdlet建立連接。
優惠提示:如果您希望在其他客戶端計算機上使用此RemoteAD模組,您可以將RemoteAD文件夾複製到其他機器上的PowerShell Core模組文件夾。
這兩種方法之間的區別在於 – 當您第一次使用AD cmdlet時,PowerShell只會與域控制器建立連接。這是一個持久的連接。您不必將上述命令添加到您的腳本或配置文件中,因為PowerShell將自動加載它們。但是,請注意,如果您更新域控制器上的AD模組,您可能需要重複這些步驟。
結論
發現一些IT專業人士需要經歷的程序非常簡單,這讓人感到耳目一新。感謝微軟在過去十年中一直保持安裝PowerShell活動目錄模組的整體流程相當流暢而一致!每一點助力都是宝贵的。
多虧這樣的帖子,如果你需要乘坐你的迪羅倫回到過去,你將擁有完成任務所需的一切。感謝您的閱讀,請隨意在下面的評論部分留下任何意見或問題。
Source:
https://petri.com/install-active-directory-powershell-module/