


Whisper AI是由OpenAI开发的先进自动语音识别(ASR)模型,能够以令人印象深刻的准确性将音频转录为文字,并支持多种语言。虽然Whisper AI 主要用于批处理,但可以在Linux系统上配置为实时语音转文字转录。
在本指南中,我们将逐步介绍如何在Linux系统上安装、配置和运行实时转录的Whisper AI。
什么是 Whisper AI?
Whisper AI是基于大量音频录音数据集训练的开源语音识别模型,基于深度学习架构,使其能够:
- 转录多种语言的语音。
- 有效处理口音和背景噪音。
- 将口语翻译成英语。
由于它设计用于高准确度转录,它被广泛应用于:
- 实时转录服务(例如辅助功能)。
- 语音助手和自动化。
- 转录录制的音频文件。
默认情况下,Whisper AI并未针对实时处理进行优化。但是,通过一些额外工具,它可以处理实时音频流进行即时转录。
Whisper AI 系统要求
在運行 Whisper AI 前,請確保您的系統符合以下要求:
硬體要求:
- CPU:多核心處理器(Intel/AMD)。
- RAM:至少 8GB(建議 16GB 或以上)。
- GPU:具備 CUDA 的 NVIDIA 顯示卡(可選,但能顯著加快處理速度)。
- 儲存空間:至少 10GB 的空閒磁碟空間用於模型和依賴項。
軟體要求:
- 一個 Linux 發行版,如 Ubuntu、Debian、Arch、Fedora 等。
- Python 版本 3.8 或更高。
- Pip 套件管理器 用於安裝 Python 套件。
- FFmpeg 用於處理音訊檔案和串流。
步驟 1:安裝所需的依賴項
在安裝 Whisper AI 前,請更新您的套件列表並升級現有套件。
sudo apt update     [On Ubuntu]
sudo dnf update -y  [On Fedora]
sudo pacman -Syu    [On Arch]
接下來,您需要安裝 Python 3.8 或更高版本及 Pip 套件管理器,如下所示。
sudo apt install python3 python3-pip python3-venv -y             [On Ubuntu]
sudo dnf install python3 python3-pip python3-virtualenv -y       [On Fedora]
sudo pacman -S python python-pip python-virtualenv               [On Arch]
最後,您需要安裝 FFmpeg,這是一個用於處理音訊和視頻檔案的多媒體框架。
sudo apt install ffmpeg     [On Ubuntu]
sudo dnf install ffmpeg     [On Fedora]
sudo pacman -S ffmpeg       [On Arch]
步驟 2:在 Linux 中安裝 Whisper AI
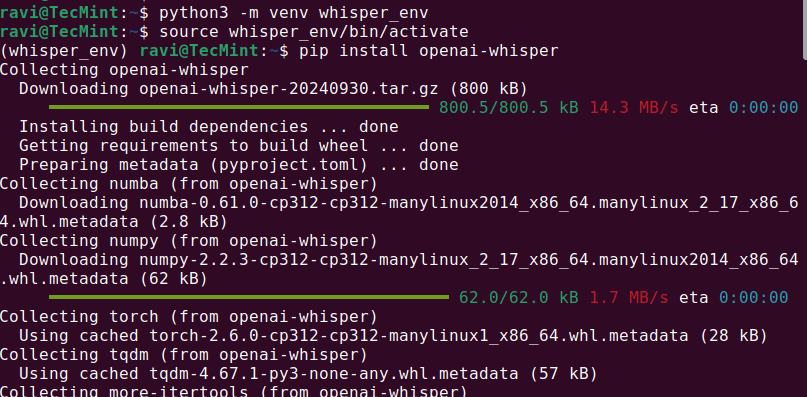
一旦所需的依賴項安裝完成,您可以在虛擬環境中安裝 Whisper AI,這樣可以安裝 Python 套件而不影響系統套件。
python3 -m venv whisper_env
source whisper_env/bin/activate
pip install openai-whisper
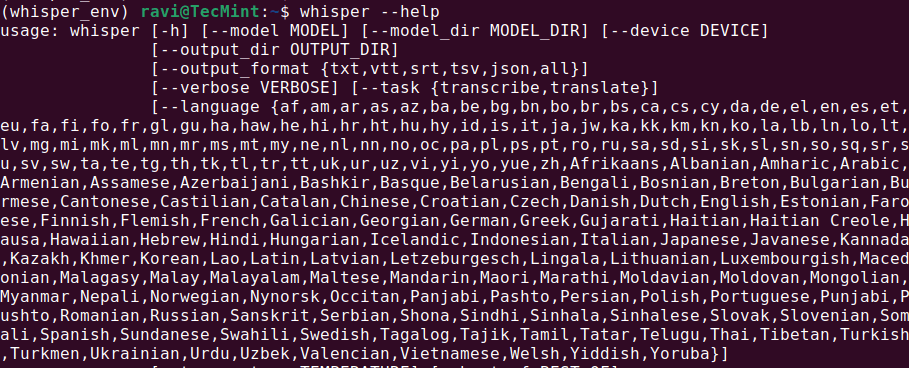
安裝完成後,通過運行來檢查 Whisper AI 是否正確安裝。
whisper --help
這應顯示可用命令和選項的幫助菜單,這意味著 Whisper AI 已安裝並準備好使用。
步驟 3:在 Linux 中運行 Whisper AI
一旦 Whisper AI 安裝完成,您可以使用不同的命令開始轉錄音頻文件。
轉錄音頻文件
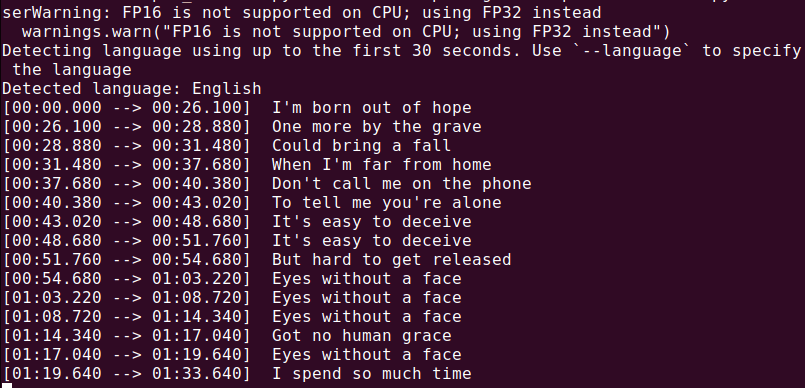
要轉錄音頻文件(audio.mp3),請運行:
whisper audio.mp3
Whisper 將處理該文件並生成文本格式的轉錄本。
現在一切都已安裝,讓我們創建一個 Python 腳本來從您的麥克風捕獲音頻並實時轉錄。
nano real_time_transcription.py
將以下代碼複製並粘貼到文件中。
import sounddevice as sd
import numpy as np
import whisper
import queue
import threading

# Load the Whisper model
model = whisper.load_model("base")

# Audio parameters
SAMPLE_RATE = 16000
BUFFER_SIZE = 1024
audio_queue = queue.Queue()

def audio_callback(indata, frames, time, status):
    """Callback function to capture audio data."""
    if status:
        print(status)
    audio_queue.put(indata.copy())

def transcribe_audio():
    """Thread to transcribe audio in real time."""
    while True:
        audio_data = audio_queue.get()
        audio_data = np.concatenate(list(audio_queue.queue))  # Combine buffered audio
        audio_queue.queue.clear()

        # Transcribe the audio
        result = model.transcribe(audio_data.flatten(), language="en")
        print(f"Transcription: {result['text']}")

# Start the transcription thread
transcription_thread = threading.Thread(target=transcribe_audio, daemon=True)
transcription_thread.start()

# Start capturing audio from the microphone
with sd.InputStream(callback=audio_callback, channels=1, samplerate=SAMPLE_RATE, blocksize=BUFFER_SIZE):
    print("Listening... Press Ctrl+C to stop.")
    try:
        while True:
            pass
    except KeyboardInterrupt:
        print("\nStopping...")
使用 Python 執行該腳本,這將開始監聽您的麥克風輸入並實時顯示轉錄的文本。清晰地對著麥克風說話,您應該會在終端上看到結果打印出來。
python3 real_time_transcription.py
結論
Whisper AI 是一種強大的語音轉文本工具,可適應於 Linux 上的實時轉錄。為了獲得最佳效果,請使用 GPU 並優化系統以進行實時處理。
Source:
https://www.tecmint.com/whisper-ai-audio-transcription-on-linux/