


Spring Bean Scopes 允許我們更細緻地控制 bean 實例的創建。有時我們希望將 bean 實例創建為單例,但在其他情況下,我們可能希望它在每次請求時或在一個會話中創建一次。
Spring Bean Scopes
有五種類型的spring bean範圍:
- singleton – 只會為 spring 容器創建一個 spring bean 實例。這是默認的 spring bean 範圍。在使用此範圍時,請確保 bean 沒有共享實例變量,否則可能導致數據不一致的問題。
- prototype – 每次從 spring 容器請求 bean 時都會創建一個新的實例。
- request – 這與 prototype 範圍相同,但是它是為 Web 應用程序而設計的。對於每個 HTTP 請求,將創建 bean 的新實例。
- session – 每個 HTTP 會話都會由容器創建一個新的 bean。
- global-session – 這用於為 Portlet 應用程序創建全局會話 bean。
Spring Bean Singleton 和 Prototype 範圍
Spring bean 的 singleton 和 prototype 範圍可以在獨立的 spring 應用程式中使用。讓我們看看如何使用 @Scope 注釋輕鬆配置這些範圍。假設我們有一個 java bean 類。
package com.journaldev.spring;

public class MyBean {

	public MyBean() {
		System.out.println("MyBean instance created");
	}

}
讓我們定義 spring 配置 類,在這裡我們將定義從 spring 容器中獲取 MyBean 實例的方法。
package com.journaldev.spring;

import org.springframework.context.annotation.Bean;
import org.springframework.context.annotation.Configuration;
import org.springframework.context.annotation.Scope;

@Configuration
public class MyConfiguration {

	@Bean
	@Scope(value="singleton")
    public MyBean myBean() {
		return new MyBean();
	}

}
請注意,singleton 是默認範圍,因此我們可以從上述 bean 定義中刪除 @Scope(value="singleton")。現在讓我們創建一個主方法並測試 singleton 範圍。
package com.journaldev.spring;

import org.springframework.context.annotation.AnnotationConfigApplicationContext;

public class MySpringApp {

	public static void main(String[] args) {
		AnnotationConfigApplicationContext ctx = new AnnotationConfigApplicationContext();
		ctx.register(MyConfiguration.class);
		ctx.refresh();

		 MyBean mb1 = ctx.getBean(MyBean.class);
		 System.out.println(mb1.hashCode());

		 MyBean mb2 = ctx.getBean(MyBean.class);
		 System.out.println(mb2.hashCode());

		ctx.close();
	}

}
當上面的程序被執行時,我們將得到如下輸出。
MyBean instance created
867988177
867988177
注意,兩個 MyBean 實例具有相同的 hashcode,並且構造函數只被調用一次,這意味著 spring 容器總是返回 MyBean 的相同實例。現在讓我們將範圍更改為 prototype。
@Bean
@Scope(value="prototype")
public MyBean myBean() {
	return new MyBean();
}
這次當主方法被執行時,我們將獲得以下輸出。
MyBean instance created
867988177
MyBean instance created
443934570
顯然,每次從 spring 容器中請求時,都會創建一個 MyBean 實例。現在讓我們將範圍更改為 request。
@Bean
@Scope(value="request")
public MyBean myBean() {
	return new MyBean();
}
在這種情況下,我們將得到以下異常。
Exception in thread "main" java.lang.IllegalStateException: No Scope registered for scope name 'request'
	at org.springframework.beans.factory.support.AbstractBeanFactory.doGetBean(AbstractBeanFactory.java:347)
	at org.springframework.beans.factory.support.AbstractBeanFactory.getBean(AbstractBeanFactory.java:224)
	at org.springframework.beans.factory.support.DefaultListableBeanFactory.resolveNamedBean(DefaultListableBeanFactory.java:1015)
	at org.springframework.beans.factory.support.DefaultListableBeanFactory.getBean(DefaultListableBeanFactory.java:339)
	at org.springframework.beans.factory.support.DefaultListableBeanFactory.getBean(DefaultListableBeanFactory.java:334)
	at org.springframework.context.support.AbstractApplicationContext.getBean(AbstractApplicationContext.java:1107)
	at com.journaldev.spring.MySpringApp.main(MySpringApp.java:12)
這是因為request、session和global-session範圍對於獨立應用程序不可用。
Spring Bean Request and Session Scope
對於Spring Bean請求和會話範圍示例,我們將創建Spring Boot Web應用程序。創建一個Spring Boot啟動器項目,並選擇“web”,這樣我們就可以將其運行為Web應用程序。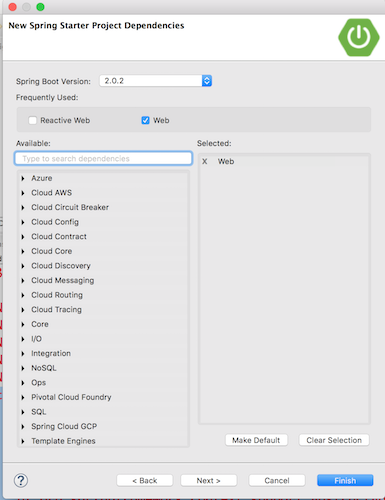 我們最終的項目將如下圖所示。
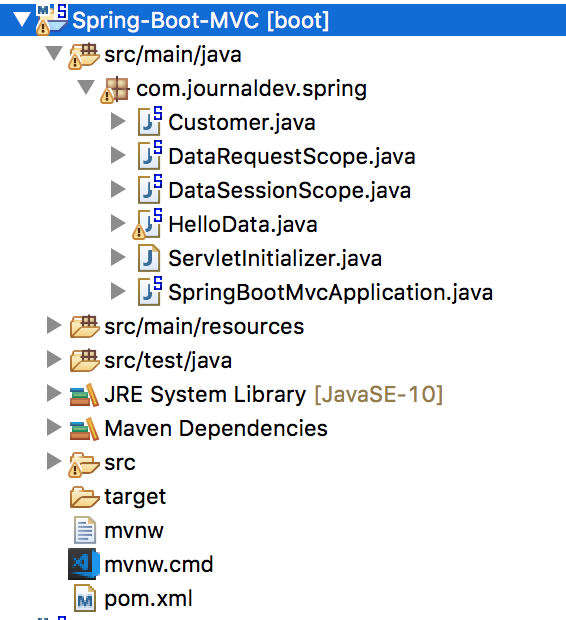
ServletInitializer和SpringBootMvcApplication是自動生成的Spring Boot類。我們不需要在那裡做任何更改。這是我的pom.xml文件,請查看我們應用程序的依賴項。您的pom.xml文件可能根據您使用的Eclipse版本略有不同。
<?xml version="1.0" encoding="UTF-8"?>
<project xmlns="https://maven.apache.org/POM/4.0.0" xmlns:xsi="https://www.w3.org/2001/XMLSchema-instance"
	xsi:schemaLocation="https://maven.apache.org/POM/4.0.0 https://maven.apache.org/xsd/maven-4.0.0.xsd">
	<modelVersion>4.0.0</modelVersion>

	<groupId>com.journaldev.spring</groupId>
	<artifactId>Spring-Boot-MVC</artifactId>
	<version>0.0.1-SNAPSHOT</version>
	<packaging>war</packaging>

	<name>Spring-Boot-MVC</name>
	<description>Spring Beans Scope MVC</description>

	<parent>
		<groupId>org.springframework.boot</groupId>
		<artifactId>spring-boot-starter-parent</artifactId>
		<version>2.0.2.RELEASE</version>
		<relativePath/> <!-- lookup parent from repository -->
	</parent>

	<properties>
		<project.build.sourceEncoding>UTF-8</project.build.sourceEncoding>
		<project.reporting.outputEncoding>UTF-8</project.reporting.outputEncoding>
		<java.version>10</java.version>
	</properties>

	<dependencies>
		<dependency>
			<groupId>org.springframework.boot</groupId>
			<artifactId>spring-boot-starter-web</artifactId>
		</dependency>

		<dependency>
			<groupId>org.springframework.boot</groupId>
			<artifactId>spring-boot-starter-tomcat</artifactId>
			<scope>provided</scope>
		</dependency>
		<dependency>
			<groupId>org.springframework.boot</groupId>
			<artifactId>spring-boot-starter-test</artifactId>
			<scope>test</scope>
		</dependency>
	</dependencies>

	<build>
		<plugins>
			<plugin>
				<groupId>org.springframework.boot</groupId>
				<artifactId>spring-boot-maven-plugin</artifactId>
			</plugin>
		</plugins>
	</build>


</project>
讓我們創建一些Spring組件並將它們配置為Spring容器中的Spring Beans,範圍為request和session。
Spring Bean Request Scope
package com.journaldev.spring;

import org.springframework.context.annotation.Scope;
import org.springframework.context.annotation.ScopedProxyMode;
import org.springframework.stereotype.Component;

@Component
@Scope(value = "request", proxyMode = ScopedProxyMode.TARGET_CLASS)
public class DataRequestScope {

	private String name = "Request Scope";

	public DataRequestScope() {
		System.out.println("DataRequestScope Constructor Called");
	}

	public String getName() {
		return name;
	}

	public void setName(String name) {
		this.name = name;
	}
}
Spring Bean Session Scope
package com.journaldev.spring;

import org.springframework.context.annotation.Scope;
import java.time.LocalDateTime;
import org.springframework.context.annotation.ScopedProxyMode;
import org.springframework.stereotype.Component;

@Component
@Scope(value = "session", proxyMode = ScopedProxyMode.TARGET_CLASS)
public class DataSessionScope {

	private String name = "Session Scope";

	public DataSessionScope() {
		System.out.println("DataSessionScope Constructor Called at "+LocalDateTime.now());
	}

	public String getName() {
		return name;
	}

	public void setName(String name) {
		this.name = name;
	}
}
Spring Component
現在讓我們創建一個 Spring 組件並使用 Spring 自動配置上述的 beans。
package com.journaldev.spring;

import org.springframework.beans.factory.annotation.Autowired;
import org.springframework.stereotype.Component;

@Component
public class Customer {

	@Autowired
	private DataRequestScope dataRequestScope;

	@Autowired
	private DataSessionScope dataSessionScope;

	public DataRequestScope getDataRequestScope() {
		return dataRequestScope;
	}

	public void setDataRequestScope(DataRequestScope dataRequestScope) {
		this.dataRequestScope = dataRequestScope;
	}

	public DataSessionScope getDataSessionScope() {
		return dataSessionScope;
	}

	public void setDataSessionScope(DataSessionScope dataSessionScope) {
		this.dataSessionScope = dataSessionScope;
	}


}
Spring Rest Controller
最後,讓我們創建一個 RestController 類別並為測試目的配置一些 API 終點。
package com.journaldev.spring;

import org.springframework.beans.factory.annotation.Autowired;
import org.springframework.web.bind.annotation.RequestMapping;
import org.springframework.web.bind.annotation.RestController;

@RestController
public class HelloData {

	@Autowired
	private Customer customer;

	@RequestMapping("/nameRS")
	public String helloRS() {
		return customer.getDataRequestScope().getName();
	}

	@RequestMapping("/nameSSUpdated")
	public String helloSSUpdated() {
		customer.getDataSessionScope().setName("Session Scope Updated");
		return customer.getDataSessionScope().getName();
	}

	@RequestMapping("/nameSS")
	public String helloSS() {
		return customer.getDataSessionScope().getName();
	}
}
Spring Boot 會話超時配置
最後,我們需要配置 Spring Boot 會話超時變數,在 src/main/resources/application.properties 中添加以下屬性。
server.session.cookie.max-age= 1
server.session.timeout= 1
現在我們的 Spring Beans 的會話範圍將在一分鐘內失效。只需運行 SpringBootMvcApplication 類別作為 Spring Boot 應用程序。您應該看到我們的端點配置的輸出如下。
2018-05-23 17:02:25.830  INFO 6921 --- [main] s.w.s.m.m.a.RequestMappingHandlerMapping : Mapped "{[/nameRS]}" onto public java.lang.String com.journaldev.spring.HelloData.helloRS()
2018-05-23 17:02:25.831  INFO 6921 --- [main] s.w.s.m.m.a.RequestMappingHandlerMapping : Mapped "{[/nameSSUpdated]}" onto public java.lang.String com.journaldev.spring.HelloData.helloSSUpdated()
2018-05-23 17:02:25.832  INFO 6921 --- [main] s.w.s.m.m.a.RequestMappingHandlerMapping : Mapped "{[/nameSS]}" onto public java.lang.String com.journaldev.spring.HelloData.helloSS()
Spring Bean 請求範圍測試
打開任何瀏覽器並前往網址https://localhost:8080/nameRS,檢查控制台輸出。您應該在每個請求上看到DataRequestScope Constructor Called被打印出來。
Spring Bean 會話範圍測試
請前往https://localhost:8080/nameSS,您將會得到以下輸出。 現在轉到
現在轉到https://localhost:8080/nameSSUpdated,以便將DataSessionScope名稱值更新為Session Scope Updated。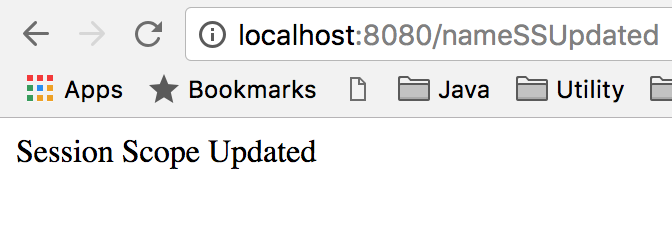 現在再次前往
https://localhost:8080/nameSS,您應該看到更新後的值。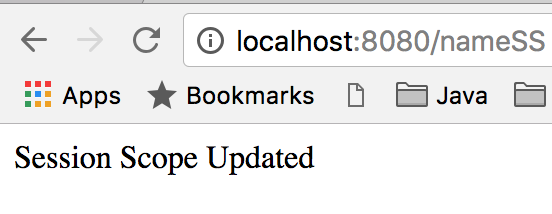 到目前為止,您應該只在控制台輸出中看到一次
DataSessionScope Constructor Called at XXX。現在等待1分鐘,以使我們的會話範圍bean失效。然後再次前往https://localhost:8080/nameSS,您應該看到原始輸出。同時,您應該檢查控制台消息,查看容器是否再次創建了DataSessionScope。 這就是有關Spring Beans範圍教程的所有內容。
您可以從我們的GitHub存儲庫下載Spring Beans範圍Spring Boot項目。
Source:
https://www.digitalocean.com/community/tutorials/spring-bean-scopes