


今天我們將學習有關Spring Security 登入範例的知識。在閱讀本文之前,請通過參考我的先前文章“Spring 4 Security 簡介”來獲取一些基礎知識。
Spring Security 登入登出範例
在這篇文章中,我們將開發Spring 4 MVC 安全Web應用程式,提供通過使用記憶體選項的登入和登出功能。此範例使用Spring Java Config與Spring Annotations,即無需使用web.xml和Spring XML配置(舊式風格)。如果您對Spring 3.x安全模組不熟悉,請先參閱以下文章,以瞭解Spring Security的基礎知識。
Spring 4 Security模組支援以下選項來存儲和管理使用者憑證:
- 記憶體存儲
- 關聯性資料庫(RDBMS)
- NoSQL資料存儲
- LDAP
我們將在這個例子中使用“In-Memory Store”選項。我們將在我的後續帖子中討論其他選項。我們將使用Spring 4.0.2.RELEASE、Spring STS 3.7 Suite IDE、Spring TC Server 3.1與Java 1.8以及Maven構建工具來開發這個例子。
Spring安全登錄示例
我們將使用Spring 4安全功能開發登錄和登出邏輯。該應用程序的主要目的是開發一個不使用“web.xml”並且不編寫一行Spring XML Beans配置的應用程序。這意味著我們將使用Spring Java Config功能與Spring注解。我們將開發這個應用程序具有以下功能:
- 歡迎頁面
- 登錄頁面
- 首頁
- 登出功能
請按照以下步驟開發和探索這個Spring 4安全簡單登錄示例。
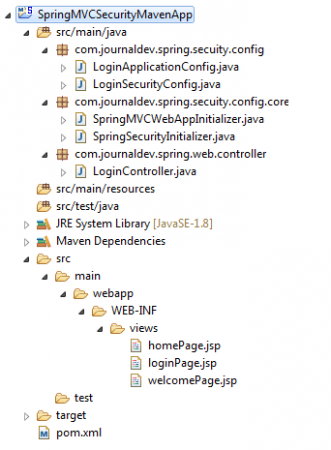
- 在Spring STS套件中創建一個“簡單的Spring Web Maven”項目,並使用以下詳細信息
Project Name : SpringMVCSecruityMavenApp
- 使用以下內容更新pom.xml
<?xml version="1.0" encoding="UTF-8"?>
<project
   xsi:schemaLocation="https://maven.apache.org/POM/4.0.0
   https://maven.apache.org/xsd/maven-4.0.0.xsd"
   xmlns="https://maven.apache.org/POM/4.0.0"
   xmlns:xsi="https://www.w3.org/2001/XMLSchema-instance">

	<modelVersion>4.0.0</modelVersion>
	<groupId>com.journaldev</groupId>
	<artifactId>SpringMVCSecruityMavenApp</artifactId>
	<packaging>war</packaging>
	<version>1.0</version>

	<properties>
	    <java.version>1.8</java.version>
	    <spring.version>4.0.2.RELEASE</spring.version>
	    <spring.security.version>4.0.2.RELEASE</spring.security.version>
	    <servlet.api.version>3.1.0</servlet.api.version>
	    <jsp.api.version>2.2</jsp.api.version>
	    <jstl.version>1.2</jstl.version>
	</properties>

	<dependencies>
		<dependency>
			<groupId>org.springframework</groupId>
			<artifactId>spring-core</artifactId>
			<version>${spring.version}</version>
		</dependency>
		<dependency>
			<groupId>org.springframework</groupId>
			<artifactId>spring-web</artifactId>
			<version>${spring.version}</version>
		</dependency>
		<dependency>
			<groupId>org.springframework</groupId>
			<artifactId>spring-webmvc</artifactId>
			<version>${spring.version}</version>
		</dependency>
		<dependency>
			<groupId>org.springframework.security</groupId>
			<artifactId>spring-security-web</artifactId>
			<version>${spring.security.version}</version>
		</dependency>
		<dependency>
			<groupId>org.springframework.security</groupId>
			<artifactId>spring-security-config</artifactId>
			<version>${spring.security.version}</version>
		</dependency>
		<dependency>
			<groupId>javax.servlet</groupId>
			<artifactId>javax.servlet-api</artifactId>
			<version>${servlet.api.version}</version>
		</dependency>
		<dependency>
			<groupId>javax.servlet.jsp</groupId>
			<artifactId>jsp-api</artifactId>
			<version>${jsp.api.version}</version>
		</dependency>
		<dependency>
			<groupId>jstl</groupId>
			<artifactId>jstl</artifactId>
			<version>${jstl.version}</version>
		</dependency>
	</dependencies>

	<build>
	    <finalName>SpringMVCSecruityMavenApp</finalName>
	    <plugins>
		<plugin>
		     <groupId>org.apache.maven.plugins</groupId>
		     <artifactId>maven-compiler-plugin</artifactId>
		     <version>3.1</version>
		     <configuration>
			<source>${java.version}</source>
			<target>${java.version}</target>
		     </configuration>
		</plugin>
		<plugin>
	           <groupId>org.apache.maven.plugins</groupId>
	           <artifactId>maven-war-plugin</artifactId>
	           <configuration>
	              <failOnMissingWebXml>false</failOnMissingWebXml>
	           </configuration>
        	</plugin>
	    </plugins>
	</build>
</project>
注意:-如果你不知道“<failOnMissingWebXml>”標誌,請在本文末尾閱讀以獲得對此元素使用的良好理解。-首先,使用Spring的@Controller注釋開發登錄控制器。
LoginController.java
package com.journaldev.spring.web.controller;

import org.springframework.stereotype.Controller;
import org.springframework.web.bind.annotation.RequestMapping;
import org.springframework.web.bind.annotation.RequestMethod;
import org.springframework.web.bind.annotation.RequestParam;
import org.springframework.web.servlet.ModelAndView;

@Controller
public class LoginController {

	@RequestMapping(value = { "/"}, method = RequestMethod.GET)
	public ModelAndView welcomePage() {
		ModelAndView model = new ModelAndView();
		model.setViewName("welcomePage");
		return model;
	}

	@RequestMapping(value = { "/homePage"}, method = RequestMethod.GET)
	public ModelAndView homePage() {
		ModelAndView model = new ModelAndView();
		model.setViewName("homePage");
		return model;
	}

	@RequestMapping(value = "/loginPage", method = RequestMethod.GET)
	public ModelAndView loginPage(@RequestParam(value = "error",required = false) String error,
	@RequestParam(value = "logout",	required = false) String logout) {

		ModelAndView model = new ModelAndView();
		if (error != null) {
			model.addObject("error", "Invalid Credentials provided.");
		}

		if (logout != null) {
			model.addObject("message", "Logged out from JournalDEV successfully.");
		}

		model.setViewName("loginPage");
		return model;
	}

}
代碼解釋:- 我們在“LoginController”中定義了三種方法來處理三種不同類型的客戶端請求
- welcomePage() 將處理所有使用“/” URI 的客戶端請求。
- homePage() 將處理所有使用“/homePage” URI 的客戶端請求。
- loginPage() 將處理所有使用“/loginPage” URI 的客戶端請求。
- 在loginPage() 中,我們處理錯誤和登出消息。
- 然後開發一個名為“LoginSecurityConfig”的類來使用Spring 4安全API提供登錄和登出安全功能。
LoginSecurityConfig.java
package com.journaldev.spring.secuity.config;

import org.springframework.beans.factory.annotation.Autowired;
import org.springframework.context.annotation.Configuration;
import org.springframework.security.config.annotation.authentication.builders.AuthenticationManagerBuilder;
import org.springframework.security.config.annotation.web.builders.HttpSecurity;
import org.springframework.security.config.annotation.web.configuration.EnableWebSecurity;
import org.springframework.security.config.annotation.web.configuration.WebSecurityConfigurerAdapter;

@Configuration
@EnableWebSecurity
public class LoginSecurityConfig extends WebSecurityConfigurerAdapter {

	@Autowired
	public void configureGlobal(AuthenticationManagerBuilder authenticationMgr) throws Exception {
		authenticationMgr.inMemoryAuthentication()
			.withUser("journaldev")
			.password("jd@123")
			.authorities("ROLE_USER");
	}

	@Override
	protected void configure(HttpSecurity http) throws Exception {
		http.authorizeRequests()
			.antMatchers("/homePage").access("hasRole('ROLE_USER')")
			.and()
				.formLogin().loginPage("/loginPage")
				.defaultSuccessUrl("/homePage")
				.failureUrl("/loginPage?error")
				.usernameParameter("username").passwordParameter("password")
			.and()
				.logout().logoutSuccessUrl("/loginPage?logout");

	}
}
代碼解釋:- 我們在“LoginSecurityConfig”中定義了兩種方法來存儲和管理用戶憑據,並處理登錄和登出安全功能。
- @EnableWebSecurity 注解用於在任何Web應用程序中啟用Web安全。
- @EnableWebMVCSecurity註釋用於啟用基於Spring MVC的Web應用程序的Web安全性。注意:@EnableWebSecurity = @EnableWebMVCSecurity + 額外功能。這就是為什麼@EnableWebMVCSecurity註釋在Spring 4.x框架中被棄用的原因。4. “LoginSecurityConfig”類或任何用於配置Spring安全性的類,應該擴展“WebSecurityConfigurerAdapter”類或實現相關接口。
- configureGlobal()方法用於存儲和管理用戶憑據。
- 在configureGlobal()方法中,我們可以使用authorities()方法來定義我們應用程序的角色,例如“ROLE_USER”。我們也可以使用roles()方法來達到相同的目的。
- authorities()和roles()方法之間的區別:
- authorities()需要完整的角色名稱,如“ROLE_USER”,roles()需要像“USER”這樣的角色名稱。它將自動將“USER”角色名稱添加“ROLE_”值。注意:我們將開發另一個示例來演示“USER”、“ADMIN”等角色,在我的後續文章中。
- 管理登錄和登出安全性的重要方法是configure(HttpSecurity http)
- 以下代碼片段用於避免未經授權訪問“/homePage”。如果您嘗試直接訪問此頁面,我們將自動重定向到“/loginPage”頁面。
.antMatchers("/homePage").access("hasRole('ROLE_USER')")
如果我們刪除access(“hasRole(‘ROLE_USER’)”)方法調用,那麼我們可以在不登錄到應用程序的情況下訪問此頁面。13. 我們使用formLogin()和logout()方法配置了登錄和登出功能。
- 啟用Spring MVC配置
LoginApplicationConfig.java
package com.journaldev.spring.secuity.config;

import org.springframework.context.annotation.Bean;
import org.springframework.context.annotation.ComponentScan;
import org.springframework.context.annotation.Configuration;
import org.springframework.context.annotation.Import;
import org.springframework.web.servlet.config.annotation.EnableWebMvc;
import org.springframework.web.servlet.view.InternalResourceViewResolver;
import org.springframework.web.servlet.view.JstlView;

@EnableWebMvc
@Configuration
@ComponentScan({ "com.journaldev.spring.*" })
@Import(value = { LoginSecurityConfig.class })
public class LoginApplicationConfig {
	@Bean
	public InternalResourceViewResolver viewResolver() {
		InternalResourceViewResolver viewResolver = new InternalResourceViewResolver();
		viewResolver.setViewClass(JstlView.class);
		viewResolver.setPrefix("/WEB-INF/views/");
		viewResolver.setSuffix(".jsp");
		return viewResolver;
	}

}
代碼說明:- 我們使用“LoginApplicationConfig”類來定義Spring MVC視圖解析器,以避免編寫“web.xml”文件。
- @EnableWebMvc 注解用於在Spring框架中啟用Spring Web MVC應用程序功能
- @Import 注解用於將Spring安全配置類導入此類中。
- @ComponentScan 注解用於在指定的包中進行組件掃描。它等同於Spring XML配置中的“context:component-scan”。
- 初始化Spring安全性
package com.journaldev.spring.secuity.config.core;

import org.springframework.security.web.context.AbstractSecurityWebApplicationInitializer;

public class SpringSecurityInitializer extends AbstractSecurityWebApplicationInitializer {

}
“SpringSecurityInitializer”用於註冊DelegatingFilterProxy以使用springSecurityFilterChain。它避免了在web.xml文件中編寫過濾器配置。- 初始化Spring MVC應用程序
“SpringMVCWebAppInitializer”類用於在基於註釋的配置中初始化“DispatcherServlet”而無需web.xml文件。SpringMVCWebAppInitializer.java
package com.journaldev.spring.secuity.config.core;

import org.springframework.web.servlet.support.AbstractAnnotationConfigDispatcherServletInitializer;
import com.journaldev.spring.secuity.config.LoginApplicationConfig;

public class SpringMVCWebAppInitializer extends AbstractAnnotationConfigDispatcherServletInitializer {

	@Override
	protected Class<?>[] getRootConfigClasses() {
		return new Class[] { LoginApplicationConfig.class };
	}

	@Override
	protected Class<?>[] getServletConfigClasses() {
		return null;
	}

	@Override
	protected String[] getServletMappings() {
		return new String[] { "/" };
	}

}
注意:-
- 當我們訪問我們的應用程序時,默認情況下,SpringMVCWebAppInitializer的getServletMappings()將允許訪問根URL:“/”。 我們可以覆蓋以轉發到不同的URL。
- Spring或Pivotal團隊正在解決此問題,以避免介紹註釋的大量Java代碼。 請查看此處:https://jira.spring.io/browse/SPR-10359。
- 開發welcomePage.jsp文件
<h3>Welcome to JournalDEV Tutorials</h3>
<a href="${pageContext.request.contextPath}/loginPage">Login to Journal</a>
- 開發loginPage.jsp文件
<%@ taglib prefix="c" uri="https://java.sun.com/jsp/jstl/core"%>
<html>
<body onload='document.loginForm.username.focus();'>
	<h3>JournalDEV Tutorials</h3>

	<c:if test="${not empty error}"><div>${error}</div></c:if>
	<c:if test="${not empty message}"><div>${message}</div></c:if>

	<form name='login' action="<c:url value='/loginPage' />" method='POST'>
		<table>
			<tr>
				<td>UserName:</td>
				<td><input type='text' name='username' value=''></td>
			</tr>
			<tr>
				<td>Password:</td>
				<td><input type='password' name='password' /></td>
			</tr>
			<tr>
				<td colspan='2'><input name="submit" type="submit" value="submit" /></td>
			</tr>
		</table>
		<input type="hidden" name="${_csrf.parameterName}" value="${_csrf.token}" />
	</form>
</body>
</html>
- 開發homepage.jsp文件
<%@taglib prefix="c" uri="https://java.sun.com/jsp/jstl/core"%>
<h3>Welcome to JournalDEV Tutorials</h3>
<ul>
	<li>Java 8 tutorial</li>
	<li>Spring tutorial</li>
	<li>Gradle tutorial</li>
	<li>BigData tutorial</li>
</ul>

<c:url value="/logout" var="logoutUrl" />
<form id="logout" action="${logoutUrl}" method="post" >
  <input type="hidden" name="${_csrf.parameterName}" value="${_csrf.token}" />
</form>
<c:if test="${pageContext.request.userPrincipal.name != null}">
	<a href="javascript:document.getElementById('logout').submit()">Logout</a>
</c:if>
- 最終項目結構如下:

運行Spring安全性MVC登錄登出示例
要運行此Spring Web應用程序,我們需要支持Spring 4和Java 8環境以及Servlet 3.1.0容器的任何Web容器。
- 在Spring STS套件中的Spring TC Server上部署和運行
- 它會自動訪問我們應用程式歡迎頁面的 URL,如下所示。
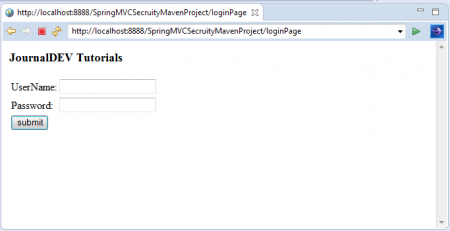
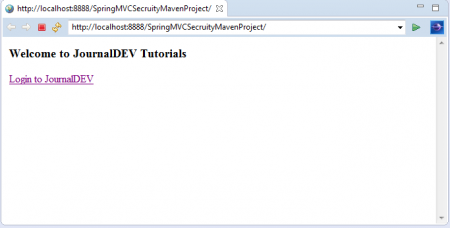 – 點擊“登入到JournalDEV”鏈接以訪問登錄頁面。
 – 現在,提供錯誤的登錄詳細信息並點擊“登入”按鈕。
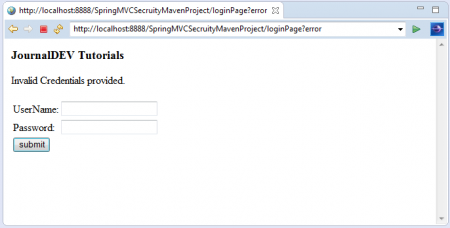 在這裡,我們可以觀察到這個錯誤信息:“提供了無效的憑據。” – 現在,提供在“LoginSecurityConfig”類中配置的正確登錄詳細信息。
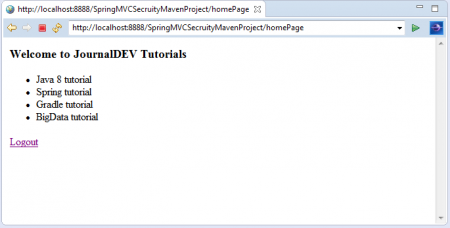 成功登錄到我們的應用程式後,我們可以看到我們的應用程式主頁,帶有“登出”鏈接。 – 點擊“登出”鏈接以從應用程式中登出。
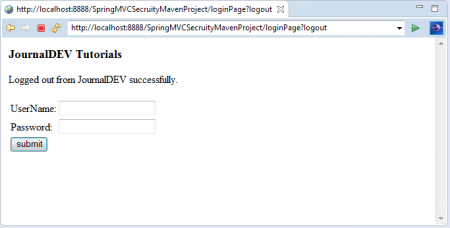 在這裡,我們可以觀察到我們已成功從應用程式中登出並再次重定向到登錄頁面。我們可以在這個登錄頁面上觀察到一些登出成功的消息。


注意:如果我們觀察這個例子,我們並沒有正確使用 web.xml 檔案。由於這是一個 Web 應用程式,Maven 會搜尋 web.xml 檔案,如果在應用程式中找不到,就會引發一些錯誤。為了避免 Maven 相關的問題,我們需要在 pom.xml 檔案中配置 “
Source:
https://www.digitalocean.com/community/tutorials/spring-4-security-mvc-login-logout-example