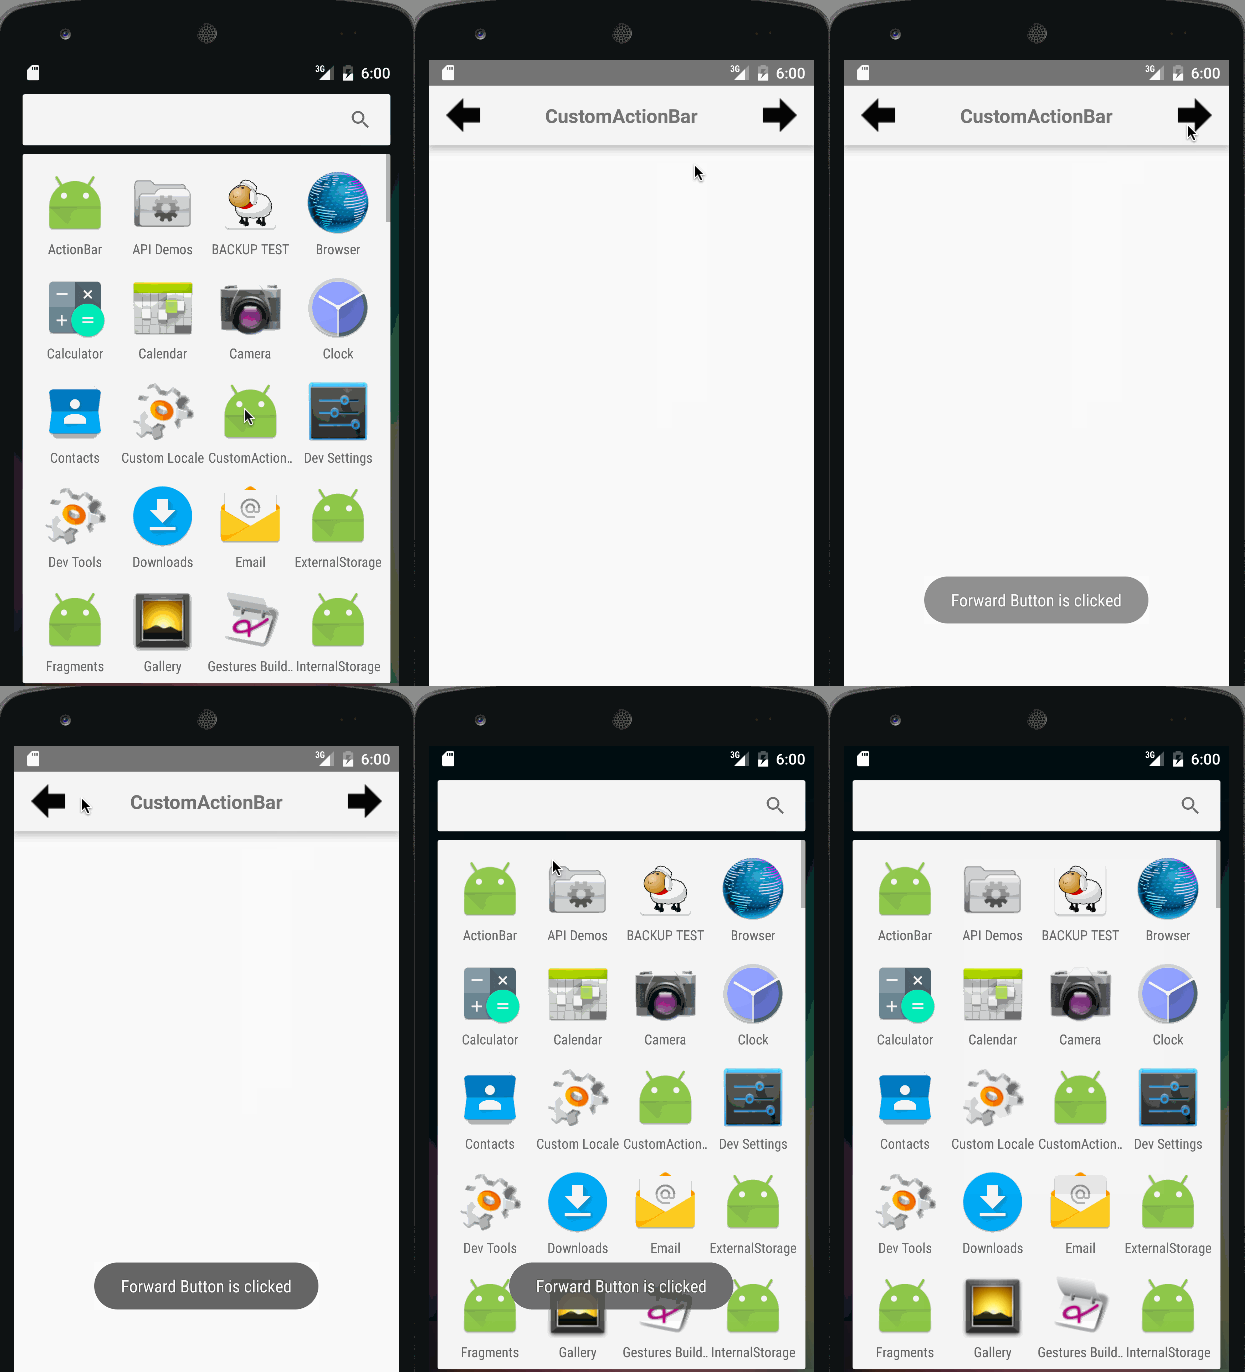
在這個教程中,我們將創建一個包含自定義佈局的Android自定義操作欄的應用程序。我們假設您對在本教程中討論的ActionBar組件有基本的理解。
Android自定義操作欄
要自定義操作欄,首先我們需要在 res/values/styles.xml 中配置主題,並在 AndroidManifest.xml 中為相應的活動類設置主題。以下是xml佈局的示例: styles.xml
<resources>

<style name="AppTheme" parent="Theme.AppCompat.Light.NoActionBar">
        <!-- Customize your theme here. -->
    </style>

    <style name="CustomTheme" parent="Theme.AppCompat.Light">

        <item name="contentInsetStart">0dp</item>
        <item name="contentInsetEnd">0dp</item>
    </style>

</resources>
從上面的片段中,如果我們在我們的活動中使用 AppTheme 樣式,它將拋出一個空指針異常,因為它明確指定了NoActionBar主題。因此,在這個項目中,我們將使用 CustomTheme 樣式。 contentInsetStart和contentInsetEnd是填充值。請注意,我們將使用 AppCompatActivity ,因為它與3.0之前的Android版本兼容性最強。
自定義操作欄佈局
以下是將設置為我們的MainActivity ActionBar的視圖佈局。custom_action_bar_layout.xml
<?xml version="1.0" encoding="utf-8"?>
<TableLayout xmlns:android="https://schemas.android.com/apk/res/android"
    android:layout_width="match_parent"
    android:layout_height="wrap_content"
    android:orientation="horizontal"
    >

    <TableRow>

        <ImageButton
            android:layout_width="wrap_content"
            android:layout_height="wrap_content"
            android:src="@drawable/back"
            android:layout_gravity="center_vertical"
            android:background="@android:color/transparent"
            android:id="@+id/action_bar_back"
            android:layout_alignParentTop="true"
            android:layout_centerHorizontal="true" />


        <TextView
            android:layout_width="wrap_content"
            android:layout_height="wrap_content"
            android:text="@string/app_name"
            android:gravity="center_horizontal"
            android:textAppearance="?android:attr/textAppearanceMedium"
            android:textStyle="bold"
            android:padding="10dp"
            android:layout_alignParentTop="true"
            android:layout_weight="1"
            />

        <ImageButton
            android:layout_width="wrap_content"
            android:layout_height="wrap_content"
            android:src="@drawable/forward"
            android:id="@+id/action_bar_forward"
            android:layout_gravity="center_vertical"
            android:background="@android:color/transparent"
            android:layout_alignParentTop="true"
            android:layout_centerHorizontal="true" />


    </TableRow>

</TableLayout>
該視圖佈局包括兩個代表前進和後退圖像按鈕以及中央的TextView的ImageButtons。
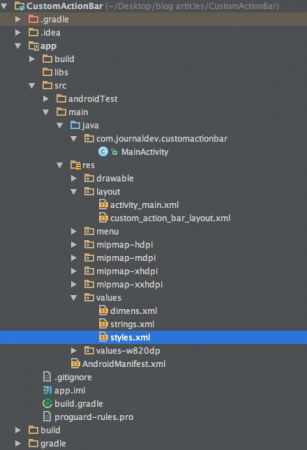
Android自定義操作欄項目結構
Android自定義操作欄代碼
activity_main.xml是一個空的RelativeLayout,因為我們的重點在於ActionBar。 MainActivity.java如下。
package com.journaldev.customactionbar;

import android.support.v7.app.ActionBar;
import android.support.v7.app.AppCompatActivity;
import android.os.Bundle;
import android.view.Menu;
import android.view.MenuItem;
import android.view.View;
import android.widget.ImageButton;
import android.widget.Toast;

public class MainActivity extends AppCompatActivity {

    @Override
    protected void onCreate(Bundle savedInstanceState) {
        super.onCreate(savedInstanceState);
        setContentView(R.layout.activity_main);

        getSupportActionBar().setDisplayOptions(ActionBar.DISPLAY_SHOW_CUSTOM);
        getSupportActionBar().setDisplayShowCustomEnabled(true);
        getSupportActionBar().setCustomView(R.layout.custom_action_bar_layout);
        View view =getSupportActionBar().getCustomView();

        ImageButton imageButton= (ImageButton)view.findViewById(R.id.action_bar_back);

        imageButton.setOnClickListener(new View.OnClickListener() {
            @Override
            public void onClick(View v) {
                finish();
            }
        });

        ImageButton imageButton2= (ImageButton)view.findViewById(R.id.action_bar_forward);

        imageButton2.setOnClickListener(new View.OnClickListener() {
            @Override
            public void onClick(View v) {
                Toast.makeText(getApplicationContext(),"Forward Button is clicked",Toast.LENGTH_LONG).show();
            }
        });
    }


}
在上述代碼中,我們使用了支援庫。 因此,我們使用getSupportActionBar()而不是getActionBar()。 要將自定義佈局添加到ActionBar,我們在getSupportActionBar()上調用了以下兩個方法:
- getSupportActionBar().setDisplayOptions(ActionBar.DISPLAY_SHOW_CUSTOM);
- getSupportActionBar().setDisplayShowCustomEnabled(true);
setCustomView()被調用以載入帶有自定義視圖的ActionBar,如上所示。要為ActionBar按鈕設置onClickListeners,我們首先需要使用getCustomView()獲取CustomView。在本教程中,我們已經將返回按鈕編程為使用finish(); 關閉活動,並將前進按鈕編程為顯示Toast。注意:在 AndroidManifest.xml 中應用程序標記中添加以下行。
android:theme="@style/CustomTheme"
這是我們的Android應用程序,具有自定義主題和布局。 注意:兩側都有固定邊距,無法修改。為此,我們需要將ActionBar替換為ToolBar。我們將在以後的教程中討論這個問題。這結束了Android自定義操作欄教程。您可以從以下鏈接下載最終的Android CustomActionBar項目。
參考:Android文檔
Source:
https://www.digitalocean.com/community/tutorials/android-custom-action-bar-example-tutorial


