


Varnish Cache(通常简称为Varnish)是一个开源、强大且快速的反向代理HTTP加速器,具有现代架构和灵活的配置语言。作为反向代理,它是一种软件,可以部署在您的网络服务器前面(即源服务器或后端),如Nginx,以接收客户端的HTTP请求并将其转发到源服务器进行处理。然后将来自源服务器的响应传递给客户端。
Varnish充当Nginx和客户端之间的中间人,但具有一些性能优势。其主要目的是通过作为缓存引擎使您的应用程序加载更快。它接收来自客户端的请求,并将它们转发到后端一次以缓存请求的内容(将文件和文件片段存储在内存中)。然后,将来对完全相似内容的所有未来请求都将从缓存中提供。
这使得您的Web应用程序加载更快,并间接提高了您的Web服务器的整体性能,因为Varnish将从内存中提供内容,而不是Nginx从存储磁盘处理文件。
除了缓存之外,Varnish还具有其他几个用例,包括HTTP请求路由器、负载均衡器、Web应用程序防火墙等。
清漆的配置使用内置的高度可扩展的清漆配置语言(VCL),它使您能够编写处理传入请求的策略。您可以使用它来构建定制的解决方案、规则和模块。
在本文中,我们将介绍在全新的CentOS 8或RHEL 8服务器上安装Nginx网络服务器和Varnish Cache 6的步骤。RHEL 8用户应确保他们启用红帽订阅。
要设置完整的LEMP堆栈,而不仅仅是安装Nginx网络服务器,请查看以下指南。
第一步:在CentOS/RHEL 8上安装Nginx网络服务器
1. CentOS/RHEL 8预装了最新版本的Nginx网络服务器软件,因此我们将使用以下dnf命令从默认仓库中安装它。
# dnf update
# dnf install nginx
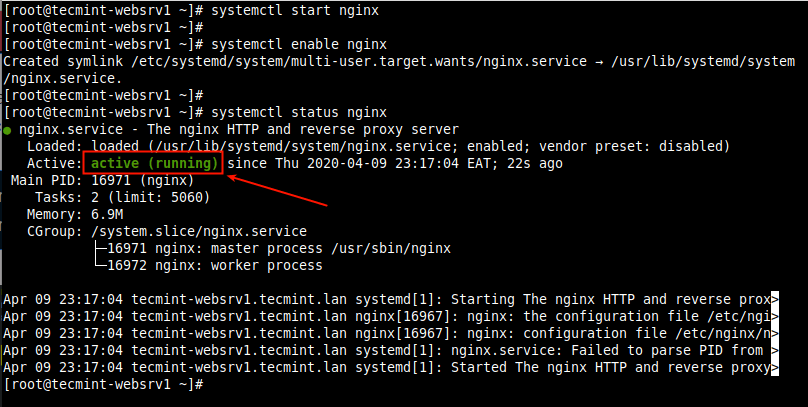
2. 一旦安装了Nginx,您需要使用以下systemctl命令来启动、启用并验证状态。
# systemctl start nginx
# systemctl enable nginx
# systemctl status nginx
3. 如果您有点好奇,您还可以使用以下ss命令检查运行在默认80端口的Nginx TCP套接字。
# ss -tpln

4. 如果您的系统上运行着防火墙,请确保更新防火墙规则以允许对Web服务器的请求。
# firewall-cmd --zone=public --permanent --add-service=http
# firewall-cmd --reload
第二步:在CentOS/RHEL 8上安装Varnish Cache 6
5. CentOS/RHEL 8默认提供了一个Varnish Cache DNF模块,其中包含6.0版本的LTS(长期支持)。
要安装该模块,请运行以下命令。
# dnf module install varnish

6. 模块安装完成后,您可以确认系统上安装的 Varnish 版本。
# varnishd -V

7. 安装 Varnish Cache 后,主要的可执行命令安装在 /usr/sbin/varnishd 下,varnish 配置文件位于 /etc/varnish/。
文件 /etc/varnish/default.vcl 是使用 VCL 编写的主 varnish 配置文件,而 /etc/varnish/secret 是 varnish 密钥文件。
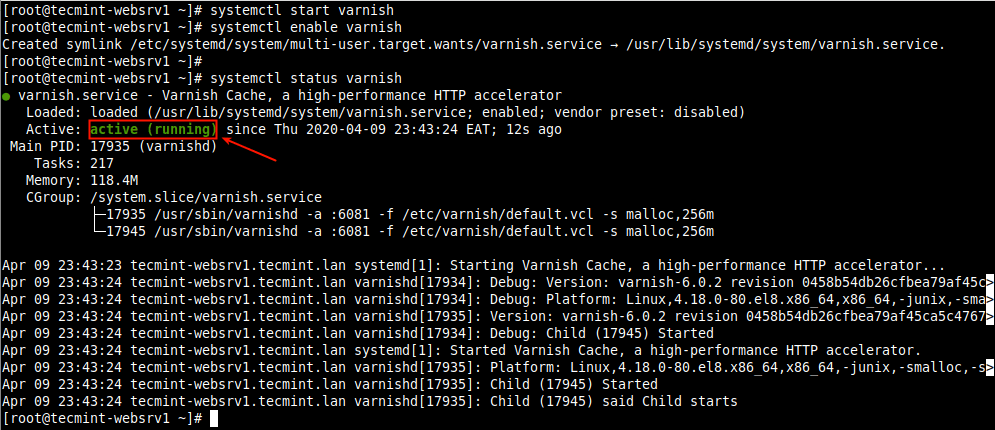
8. 接下来,启动 Varnish 服务,启用系统启动时自动启动,并确认其正在运行。
# systemctl start varnish
# systemctl enable varnish
# systemctl status varnish
第三步:配置 Nginx 以与 Varnish Cache 协同工作
9. 在本节中,我们将展示如何配置 Varnish Cache 以在 Nginx 前运行。默认情况下,Nginx 监听端口 80,通常每个服务器块(或虚拟主机)都配置为监听此端口。
例如,请查看主配置文件(/etc/nginx/nginx.conf)中配置的 默认 nginx 服务器块。
# vi /etc/nginx/nginx.conf
查找如下截图所示的服务器块部分。
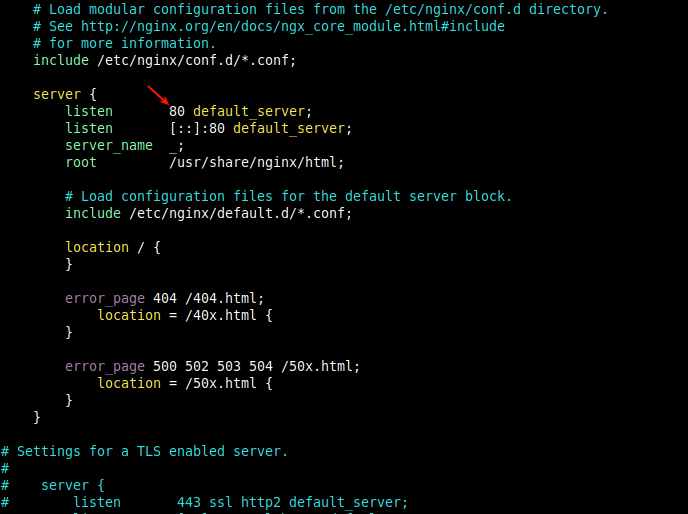
10.要在Varnish前面运行Nginx,您应该将默认的Nginx端口从80更改为8080(或您选择的任何其他端口)。
这应该在您希望通过Varnish提供服务的所有未来服务器块配置文件中完成(通常创建在/etc/nginx/conf.d/下)。
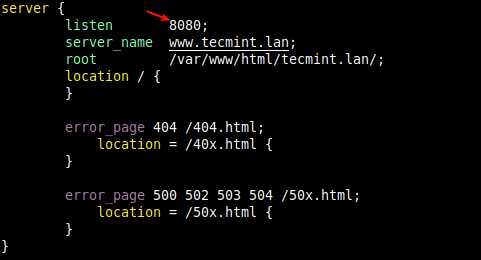
例如,我们测试站点tecmint.lan的服务器块是/etc/nginx/conf.d/tecmint.lan.conf,并具有以下配置。
server {
        listen       8080;
        server_name  www.tecmint.lan;
        root         /var/www/html/tecmint.lan/;
        location / {
        }

        error_page 404 /404.html;
            location = /40x.html {
        }
        error_page 500 502 503 504 /50x.html;
            location = /50x.html {
        }
}
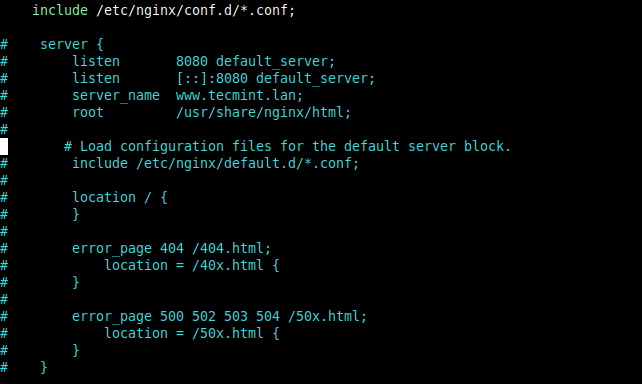
重要:请记住通过注释掉/etc/nginx/nginx.conf文件中的配置部分来禁用默认服务器块,如以下屏幕截图所示。这样可以使您在服务器上开始运行其他网站/应用程序,否则,Nginx将始终将请求定向到默认服务器块。
11.配置完成后,检查配置文件是否有错误,并重新启动Nginx服务以应用最近的更改。
# nginx -t
# systemctl restart nginx

12.接下来,为了从客户端接收HTTP请求,我们需要配置Varnish在端口80上运行。与早期版本的Varnish Cache中在Varnish环境文件中进行更改的做法不同(该做法现已不推荐),在版本6.0及以上。
我们需要在Varnish服务文件中进行所需的更改。运行以下命令以打开适当的服务文件进行编辑。
# systemctl edit --full varnish
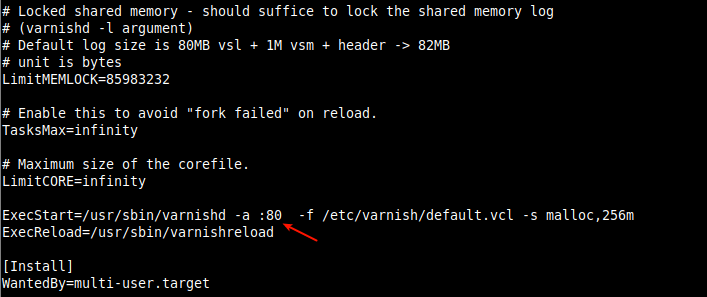
找到以下行并更改-a开关的值,该开关指定监听地址和端口。 将端口设置为80,如下面的截图所示。
注意,如果您不指定地址,varnishd将侦听服务器上所有可用的IPv4和IPv6接口。
ExecStart=/usr/sbin/varnishd -a :80 -f /etc/varnish/default.vcl -s malloc,256m
保存文件中的更改并退出。
13. 接下来,您需要在Varnish主配置文件中定义Varnish将访问以获取内容的后端服务器。
# vi /etc/varnish/default.vcl
查找默认后端配置部分,并将字符串“default”更改为server1(或您选择的任何名称以表示原始服务器)。 然后将端口设置为8080(或您在服务器块中定义的Nginx侦听端口)。
backend server1 {
    .host = "127.0.0.1";
    .port = "8080";
}

对于此指南,我们在同一台服务器上运行Varnish和Nginx。 如果您的Nginx Web服务器运行在不同的主机上。 例如,具有地址10.42.0.247的另一个服务器,则设置.host参数如下所示。
backend server1 {
    .host = "10.42.0.247";
    .port = "8080";
}
保存文件并关闭它。
14. 接下来,由于Varnish服务文件中的最新更改,您需要重新加载systemd管理器配置,然后重新启动Varnish服务以应用更改,如下所示。
# systemctl daemon-reload
# systemctl restart varnish
15. 现在确认Nginx和Varnish是否在配置的TCP套接字上侦听。
# ss -tpln

第四步:测试 Nginx Varnish 缓存设置
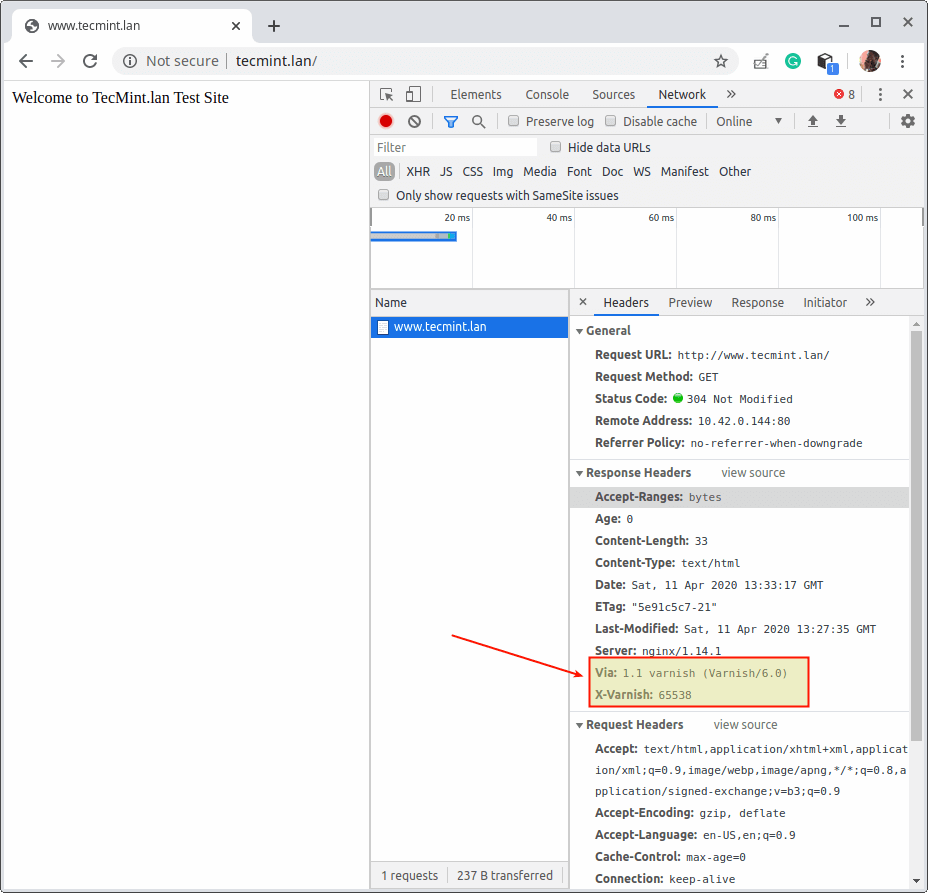
16. 接下来,验证网页是否通过 Varnish 缓存 提供。打开一个网络浏览器,并使用服务器 IP 或 FDQN 进行导航,如下截图所示。
http://www.tecmin.lan
OR
http://10.42.0.144
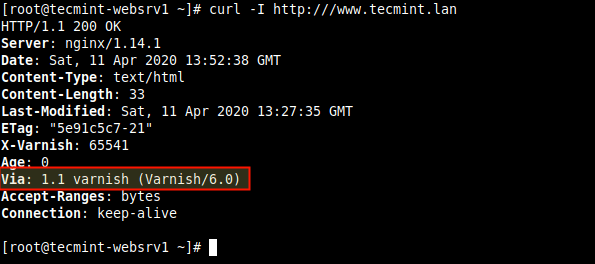
17. 或者,使用如下所示的 curl 命令。使用您服务器的 IP 地址或网站的 FQDN,或者如果您在本地测试,则使用 127.0.0.1 或 localhost。
# curl -I http:///www.tecmint.lan
有用的 Varnish 缓存管理工具
18. 在这最后一节,我们将简要描述一些有用的实用程序,这些程序随 Varnish 缓存 一起提供,您可以使用这些程序来控制 varnishd,访问内存日志和整体统计信息等。
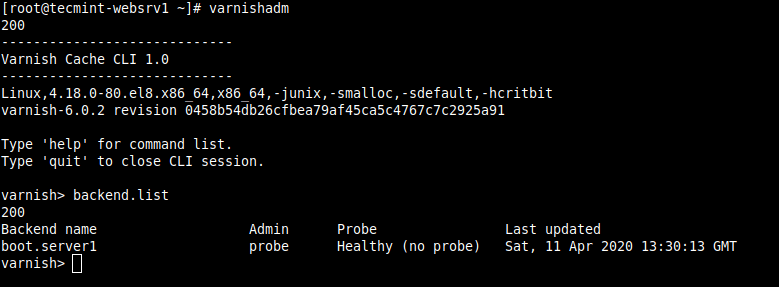
varnishadm
varnishadm 用于控制正在运行的 Varnish 实例的实用程序。它建立到 varnishd 的 CLI 连接。例如,您可以使用它列出配置的后端,如下截图所示(阅读 man varnishadm 以获取更多信息)。
# varnishadm
varnish> backend.list
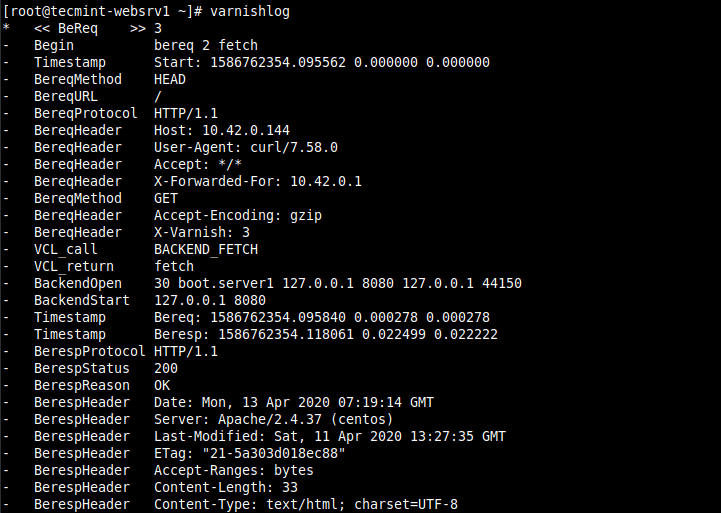
varnishlog
varnishlog 实用程序提供对请求特定数据的访问。它提供有关特定客户端和请求的信息(阅读 man varnishlog 以获取更多信息)。
# varnishlog
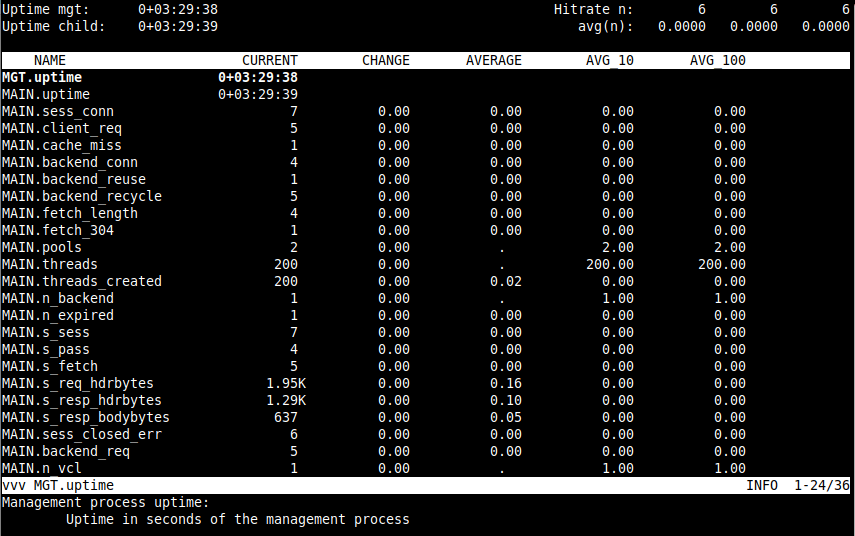
varnishstat
A varnishstat also known as varnish statistics, which gives you a glance at Varnish’s current performance by providing access to in-memory statistics such as cache hits and misses, information about the storage, threads created, deleted objects (read man varnishstat for more information).
# varnishstat
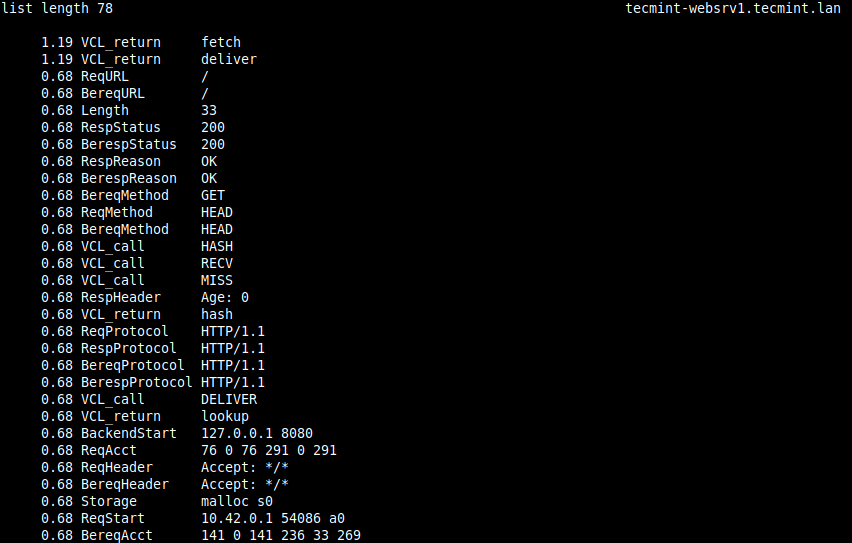
varnishtop
A varnishtop utility reads the shared memory logs and presents a continuously updated list of the most commonly occurring log entries (read man varnishtop for more information).
# varnishtop
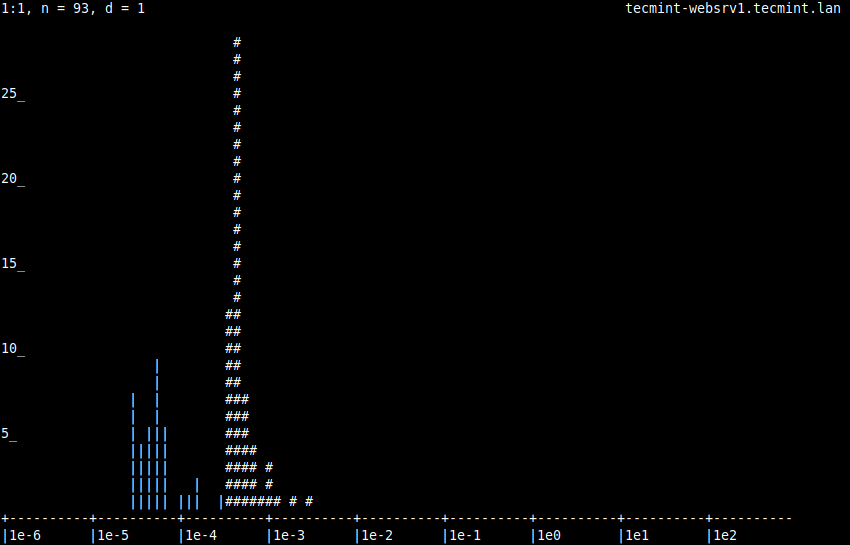
varnishhist
A varnishhist (varnish history) utility parses the varnish logs and outputs a continuously updated histogram showing the distribution of the last n requests by their processing (read man varnishhist for more information).
# varnishhist
这就是全部!在本指南中,我们展示了如何在Varnish Cache上安装并在Nginx HTTP服务器前运行,以加速在CentOS/RHEL 8中传递网页内容。
关于本指南的任何想法或问题都可以使用下面的反馈表单分享。有关更多信息,请阅读Varnish Cache文档。
Varnish Cache的主要缺点是其缺乏对HTTPS的本机支持。要在您的网站/应用程序上启用HTTPS,您需要配置一个SSL/TLS终止代理,与Varnish Cache一起工作以保护您的网站。在我们的下一篇文章中,我们将展示如何在CentOS/RHEL 8上使用Hitch为Varnish Cache启用HTTPS。启用HTTPS for Varnish Cache using Hitch。
Source:
https://www.tecmint.com/install-varnish-cache-for-nginx-on-centos-rhel-8/