


作者选择了维基媒体基金会作为Write for Donations计划的捐赠对象。
介绍
基础设施即代码(IaC)是一种通过在代码中定义资源状态及其关系来自动化基础设施部署和修改的实践。执行该代码会在云中创建或修改实际资源。IaC允许工程师使用像Terraform(由HashiCorp开发)这样的IaC工具来提供基础设施。
使用IaC,对基础设施的更改可以通过与应用程序代码相同的代码审查流程。您可以将代码存储在版本控制(如Git)中,以保留基础设施状态的历史记录,并可以使用更高级别的工具(如自助内部开发者平台)进一步自动化部署流程。
Terraform 是一款流行的平台无关的 IaC 工具,因为它广泛支持许多平台,包括 GitHub、Cloudflare 和 DigitalOcean。大多数 Terraform 配置都是使用一种叫做 HashiCorp 配置语言(HCL)的声明性语言编写的。
Cloud Development Kit for Terraform(CDKTF)是建立在 Terraform 之上的工具,允许您使用熟悉的编程语言(如 TypeScript、Python 或 Go)而不是 HCL 来定义基础设施。这个工具可以为不熟悉 HCL 的开发人员提供更浅的学习曲线,同时允许开发人员使用像循环、变量和函数等本地编程特性。
在本教程中,您将首先安装 cdktf 命令行界面(CLI)工具。然后,您将使用 TypeScript 创建一个 CDKTF 项目,并定义该项目的两个由负载均衡器负载平衡的 NGINX 服务器。然后,您将使用 cdktf 部署基础设施。在本教程结束时,您将拥有一个 CDKTF 项目,可以从中构建以扩展您的基础设施。
注意:本教程已使用 CDKTF 0.11.2 和 Terraform 1.2.2 进行测试。
先决条件
要完成本教程,您需要:
- A good understanding of Infrastructure-as-Code (IaC). You can learn about IaC in Infrastructure as Code Explained.
- A DigitalOcean account. If you do not have one, sign up for a new account.
- A DigitalOcean Personal Access Token, which you can create via the DigitalOcean console. Instructions on how to do that can be found at How to Generate a Personal Access Token.
- A password-less SSH key added to your DigitalOcean account. You can add that by following How To Use SSH Keys with DigitalOcean Droplets. When you add the key to your account, remember the name you give it, as you will need it in this tutorial. For CDKTF to accept the name of your key, it must start with a letter or underscore and may contain only letters, digits, underscores, and dashes.
- 在您的本地机器上安装 Terraform,您可以按照 如何在 DigitalOcean 中使用 Terraform 的“步骤 1 – 安装 Terraform”进行设置。
- 在您的本地机器上安装 Node.js。您可以在 如何安装 Node.js 并创建本地开发环境 系列中找到说明。
- 熟练编程 JavaScript。要提高您的技能,请查看 如何使用 JavaScript 编码 系列。
- 熟悉使用 TypeScript 的基本功能。如果您对 TypeScript 不熟悉,如何在 TypeScript 中编码 教程系列是提高您速度的良好资源。
- A code editor or integrated development environment (IDE) that supports TypeScript. If you are not currently using one, try Visual Studio Code. You can also read up on How To Work With TypeScript in Visual Studio Code.
步骤 1 — 安装 cdktf 命令行工具
首先,您将安装 cdktf 命令行工具。
cdktf CLI 可作为 NPM 包使用。如果您在 npmjs.com 上搜索 cdktf,您会找到两个名称类似的包:cdktf 和 cdktf-cli。
从概念上讲,CDKTF 是在 Terraform 之上的一个抽象层。它由两部分组成:
-
一个包含一组本地语言结构(如函数和类)的库,用于定义基础架构。此部分封装在
cdktfnpm 包中。例如,您可以在以下示例 CDKTF 项目中看到来自cdktf包的App和TerraformStack类的使用: -
一个适配器,解析 CDKTF 项目中的构造,并将其简化为一组 JSON 文档,然后以与 HCL 相同的方式被摄入到 Terraform 中。此适配器被封装到一个名为
cdktf的 CLI 工具中,由cdktf-cli软件包提供。
要安装 cdktf CLI 工具,您需要 cdktf-cli 软件包。您可以使用 npm、yarn 或您选择的软件包管理器全局安装此软件包。
要使用 npm 安装 cdktf-cli,请运行以下命令:
注意:在发布本文后可能会有更新版本的 cdktf-cli 软件包。您可以尝试使用 npm install --global cdktf-cli@latest 命令跟随最新版本进行教程,但请注意某些输出可能会略有不同。
或者,您可以在 macOS 或 Linux 上使用 Homebrew 安装 cdktf CLI,如下所示:cdktf 公式:
要验证安装是否成功,请运行不带参数的 cdktf 命令:
您将看到类似以下的输出:
OutputPlease pass a command to cdktf, here are all available ones:
cdktf

Commands:
  cdktf init                Create a new cdktf project from a template.
  cdktf get                 Generate CDK Constructs for Terraform providers and modules.
  cdktf convert             Converts a single file of HCL configuration to CDK for Terraform.
  cdktf deploy [stacks...]  Deploy the given stacks
  cdktf destroy [stacks..]  Destroy the given stacks
  cdktf diff [stack]        Perform a diff (terraform plan) for the given stack
  cdktf list                List stacks in app.
  cdktf login               Retrieves an API token to connect to Terraform Cloud.
  cdktf synth               Synthesizes Terraform code for the given app in a directory.
  cdktf watch [stacks..]    [experimental] Watch for file changes and automatically trigger a deploy
  cdktf output [stacks..]   Prints the output of stacks
  cdktf debug               Get debug information about the current project and environment
  cdktf completion          generate completion script

Options:
      --version                   显示版本号
      --disable-logging           不写日志文件。支持使用环境变量 CDKTF_DISABLE_LOGGING。
      --disable-plugin-cache-env  不自动设置 TF_PLUGIN_CACHE_DIR。
      --log-level                 应写入哪个日志级别。
  -h, --help                      Show help

Options can be specified via environment variables with the "CDKTF_" prefix (e.g. "CDKTF_OUTPUT")
输出显示可用命令。在本教程的其余部分,您将通过使用 cdktf init、cdktf get、cdktf deploy 和 cdktf destroy 来获得使用经验。
现在您已安装了 cdktf CLI,您可以通过编写一些 TypeScript 代码来定义基础架构。
步骤 2 —— 创建新的 CDKTF 项目
在此步骤中,您将使用刚刚安装的 cdktf CLI 创建一个模板 CDKTF 项目,后续步骤将在此基础上构建。
通过运行以下命令创建一个将容纳 CDKTF 项目的目录:
然后,进入新创建的目录:
使用 cdktf init 命令创建一个 CDKTF 项目脚手架,您将在其上构建:
CDKTF 允许开发人员使用 TypeScript、Python、Java、C# 或 Go 来定义基础设施。选项 --template=typescript 告诉 cdktf 使用 TypeScript 来构建这个 CDKTF 项目。
Terraform(因此也是 CDKTF)通过记录其管理的资源的定义和状态来跟踪它管理的资源,这些记录保存在称为 Terraform 状态 文件中。选项 --local 告诉 CDKTF 在运行 cdktf 的机器上将这些状态文件保存在本地(每个文件遵循命名结构 terraform.<stack>.tfstate)。
运行命令后,CLI 可能会询问您是否同意向 CDKTF 团队发送崩溃报告以帮助他们改进产品:
Output? Do you want to send crash reports to the CDKTF team? See https://www.terraform.io/cdktf/create-and-deploy/configuration-file for
 more information (Y/n)
如果您同意,请键入 Y;如果您不同意,请键入 N,然后按 ENTER 键。
cdktf 然后会创建项目框架并安装软件包。当项目框架完成创建后,您将看到类似以下的输出:
Output  Your cdktf typescript project is ready!

  cat help                Print this message

  Compile:
    npm run get           Import/update Terraform providers and modules (you should check-in this directory)
    npm run compile       Compile typescript code to javascript (or "npm run watch")
    npm run watch         Watch for changes and compile typescript in the background
    npm run build         Compile typescript

  Synthesize:
    cdktf synth [stack]   Synthesize Terraform resources from stacks to cdktf.out/ (ready for 'terraform apply')

  Diff:
    cdktf diff [stack]    Perform a diff (terraform plan) for the given stack

  Deploy:
    cdktf deploy [stack]  Deploy the given stack

  Destroy:
    cdktf destroy [stack] Destroy the stack

  Test:
    npm run test        Runs unit tests (edit __tests__/main-test.ts to add your own tests)
    npm run test:watch  Watches the tests and reruns them on change

  Upgrades:
    npm run upgrade        Upgrade cdktf modules to latest version
    npm run upgrade:next   Upgrade cdktf modules to latest "@next" version (last commit)
您还将在 infra 目录中看到一些新添加的文件。最重要的文件是 cdktf.json 和 main.ts。
cdktf.json 是 CDKTF 项目的 配置文件。如果打开该文件,将显示如下内容:
app 属性定义了用于将 TypeScript 代码合成为与 Terraform 兼容的 JSON 的命令。该属性指示 main.ts 是 CDKTF 项目的入口点。
如果你打开main.ts文件,你会看到类似以下的内容:
在CDKTF语言中,一组相关的基础设施资源可以被分组到一个堆栈中。例如,构成API应用程序的资源,如Droplets、负载均衡器和DNS记录,可以被分组到一个名为APIStack的单个堆栈中。每个堆栈保持自己的状态,并且可以独立于其他堆栈部署、修改或销毁。堆栈的常见用法是为生产环境和开发环境分别设置一个堆栈。
一个应用程序是多个堆栈的容器。例如,一个应用程序可以组合各种微服务的堆栈。
在main.ts中生成的CDKTF项目脚手架包含一个名为MyStack的单个堆栈类,目前没有定义任何资源。一个MyStack的实例被创建并命名为infra,包含在一个名为app的应用程序中。在接下来的步骤中,你将在MyStack构造函数中定义基础设施资源。
创建项目后,下一步是配置CDKTF项目的提供者。
第3步 — 安装DigitalOcean提供者
在这一步中,您将把DigitalOcean提供程序安装到CDKTF项目中。
提供程序是提供指示给Terraform(在幕后由cdktf使用)的库,用于在云提供商、SaaS提供商和其他公开应用程序编程接口(API)的平台上创建、更新和删除资源。提供程序将调用这些上游API的逻辑封装成Terraform可以调用的标准函数。
例如,如果您要在没有Terraform的情况下创建一个新的DigitalOcean Droplet,则必须向/v2/droplets端点发送POST请求到DigitalOcean API。而使用Terraform,则可以安装DigitalOcean提供程序并定义一个digitalocean_droplet资源,类似于以下示例片段:
然后,您可以使用cdktf CLI工具将此TypeScript代码转换为与Terraform兼容的JSON,并将其传递给提供程序,提供程序将代表您进行适当的API调用以创建Droplet。
现在您已经了解了提供程序是什么,您可以为您的CDKTF项目设置DigitalOcean提供程序。
打开cdktf.json文件,并将字符串digitalocean/digitalocean添加到terraformProviders数组中:
digitalocean/digitalocean是Terraform Registry上DigitalOcean提供程序的标识符。
保存并关闭文件。
接下来,运行cdktf get以下载和安装提供程序。
cdktf get将下载提供程序,提取模式,生成相应的TypeScript类,并将其添加为TypeScript模块在.gen/providers/下。这种自动代码生成使您可以使用任何Terraform提供程序和HCL模块与CDKTF,并且这是CDKTF如何能够在支持它的编辑器中提供代码完成的方式。

一旦cdktf get完成运行,您将看到类似以下的输出:
OutputGenerated typescript constructs in the output directory: .gen
您还将看到一个名为.gen的新目录,其中包含提供程序的生成代码。
在这一步中,您将安装digitalocean/digitalocean提供程序到项目中。在下一步中,您将配置DigitalOcean提供程序,以使用DigitalOcean API对提供程序进行身份验证所需的凭据。
第四步 — 配置DigitalOcean提供程序
在这一步中,您将使用您的DigitalOcean个人访问令牌配置DigitalOcean提供程序,该令牌允许提供程序代表您调用DigitalOcean API。
不同的提供程序需要并支持不同的凭据来验证上游API。对于DigitalOcean提供程序,您需要提供您的DigitalOcean个人访问令牌。您可以通过将其设置为DIGITALOCEAN_TOKEN或DIGITALOCEAN_ACCESS_TOKEN环境变量来指定提供程序的令牌。
在终端中运行以下命令以为该终端会话设置环境变量。
注意:通过调用export,您只为该终端会话设置环境变量。如果您关闭并重新打开终端,或者在不同的终端中运行cdktf命令,则需要再次运行export命令,以使环境变量生效。
接下来,您将在MyStack类中指定提供程序,这将允许您在堆栈中定义提供程序提供的资源。将main.ts文件更新为以下内容:
提供程序的模块位于./.gen/providers/digitalocean,这是在运行cdktf get时自动生成的。
您在此步骤中使用凭据配置了digitalocean/digitalocean提供程序。接下来,您将开始定义构成本教程目标的基础设施。
第5步 — 在Droplets上定义Web应用程序
在这一步中,您将定义两个NGINX服务器,每个服务器都提供不同的文件,部署在两个相同的Ubuntu 20.04 Droplets上。
您从定义这两个Droplets开始。修改main.ts以进行突出显示的更改:
您使用JavaScript本地循环(Array.prototype.map())来避免代码重复。
就像您通过控制台创建Droplet一样,有几个参数需要指定:
image– 您的Droplet将运行的Linux发行版和版本。region– Droplet将运行的数据中心。size– 保留给Droplet的CPU和内存资源的数量。name– 用于引用Droplet的唯一名称。
image、region 和 size 的值必须是 DigitalOcean 支持的内容。您可以在 DigitalOcean API Slugs 页面上找到所有受支持的 Linux 发行版镜像、Droplet 大小和地区的有效值(称为slugs)。您可以在DigitalOcean Droplet文档页面上找到所需和可选属性的完整列表。
添加 SSH 密钥
作为先决条件的一部分,您已将无密码 SSH 公钥上传到您的 DigitalOcean 账户并记录了其名称。您现在将使用该名称来检索 SSH 密钥的 ID,并将其传递到您 Droplet 的定义中。
由于 SSH 密钥是手动添加到您的 DigitalOcean 账户的,它不是您当前 Terraform 配置管理的资源。如果您尝试定义一个新的digitalocean_ssh_key资源,它将创建一个新的 SSH 密钥而不是使用现有的。
相反,您将定义一个新的digitalocean_ssh_key 数据源。在 Terraform 中,数据源用于检索当前 Terraform 配置未管理的基础设施信息。换句话说,它们提供了对预先存在的外部基础设施状态的只读视图。一旦定义了数据源,您就可以在 Terraform 配置的其他地方使用该数据。
仍然在main.ts中,在MyStack的构造函数中,定义一个新的DataDigitaloceanSshKey数据源,并传入您为 SSH 密钥分配的名称(这里,名称为do_cdktf):
然后,更新 Droplet 的定义以包括 SSH 密钥:
在部署后,您可以使用私有 SSH 密钥访问 Droplet,而不是密码。
指定用户数据脚本以安装 NGINX
您现在已经定义了两个运行 Ubuntu 的相同 Droplet,配置了 SSH 访问。下一个任务是在每个 Droplet 上安装 NGINX。
当创建Droplet时,一个名为CloudInit的工具将引导服务器。CloudInit可以接受一个名为用户数据的文件,该文件可以修改服务器引导的方式。用户数据可以是任何服务器可以解释的cloud-config文件或脚本,比如Bash脚本。
在本步骤的其余部分,您将创建一个Bash脚本,并将其指定为Droplet的用户数据。该脚本将在引导过程中安装NGINX。此外,该脚本还将替换/var/www/html/index.html文件的内容(NGINX默认提供的文件)为Droplet的主机名和IP地址,这将导致两个NGINX服务器提供不同的文件。在下一步中,您将把这两个NGINX服务器放在负载均衡器后面;通过提供不同的文件,可以明显看出负载均衡器是否正确分发请求。
仍然在main.ts中,将一个新的userData属性添加到Droplet的配置对象中:
警告:确保在shebang(#!)之前没有换行;否则,脚本可能不会被执行。
当Droplet首次配置时,脚本将作为root用户运行。它将使用Ubuntu的包管理器APT来安装nginx包。然后,它将使用DigitalOcean的元数据服务来检索有关自身的信息,并将主机名和IP地址写入index.html,该文件由NGINX提供。
在此步骤中,您定义了两个运行Ubuntu的Droplets,配置了每个Droplet的SSH访问权限,并使用用户数据功能安装了NGINX。在下一步中,您将定义一个负载均衡器,该负载均衡器将位于这些NGINX服务器之前,并配置其以轮询方式进行负载均衡。
步骤6 —— 定义负载均衡器
在此步骤中,您将通过定义DigitalOcean负载均衡器来定义一个digitalocean_loadbalancer资源的实例。
仍然在main.ts中,在MyStack构造函数的末尾添加以下负载均衡器的定义:
forwardingRule 参数告诉负载均衡器监听端口 80 上的 HTTP 请求,并将它们转发到每个 Droplet 上的端口 80。
dropletIds 指定负载均衡器将传递请求的 Droplets。它需要一个数字,但 droplet.id 的值是一个字符串。因此,您已经使用了 Fn.tonumber Terraform 函数 来将字符串 Droplet ID 值转换为数字。
注意: 您在这里使用了 Fn.tonumber Terraform 函数,而不是 JavaScript 原生的 parseInt,因为 droplet.id 的值在 Droplet 被配置之前是未知的。Terraform 函数旨在在 Terraform 应用配置之前操作未知的运行时值。
保存并关闭文件。
您现在已经定义了两个 Droplets 和一个位于它们前面的负载均衡器。您的 main.ts 应该类似于这样:
在下一步中,您将使用 cdktf CLI 工具来实现整个 CDKTF 项目。
第 7 步 —— 配置您的基础设施
在这一步中,您将使用cdktf命令行工具来创建您在前面步骤中定义的Droplets和负载均衡器。
确保您位于infra/目录中,并已为您的终端会话设置了DIGITALOCEAN_ACCESS_TOKEN环境变量,然后运行cdktf deploy命令:
您应该会看到类似以下的输出:
Outputinfra  Initializing the backend...
infra  Initializing provider plugins...
infra  - Reusing previous version of digitalocean/digitalocean from the dependency lock file
infra  - Using previously-installed digitalocean/digitalocean v2.19.0
infra  Terraform has been successfully initialized!
infra  Terraform used the selected providers to generate the following execution
       plan. Resource actions are indicated with the following symbols:
       + create

       Terraform will perform the following actions:
infra    # digitalocean_droplet.bar (bar) will be created
         + resource "digitalocean_droplet" "bar" {
       + backups              = false
       + created_at           = (known after apply)
       + disk                 = (known after apply)
       + graceful_shutdown    = false
       + id                   = (known after apply)
       + image                = "ubuntu-20-04-x64"
       + ipv4_address         = (known after apply)
       + ipv4_address_private = (known after apply)
       + ipv6                 = false
       + ipv6_address         = (known after apply)
       + locked               = (known after apply)
       + memory               = (known after apply)
       + monitoring           = false
       + name                 = "bar"
       + price_hourly         = (known after apply)
       + price_monthly        = (known after apply)
       + private_networking   = (known after apply)
       + region               = "lon1"
       + resize_disk          = true
       + size                 = "s-1vcpu-1gb"
       + ssh_keys             = [
       + "34377800",
       ]
       + status               = (known after apply)
       + urn                  = (known after apply)
       + user_data            = "f9b1d9796d069fe504ce0d89439b6b664b14b1a1"
       + vcpus                = (known after apply)
       + volume_ids           = (known after apply)
       + vpc_uuid             = (known after apply)
       }

         # digitalocean_droplet.foo (foo) 将会被创建
         + resource "digitalocean_droplet" "foo" {
       + backups              = false
       + created_at           = (known after apply)
       + disk                 = (known after apply)
       + graceful_shutdown    = false
       + id                   = (known after apply)
       + image                = "ubuntu-20-04-x64"
       + ipv4_address         = (known after apply)
       + ipv4_address_private = (known after apply)
       + ipv6                 = false
       + ipv6_address         = (known after apply)
       + locked               = (known after apply)
       + memory               = (known after apply)
       + monitoring           = false
       + name                 = "foo"
       + price_hourly         = (known after apply)
       + price_monthly        = (known after apply)
       + private_networking   = (known after apply)
       + region               = "lon1"
       + resize_disk          = true
       + size                 = "s-1vcpu-1gb"
       + ssh_keys             = [
       + "34377800",
       ]
       + status               = (known after apply)
       + urn                  = (known after apply)
       + user_data            = "f9b1d9796d069fe504ce0d89439b6b664b14b1a1"
       + vcpus                = (known after apply)
       + volume_ids           = (known after apply)
       + vpc_uuid             = (known after apply)
       }

         # digitalocean_loadbalancer.lb (lb) 将会被创建
         + resource "digitalocean_loadbalancer" "lb" {
       + algorithm                        = "round_robin"
       + disable_lets_encrypt_dns_records = false
       + droplet_ids                      = (known after apply)
       + enable_backend_keepalive         = false
       + enable_proxy_protocol            = false
       + id                               = (known after apply)
       + ip                               = (known after apply)
       + name                             = "default"
       + redirect_http_to_https           = false
       + region                           = "lon1"
       + size_unit                        = (known after apply)
       + status                           = (known after apply)
       + urn                              = (known after apply)
       + vpc_uuid                         = (known after apply)

       + forwarding_rule {
       + certificate_id   = (known after apply)
       + certificate_name = (known after apply)
       + entry_port       = 80
       + entry_protocol   = "http"
       + target_port      = 80
       + target_protocol  = "http"
       + tls_passthrough  = false
       }

       + healthcheck {
       + check_interval_seconds   = (known after apply)
       + healthy_threshold        = (known after apply)
       + path                     = (known after apply)
       + port                     = (known after apply)
       + protocol                 = (known after apply)
       + response_timeout_seconds = (known after apply)
       + unhealthy_threshold      = (known after apply)
       }

       + sticky_sessions {
       + cookie_name        = (known after apply)
       + cookie_ttl_seconds = (known after apply)
       + type               = (known after apply)
       }
       }

       Plan: 3 to add, 0 to change, 0 to destroy.

       ─────────────────────────────────────────────────────────────────────────────

       Saved the plan to: plan

       To perform exactly these actions, run the following command to apply:
       terraform apply "plan"

Please review the diff output above for infra
❯ Approve  Applies the changes outlined in the plan.
  Dismiss
  Stop
注意: CDKTF 仍在开发中,输出可能与上面显示的不同。
此显示列出了cdktf计划创建、更新和销毁的所有资源和属性。某些值,例如 Droplet 的 ID,在资源创建后才能知道。对于这些值,在输出中您将看到(known after apply)作为属性值。
检查资源列表以确保符合您的预期。然后,使用箭头键选择批准选项并按ENTER。
您将看到类似以下的输出:
Outputinfra  digitalocean_droplet.foo (foo): Creating...
       digitalocean_droplet.bar (bar): Creating...
infra  digitalocean_droplet.bar (bar): Still creating... [10s elapsed]
infra  digitalocean_droplet.foo (foo): Still creating... [10s elapsed]


1 Stack deploying     0 Stacks done     0 Stacks waiting
此输出告诉您cdktf正在与 DigitalOcean API 通信以创建 Droplet。cdktf首先创建 Droplet,因为负载均衡器依赖于 Droplet 的 ID,而在 Droplets 被创建之前是未知的。
创建 Droplet 通常不会超过一分钟。一旦 Droplets 被创建,cdktf将继续创建负载均衡器。
Outputinfra  digitalocean_droplet.bar (bar): Creation complete after 54s [id=298041598]
infra  digitalocean_droplet.foo (foo): Creation complete after 55s [id=298041600]
infra  digitalocean_loadbalancer.lb (lb): Creating...
infra  digitalocean_loadbalancer.lb (lb): Still creating... [10s elapsed]
负载均衡器可能需要更长时间。创建负载均衡器后,您将看到一个摘要,显示堆栈已成功部署。
Outputinfra  digitalocean_loadbalancer.lb (lb): Still creating... [1m30s elapsed]
infra  digitalocean_loadbalancer.lb (lb): Creation complete after 1m32s [id=4f9ae2b7-b649-4fb4-beed-96b95bb72dd1]
infra
       Apply complete! Resources: 3 added, 0 changed, 0 destroyed.


No outputs found.
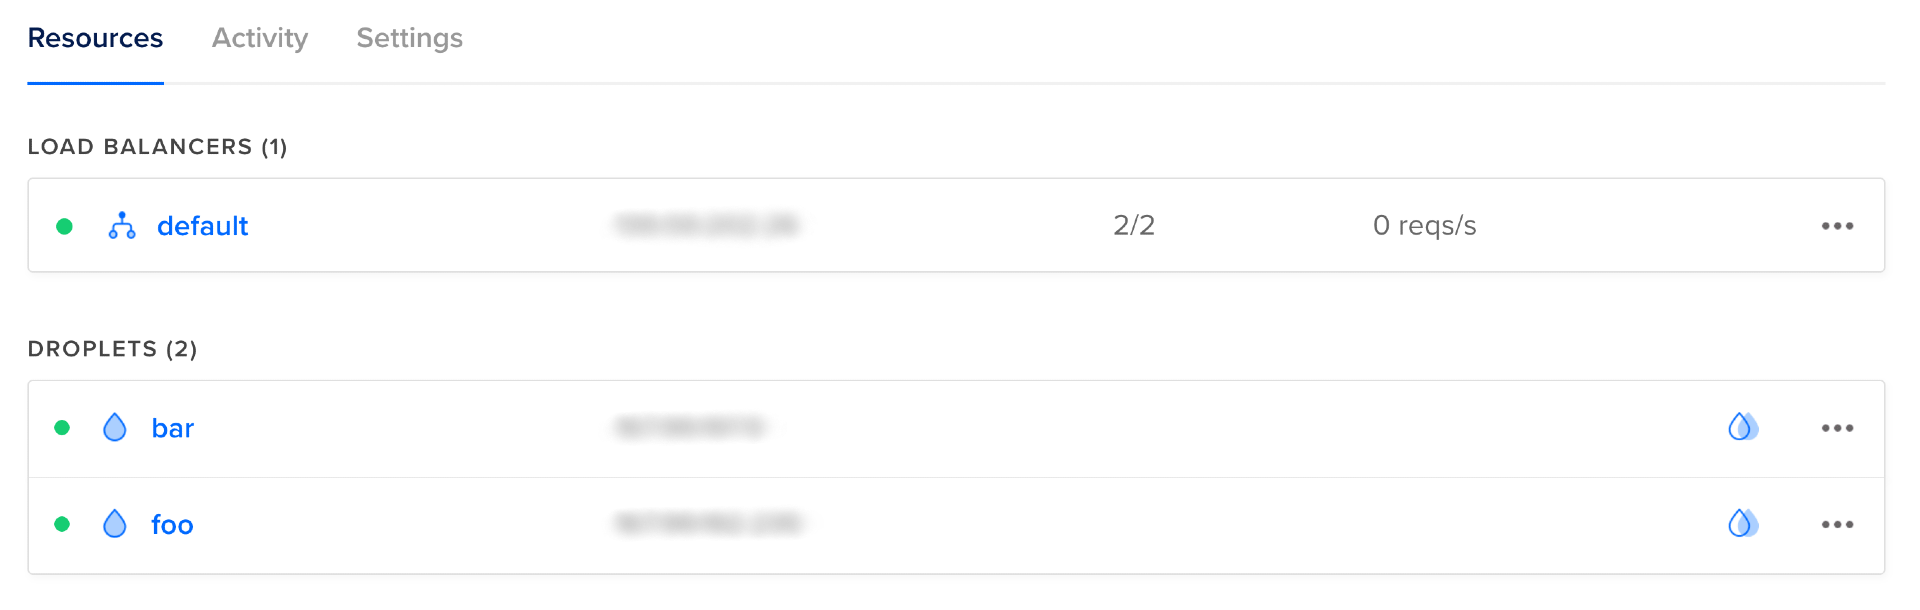
您现在可以访问DigitalOcean控制台,在那里您可以看到一个名为default的负载均衡器和两个健康的Droplet,分别命名为foo和bar,每个都作为负载均衡器的目标。
您可以通过访问每个Droplet的IP地址来测试NGINX是否正在运行并正确提供内容。您应该会看到类似以下的文本:
Droplet: bar, IP Address: droplet_ip
如果您没有看到该文本字符串或服务器没有响应,请检查您指定的用户数据是否正确,并确保没有任何字符(包括换行符)出现在shebang(#!)之前。您还可以使用您的SSH私钥SSH到Droplet,并查看CloudInit在/var/log/cloud-init-output.log生成的输出日志:
确认Droplets已启动并提供内容后,您可以开始测试负载均衡器。您可以通过发送一些请求来执行此操作。
从终端运行以下命令,向负载均衡器发送十个请求:
您应该会看到类似以下的输出,尽管显示的IP地址将不同:
OutputDroplet: foo, IP Address: droplet_foo_ip
Droplet: bar, IP Address: droplet_bar_ip
Droplet: foo, IP Address: droplet_foo_ip
Droplet: bar, IP Address: droplet_bar_ip
Droplet: bar, IP Address: droplet_bar_ip
Droplet: foo, IP Address: droplet_foo_ip
Droplet: bar, IP Address: droplet_bar_ip
Droplet: foo, IP Address: droplet_foo_ip
Droplet: bar, IP Address: droplet_bar_ip
Droplet: foo, IP Address: droplet_foo_ip
它显示负载均衡器的请求已转发到每个Droplet五次,表明负载均衡器正在工作。
注意:负载均衡器可能不会始终在两个Droplet之间完美平衡;您可能会发现向一个Droplet发送了四个请求,而向另一个Droplet发送了六个请求。这种行为是正常的。
在这一步中,您使用cdktf来配置您的资源,然后使用DigitalOcean控制台查找您的Droplets和负载均衡器的IP地址。然后,您发送请求到每个Droplet和负载均衡器以确认它们的工作。
在下一步中,您将获取Droplets和负载均衡器的IP地址,而无需登录到DigitalOcean控制台。
步骤8 — 输出信息
在上一步中,您必须登录到DigitalOcean控制台才能获取您的Droplet和负载均衡器的IP地址。在这一步中,您将稍微修改您的代码,以便这些信息被打印在cdktf deploy命令的输出中,节省了您访问控制台的时间。
Terraform将其管理资源的配置和状态记录在状态文件中。对于您的infra堆栈,状态文件可以在infra/terraform.infra.tfstate中找到。您将能够在此状态文件中找到Droplets和负载均衡器的IP地址。
然而,浏览大文件可能会不方便。CDKTF提供了TerraformOutput构造,您可以使用它来输出变量并使其在堆栈外部可用。任何输出在运行cdktf deploy后都会打印在stdout中。随时运行cdktf output也可以打印输出。
注意:虽然在本教程中您只是使用输出将信息打印到控制台,但其真正的强大之处在于使用其他堆栈的输出作为输入的堆栈,这是一种称为跨堆栈引用的功能。
更新main.ts文件以包含负载均衡器和Droplets的输出:
保存并关闭文件。
运行cdktf deploy以实现更改:
在输出中,您应该看到类似以下的内容:
Output─────────────────────────────────────────────────────────────────────────────

Changes to Outputs:
+ droplet0IP     = "droplet_foo_ip"
+ droplet1IP     = "droplet_bar_ip"
+ loadBalancerIP = "load_balancer_ip"

You can apply this plan to save these new output values to the Terraform
state, without changing any real infrastructure.

─────────────────────────────────────────────────────────────────────────────
此输出告诉您不会进行基础设施更改,只会输出堆栈中的内容。
使用箭头键选择批准,然后按ENTER。在终端输出末尾,您应该看到类似以下的内容:
Outputinfra
droplet0IP = droplet_foo_ip
droplet1IP = droplet_bar_ip
loadBalancerIP = load_balancer_ip
现在,每次运行cdktf deploy或cdktf output时,Droplets和负载均衡器的IP地址都会在终端输出中打印出来,无需从DigitalOcean控制台获取该信息。
您现在已经创建了两个Droplets和一个负载均衡器,并确认它们正在运行。您可以将您开发的CDKTF项目用作定义更复杂基础架构的基础(您可以在do-community / digitalocean-cdktf-typescript找到参考实现)。
在本教程中配置的资源将产生费用。如果您不打算使用创建的基础架构,则应将其销毁。在接下来的最后一步中,您将通过销毁本教程中创建的资源来清理项目。
步骤 9 — 销毁您的基础架构
在这一步中,您将删除本教程中创建的所有资源。
仍然在 infra/ 目录中,运行 cdktf destroy:
您应该会看到类似以下的输出:
Outputinfra  Initializing the backend...
infra  Initializing provider plugins...
infra  - Reusing previous version of digitalocean/digitalocean from the dependency lock file
infra  - Using previously-installed digitalocean/digitalocean v2.19.0
infra  Terraform has been successfully initialized!
infra  digitalocean_droplet.bar (bar): Refreshing state... [id=298041598]
       digitalocean_droplet.foo (foo): Refreshing state... [id=298041600]
infra  digitalocean_loadbalancer.lb (lb): Refreshing state... [id=4f9ae2b7-b649-4fb4-beed-96b95bb72dd1]
infra  Terraform used the selected providers to generate the following execution
       plan. Resource actions are indicated with the following symbols:
       - destroy

       Terraform will perform the following actions:
infra    # digitalocean_droplet.bar (bar) will be destroyed
         - resource "digitalocean_droplet" "bar" {
       - backups              = false -> null
       - created_at           = "2022-05-02T10:04:16Z" -> null
       - disk                 = 25 -> null
       - graceful_shutdown    = false -> null
       - id                   = "298041598" -> null
       - image                = "ubuntu-20-04-x64" -> null
       - ipv4_address         = "droplet_bar_public_ip" -> null
       - ipv4_address_private = "droplet_bar_private_ip" -> null
       - ipv6                 = false -> null
       - locked               = false -> null
       - memory               = 1024 -> null
       - monitoring           = false -> null
       - name                 = "bar" -> null
       - price_hourly         = 0.00744 -> null
       - price_monthly        = 5 -> null
       - private_networking   = true -> null
       - region               = "lon1" -> null
       - resize_disk          = true -> null
       - size                 = "s-1vcpu-1gb" -> null
       - ssh_keys             = [
       - "34377800",
       ] -> null
       - status               = "active" -> null
       - tags                 = [] -> null
       - urn                  = "do:droplet:298041598" -> null
       - user_data            = "f9b1d9796d069fe504ce0d89439b6b664b14b1a1" -> null
       - vcpus                = 1 -> null
       - volume_ids           = [] -> null
       - vpc_uuid             = "bed80b32-dc82-11e8-83ec-3cfdfea9f3f0" -> null
       }

         # digitalocean_droplet.foo (foo) 将被销毁
         - resource "digitalocean_droplet" "foo" {
       - backups              = false -> null
       - created_at           = "2022-05-02T10:04:16Z" -> null
       - disk                 = 25 -> null
       - graceful_shutdown    = false -> null
       - id                   = "298041600" -> null
       - image                = "ubuntu-20-04-x64" -> null
       - ipv4_address         = "droplet_foo_public_ip" -> null
       - ipv4_address_private = "droplet_foo_private_ip" -> null
       - ipv6                 = false -> null
       - locked               = false -> null
       - memory               = 1024 -> null
       - monitoring           = false -> null
       - name                 = "foo" -> null
       - price_hourly         = 0.00744 -> null
       - price_monthly        = 5 -> null
       - private_networking   = true -> null
       - region               = "lon1" -> null
       - resize_disk          = true -> null
       - size                 = "s-1vcpu-1gb" -> null
       - ssh_keys             = [
       - "34377800",
       ] -> null
       - status               = "active" -> null
       - tags                 = [] -> null
       - urn                  = "do:droplet:298041600" -> null
       - user_data            = "f9b1d9796d069fe504ce0d89439b6b664b14b1a1" -> null
       - vcpus                = 1 -> null
       - volume_ids           = [] -> null
       - vpc_uuid             = "bed80b32-dc82-11e8-83ec-3cfdfea9f3f0" -> null
       }

         # digitalocean_loadbalancer.lb (lb) 将被销毁
         - resource "digitalocean_loadbalancer" "lb" {
       - algorithm                        = "round_robin" -> null
       - disable_lets_encrypt_dns_records = false -> null
       - droplet_ids                      = [
       - 298041598,
       - 298041600,
       ] -> null
       - enable_backend_keepalive         = false -> null
       - enable_proxy_protocol            = false -> null
       - id                               = "4f9ae2b7-b649-4fb4-beed-96b95bb72dd1" -> null
       - ip                               = "load_balancer_ip" -> null
       - name                             = "default" -> null
       - redirect_http_to_https           = false -> null
       - region                           = "lon1" -> null
       - size_unit                        = 1 -> null
       - status                           = "active" -> null
       - urn                              = "do:loadbalancer:4f9ae2b7-b649-4fb4-beed-96b95bb72dd1" -> null
       - vpc_uuid                         = "bed80b32-dc82-11e8-83ec-3cfdfea9f3f0" -> null

       - forwarding_rule {
       - entry_port      = 80 -> null
       - entry_protocol  = "http" -> nul
infra  l
       - target_port     = 80 -> null
       - target_protocol = "http" -> null
       - tls_passthrough = false -> null
       }

       - healthcheck {
       - check_interval_seconds   = 10 -> null
       - healthy_threshold        = 5 -> null
       - path                     = "/" -> null
       - port                     = 80 -> null
       - protocol                 = "http" -> null
       - response_timeout_seconds = 5 -> null
       - unhealthy_threshold      = 3 -> null
       }

       - sticky_sessions {
       - cookie_ttl_seconds = 0 -> null
       - type               = "none" -> null
       }
       }

       Plan: 0 to add, 0 to change, 3 to destroy.

       ─────────────────────────────────────────────────────────────────────────────

       Saved the plan to: plan

       To perform exactly these actions, run the following command to apply:
       terraform apply "plan"

Please review the diff output above for infra
❯ Approve  Applies the changes outlined in the plan.
  Dismiss
  Stop
这一次,每个资源旁边不再显示 +,而是显示 -,表示 CDKTF 计划销毁该资源。检查所提出的更改,然后使用箭头键选择 批准 并按 ENTER 键。DigitalOcean 提供程序现在将与 DigitalOcean API 通信以销毁资源。
Outputinfra  digitalocean_loadbalancer.lb (lb): Destroying... [id=4f9ae2b7-b649-4fb4-beed-96b95bb72dd1]
infra  digitalocean_loadbalancer.lb (lb): Destruction complete after 1s
infra  digitalocean_droplet.bar (bar): Destroying... [id=298041598]
       digitalocean_droplet.foo (foo): Destroying... [id=298041600]
首先删除了负载均衡器,因为它没有依赖关系(其他资源没有引用负载均衡器作为它们的输入)。因为负载均衡器引用了 Droplets,所以它们只能在负载均衡器销毁之后销毁。
在资源被销毁后,您将在输出中看到以下行打印出来:
OutputDestroy complete! Resources: 3 destroyed.
结论
在本教程中,您使用 CDKTF 来创建和销毁一个由两个运行 NGINX 服务器的 DigitalOcean Droplets 组成的负载均衡的网页,并在负载均衡器后面提供服务。您还在终端上输出了有关资源的信息。
CDKTF 是在 Terraform 之上的抽象层。对 Terraform 的良好理解有助于理解 CDKTF。如果您想了解更多关于 Terraform 的信息,可以阅读《如何使用 Terraform 管理基础架构》系列,该系列深入介绍了 Terraform。
您还可以查看官方的 CDK for Terraform 文档 和 教程 以了解更多关于 CDKTF 的信息。