


Pessoal, se você é um leitor regular do tecmint.com, notará que este é nosso terceiro artigo sobre ferramentas de segurança. Em nossos dois artigos anteriores, fornecemos a você todas as orientações sobre como proteger o Apache e os Sistemas Linux de Malware, DOS, e ataques DDOS usando mod_security e mod_evasive e LMD (Linux Malware Detect).
Novamente, estamos aqui para apresentar uma nova ferramenta de segurança chamada Rkhunter (Rootkit Hunter). Este artigo irá guiá-lo sobre como instalar e configurar o RKH (RootKit Hunter) em sistemas Linux usando código-fonte.
O que é Rkhunter?
Rkhunter (Rootkit Hunter) é uma ferramenta de verificação de scanner baseada em Unix/Linux de código aberto para sistemas Linux lançada sob a licença GPL que verifica backdoors, rootkits e exploits locais em seus sistemas.
Ele verifica arquivos ocultos, permissões incorretas definidas em binários, strings suspeitas no kernel, etc. Para saber mais sobre o Rkhunter e seus recursos, visite http://rkhunter.sourceforge.net/.
Instale o Scanner Rootkit Hunter em Sistemas Linux
Passo 1: Baixando o Rkhunter
Primeiro, baixe a versão estável mais recente da ferramenta Rkhunter acessando http://rkhunter.sourceforge.net/ ou use o comando Wget abaixo para baixá-lo em seus sistemas.
# cd /tmp
# wget http://downloads.sourceforge.net/project/rkhunter/rkhunter/1.4.6/rkhunter-1.4.6.tar.gz
Passo 2: Instalando o Rkhunter
Depois de baixar a versão mais recente, execute os seguintes comandos como usuário root para instalá-lo.
# tar -xvf rkhunter-1.4.6.tar.gz
# cd rkhunter-1.4.6
# ./installer.sh --layout default --install
Saída de Exemplo
Checking system for:
 Rootkit Hunter installer files: found
 A web file download command: wget found
Starting installation:
 Checking installation directory "/usr/local": it exists and is writable.
 Checking installation directories:
  Directory /usr/local/share/doc/rkhunter-1.4.2: creating: OK
  Directory /usr/local/share/man/man8: exists and is writable.
  Directory /etc: exists and is writable.
  Directory /usr/local/bin: exists and is writable.
  Directory /usr/local/lib64: exists and is writable.
  Directory /var/lib: exists and is writable.
  Directory /usr/local/lib64/rkhunter/scripts: creating: OK
  Directory /var/lib/rkhunter/db: creating: OK
  Directory /var/lib/rkhunter/tmp: creating: OK
  Directory /var/lib/rkhunter/db/i18n: creating: OK
  Directory /var/lib/rkhunter/db/signatures: creating: OK
 Installing check_modules.pl: OK
 Installing filehashsha.pl: OK
 Installing stat.pl: OK
 Installing readlink.sh: OK
 Installing backdoorports.dat: OK
 Installing mirrors.dat: OK
 Installing programs_bad.dat: OK
 Installing suspscan.dat: OK
 Installing rkhunter.8: OK
 Installing ACKNOWLEDGMENTS: OK
 Installing CHANGELOG: OK
 Installing FAQ: OK
 Installing LICENSE: OK
 Installing README: OK
 Installing language support files: OK
 Installing ClamAV signatures: OK
 Installing rkhunter: OK
 Installing rkhunter.conf: OK
Installation complete
Passo 3: Atualizando o Rkhunter
Execute o atualizador RKH para preencher as propriedades do banco de dados executando o seguinte comando.
# /usr/local/bin/rkhunter --update
# /usr/local/bin/rkhunter --propupd
Saída de Exemplo
[ Rootkit Hunter version 1.4.6 ]

Checking rkhunter data files...
  Checking file mirrors.dat                                  [ Updated ]
  Checking file programs_bad.dat                             [ No update ]
  Checking file backdoorports.dat                            [ No update ]
  Checking file suspscan.dat                                 [ No update ]
  Checking file i18n/cn                                      [ No update ]
  Checking file i18n/de                                      [ No update ]
  Checking file i18n/en                                      [ No update ]
  Checking file i18n/tr                                      [ No update ]
  Checking file i18n/tr.utf8                                 [ No update ]
  Checking file i18n/zh                                      [ No update ]
  Checking file i18n/zh.utf8                                 [ No update ]
  Checking file i18n/ja                                      [ No update ]
File created: searched for 177 files, found 131, missing hashes 1
Passo 4: Configurando Cronjob e Alertas por Email
Crie um arquivo chamado rkhunter.sh em /etc/cron.daily/, que então escaneia seu sistema de arquivos todos os dias e envia notificações por email para seu endereço de email. Crie o seguinte arquivo com a ajuda do seu editor favorito.
# vi /etc/cron.daily/rkhunter.sh
Adicione as seguintes linhas de código e substitua “NomeDoSeuServidorAqui” pelo seu “Nome do Servidor” e “[email protected]” pelo seu “Id de Email“.
#!/bin/sh
(
/usr/local/bin/rkhunter --versioncheck
/usr/local/bin/rkhunter --update
/usr/local/bin/rkhunter --cronjob --report-warnings-only
) | /bin/mail -s 'rkhunter Daily Run (PutYourServerNameHere)' [email protected]
Defina permissão de execução no arquivo.
# chmod 755 /etc/cron.daily/rkhunter.sh
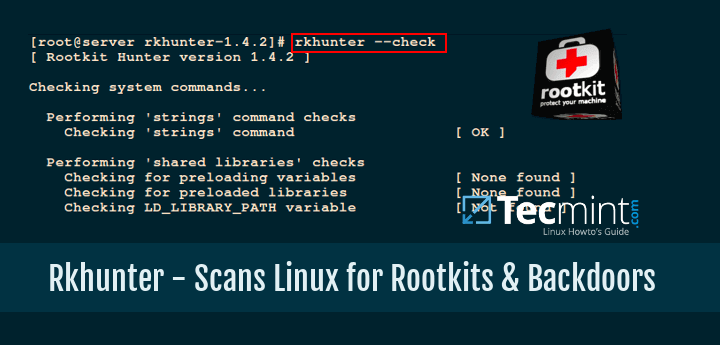
Passo 5: Escaneamento Manual e Uso
Para escanear todo o sistema de arquivos, execute o Rkhunter como usuário root.
# rkhunter --check
Saída de Exemplo
[ Rootkit Hunter version 1.4.6 ]

Checking system commands...

  Performing 'strings' command checks
    Checking 'strings' command                               [ OK ]

  Performing 'shared libraries' checks
    Checking for preloading variables                        [ None found ]
    Checking for preloaded libraries                         [ None found ]
    Checking LD_LIBRARY_PATH variable                        [ Not found ]

  Performing file properties checks
    Checking for prerequisites                               [ OK ]
    /usr/local/bin/rkhunter                                  [ OK ]
    /usr/sbin/adduser                                        [ OK ]
    /usr/sbin/chkconfig                                      [ OK ]
    /usr/sbin/chroot                                         [ OK ]
    /usr/sbin/depmod                                         [ OK ]
    /usr/sbin/fsck                                           [ OK ]
    /usr/sbin/fuser                                          [ OK ]
    /usr/sbin/groupadd                                       [ OK ]
    /usr/sbin/groupdel                                       [ OK ]
    /usr/sbin/groupmod                                       [ OK ]
    /usr/sbin/grpck                                          [ OK ]
    /usr/sbin/ifconfig                                       [ OK ]
    /usr/sbin/ifdown                                         [ Warning ]
    /usr/sbin/ifup                                           [ Warning ]
    /usr/sbin/init                                           [ OK ]
    /usr/sbin/insmod                                         [ OK ]
    /usr/sbin/ip                                             [ OK ]
    /usr/sbin/lsmod                                          [ OK ]
    /usr/sbin/lsof                                           [ OK ]
    /usr/sbin/modinfo                                        [ OK ]
    /usr/sbin/modprobe                                       [ OK ]
    /usr/sbin/nologin                                        [ OK ]
    /usr/sbin/pwck                                           [ OK ]
    /usr/sbin/rmmod                                          [ OK ]
    /usr/sbin/route                                          [ OK ]
    /usr/sbin/rsyslogd                                       [ OK ]
    /usr/sbin/runlevel                                       [ OK ]
    /usr/sbin/sestatus                                       [ OK ]
    /usr/sbin/sshd                                           [ OK ]
    /usr/sbin/sulogin                                        [ OK ]
    /usr/sbin/sysctl                                         [ OK ]
    /usr/sbin/tcpd                                           [ OK ]
    /usr/sbin/useradd                                        [ OK ]
    /usr/sbin/userdel                                        [ OK ]
    /usr/sbin/usermod                                        [ OK ]
....
[Press  to continue]


Checking for rootkits...

  Performing check of known rootkit files and directories
    55808 Trojan - Variant A                                 [ Not found ]
    ADM Worm                                                 [ Not found ]
    AjaKit Rootkit                                           [ Not found ]
    Adore Rootkit                                            [ Not found ]
    aPa Kit                                                  [ Not found ]
.....

[Press  to continue]


  Performing additional rootkit checks
    Suckit Rookit additional checks                          [ OK ]
    Checking for possible rootkit files and directories      [ None found ]
    Checking for possible rootkit strings                    [ None found ]

....
[Press  to continue]


Checking the network...

  Performing checks on the network ports
    Checking for backdoor ports                              [ None found ]
....
  Performing system configuration file checks
    Checking for an SSH configuration file                   [ Found ]
    Checking if SSH root access is allowed                   [ Warning ]
    Checking if SSH protocol v1 is allowed                   [ Warning ]
    Checking for a running system logging daemon             [ Found ]
    Checking for a system logging configuration file         [ Found ]
    Checking if syslog remote logging is allowed             [ Not allowed ]
...
System checks summary
=====================

File properties checks...
    Files checked: 137
    Suspect files: 6

Rootkit checks...
    Rootkits checked : 383
    Possible rootkits: 0

Applications checks...
    Applications checked: 5
    Suspect applications: 2

The system checks took: 5 minutes and 38 seconds

All results have been written to the log file: /var/log/rkhunter.log

One or more warnings have been found while checking the system.
Please check the log file (/var/log/rkhunter.log)
O comando acima gera um arquivo de log em /var/log/rkhunter.log com os resultados da verificação feita pelo Rkhunter.
# cat /var/log/rkhunter.log
Saída de Exemplo
[11:21:04] Running Rootkit Hunter version 1.4.6 on tecmint
[11:21:04]
[11:21:04] Info: Start date is Mon Dec 21 11:21:04 AM IST 2020
[11:21:04]
[11:21:04] Checking configuration file and command-line options...
[11:21:04] Info: Detected operating system is 'Linux'
[11:21:04] Info: Found O/S name: Fedora release 33 (Thirty Three)
[11:21:04] Info: Command line is /usr/local/bin/rkhunter --check
[11:21:04] Info: Environment shell is /bin/bash; rkhunter is using bash
[11:21:04] Info: Using configuration file '/etc/rkhunter.conf'
[11:21:04] Info: Installation directory is '/usr/local'
[11:21:04] Info: Using language 'en'
[11:21:04] Info: Using '/var/lib/rkhunter/db' as the database directory
[11:21:04] Info: Using '/usr/local/lib64/rkhunter/scripts' as the support script directory
[11:21:04] Info: Using '/usr/local/sbin /usr/local/bin /usr/sbin /usr/bin /bin /sbin /usr/libexec /usr/local/libexec' as the command directories
[11:21:04] Info: Using '/var/lib/rkhunter/tmp' as the temporary directory
[11:21:04] Info: No mail-on-warning address configured
[11:21:04] Info: X will be automatically detected
[11:21:04] Info: Found the 'basename' command: /usr/bin/basename
[11:21:04] Info: Found the 'diff' command: /usr/bin/diff
[11:21:04] Info: Found the 'dirname' command: /usr/bin/dirname
[11:21:04] Info: Found the 'file' command: /usr/bin/file
[11:21:04] Info: Found the 'find' command: /usr/bin/find
[11:21:04] Info: Found the 'ifconfig' command: /usr/sbin/ifconfig
[11:21:04] Info: Found the 'ip' command: /usr/sbin/ip
[11:21:04] Info: Found the 'ipcs' command: /usr/bin/ipcs
[11:21:04] Info: Found the 'ldd' command: /usr/bin/ldd
[11:21:04] Info: Found the 'lsattr' command: /usr/bin/lsattr
...
Para mais informações e opções, por favor execute o seguinte comando.
# rkhunter --help
Se você gostou deste artigo, compartilhar é a maneira certa de agradecer.
Source:
https://www.tecmint.com/install-rootkit-hunter-scan-for-rootkits-backdoors-in-linux/