주요 목표는 Primefaces 구현과 함께 사용되는 주 메뉴 구성 요소를 다루는 것입니다. 일반적으로 인터넷 상에 퍼져있는 다양한 형태의 메뉴를 사용하는 응용 프로그램이 많습니다. 이 튜토리얼에서는 다음 유형의 메뉴를 다룰 것입니다:
- Menu: 서브메뉴와 메뉴 항목이 있는 탐색 구성 요소입니다.
- MenuBar: 수평 탐색 구성 요소입니다.
- MenuButton: 팝업 메뉴에서 다양한 명령을 표시하는 데 사용됩니다.
- TieredMenu: 오버레이를 사용하여 중첩된 서브메뉴를 표시하는 데 사용됩니다.
- SlideMenu: 슬라이딩 애니메이션을 사용하여 중첩된 서브메뉴를 표시하는 데 사용됩니다.
이제 시작하여 Primefaces가 이러한 유형의 구성 요소에 대해 제공하는 기능을 모두 살펴보겠습니다.
Primefaces Menu – 기본 정보
| Tag | menu |
|---|---|
| Component Class | org.primefaces.component.menu.Menu |
| Component Type | org.primefaces.component.Menu |
| Component Family | org.primefaces.component |
| Renderer Type | org.primefaces.component.MenuRenderer |
| Renderer Class | org.primefaces.component.menu.MenuRenderer |
Primefaces Menu – 속성
| Name | Default | Type | Description |
|---|---|---|---|
| id | null | String | Unique identifier of the component. |
| rendered | true | Boolean | Boolean value to specify the rendering of the component, when set to false component will not be rendered. |
| binding | null | Object | An el expression that maps to a server side UIComponent instance in a backing bean. |
| widgetVar | null | String | Name of the client side widget. |
| model | null | MenuModel | A menu model instance to create menu programmatically. |
| trigger | null | String | Target component to attach the overlay menu. |
| my | null | String | Corner of menu to align with trigger element. |
| at | null | String | Corner of trigger to align with menu element. |
| overlay | false | Boolean | Defines positioning type of menu, either static or overlay. |
| style | null | String | Inline style of the main container element. |
| styleClass | null | String | Style class of the main container element. |
| triggerEvent | click | String | Event to show the dynamic positioned menu. |
Primefaces 메뉴 – 시작하기
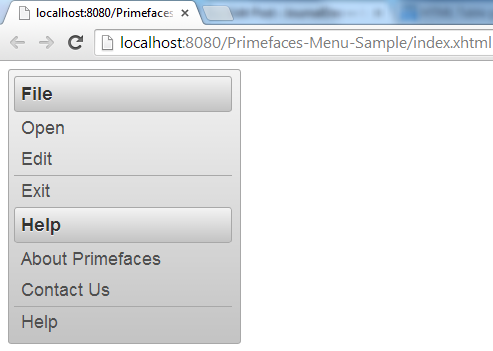
A menu is composed of submenus and menuitems. Submenus are used to group menuitems, while menuitems correspond to those actions required. Following example shows you the most simplest use of Menu component. index.xhtml
<html xmlns="https://www.w3.org/1999/xhtml"
	xmlns:ui="https://java.sun.com/jsf/facelets"
	xmlns:h="https://java.sun.com/jsf/html"
	xmlns:f="https://java.sun.com/jsf/core"
	xmlns:p="https://primefaces.org/ui">
<h:head>
	<script name="jquery/jquery.js" library="primefaces"></script>
</h:head>
<h:form>
	<p:menu>
		<p:submenu label="File">
			<p:menuitem value="Open"></p:menuitem>
			<p:menuitem value="Edit"></p:menuitem>
			<p:separator/>
			<p:menuitem value="Exit"></p:menuitem>
		</p:submenu>
		<p:submenu label="Help">
			<p:menuitem value="About Primefaces"></p:menuitem>
			<p:menuitem value="Contact Us"></p:menuitem>
			<p:separator/>
			<p:menuitem value="Help"></p:menuitem>
		</p:submenu>
	</p:menu>
</h:form>
</html>
Primefaces 메뉴 – 오버레이 메뉴
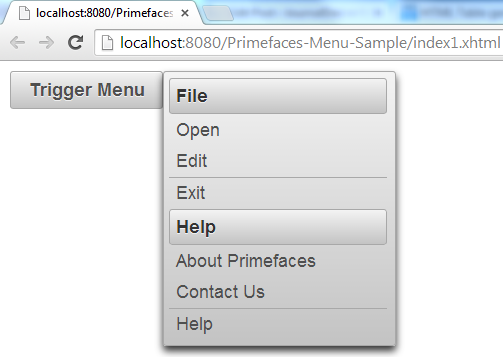
메뉴는 두 가지 방식으로 위치할 수 있습니다. 정적 위치는 메뉴가 일반 페이지 흐름에 있음을 의미합니다. 반면에 동적 메뉴는 페이지의 일반 흐름에 없어 다른 요소 위에 오버레이될 수 있습니다. 동적으로 메뉴를 정의하려면 아래 단계를 따라야 합니다:
- 메뉴를 정상적으로 정의하려면 overlay 속성을 true로 설정하고 메뉴의 trigger 속성을 트리거 액션의 id와 연결해야 합니다.
- 내와 at 메뉴의 속성을 조정하여 메뉴를 트리거 요소와 맞추기 위한 메뉴의 모서리 및 트리거의 모서리를 각각 지정해야 합니다.
- left, right, bottom 및 top은 my 및 at 속성에 대해 허용되는 유일한 값입니다.
index1.xhtml
<html xmlns="https://www.w3.org/1999/xhtml"
	xmlns:ui="https://java.sun.com/jsf/facelets"
	xmlns:h="https://java.sun.com/jsf/html"
	xmlns:f="https://java.sun.com/jsf/core"
	xmlns:p="https://primefaces.org/ui">
<h:head>
	<script name="jquery/jquery.js" library="primefaces"></script>
</h:head>
<h:form>
	<p:menu overlay="true" trigger="triggerButton" my="left top" at="right top">
		<p:submenu label="File">
			<p:menuitem value="Open"></p:menuitem>
			<p:menuitem value="Edit"></p:menuitem>
			<p:separator/>
			<p:menuitem value="Exit"></p:menuitem>
		</p:submenu>
		<p:submenu label="Help">
			<p:menuitem value="About Primefaces"></p:menuitem>
			<p:menuitem value="Contact Us"></p:menuitem>
			<p:separator/>
			<p:menuitem value="Help"></p:menuitem>
		</p:submenu>
	</p:menu>
	<p:commandButton id="triggerButton" value="Trigger Menu"></p:commandButton>
</h:form>
</html>
- 트리거 메뉴 액션이 활성화되면 정의한 메뉴가 표시됩니다.
Primefaces Menu – Ajax 및 Non-Ajax 동작
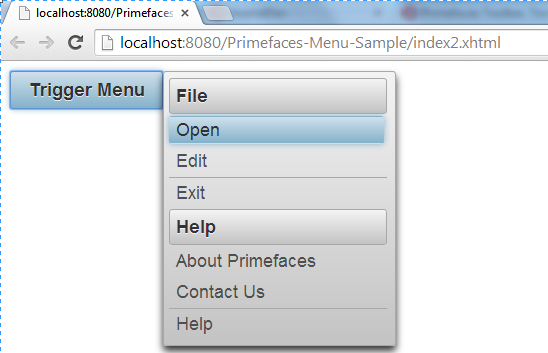
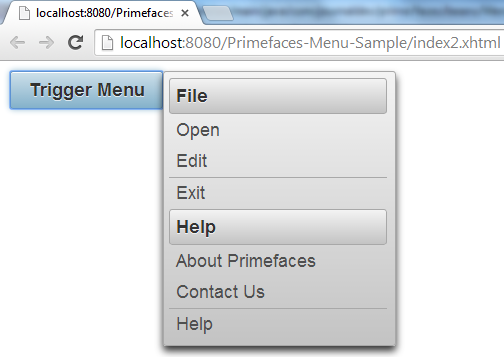
현재, 당신은 간단한 정적 메뉴와 더 복잡한 동적 메뉴를 개발했습니다. 이 두 가지 메뉴에는 제공하려는 필요한 작업에 해당하는 메뉴 항목이 포함되어 있습니다. 이러한 메뉴 항목은 실제로 p:commandButton과 같은 동작입니다. 따라서 이를 Ajax화하는 것도 적용 가능합니다. index2.xhtml
<html xmlns="https://www.w3.org/1999/xhtml"
	xmlns:ui="https://java.sun.com/jsf/facelets"
	xmlns:h="https://java.sun.com/jsf/html"
	xmlns:f="https://java.sun.com/jsf/core"
	xmlns:p="https://primefaces.org/ui">
<h:head>
	<script name="jquery/jquery.js" library="primefaces"></script>
</h:head>
<h:form>
	<p:growl id="message"></p:growl>
	<p:menu overlay="true" trigger="triggerButton" my="left top" at="right top">
		<p:submenu label="File">
			<p:menuitem value="Open" action="#{menuManagedBean.openAction}" update="message"></p:menuitem>
			<p:menuitem value="Edit"></p:menuitem>
			<p:separator/>
			<p:menuitem value="Exit"></p:menuitem>
		</p:submenu>
		<p:submenu label="Help">
			<p:menuitem value="About Primefaces"></p:menuitem>
			<p:menuitem value="Contact Us"></p:menuitem>
			<p:separator/>
			<p:menuitem value="Help"></p:menuitem>
		</p:submenu>
	</p:menu>
	<p:commandButton id="triggerButton" value="Trigger Menu"></p:commandButton>
</h:form>
</html>
MenuManagedBean.java
package com.journaldev.prime.faces.beans;

import javax.faces.application.FacesMessage;
import javax.faces.bean.ManagedBean;
import javax.faces.bean.SessionScoped;
import javax.faces.context.FacesContext;

@ManagedBean
@SessionScoped
public class MenuManagedBean {
	public String openAction(){
		FacesContext.getCurrentInstance().addMessage(null, new FacesMessage("Open action has activiated asynchrounsly !"));
		return "";
	}
}
Primefaces Menu – 동적 메뉴
메뉴는 프로그래밍적으로 생성될 수도 있습니다. 이것은 선언적 접근 방식과 비교하여 더 유연합니다. org.primefaces.model.MenuModel 인스턴스를 사용하여 그와 같은 메뉴를 정의할 수 있습니다. p:submenu, p:menuitem, p:separator와 같은 구성 요소도 프로그래밍적 메뉴를 정의하는 데 사용되는 기본 구현이 있습니다. 다음 예제는 이전에 개발한 비즈니스 시나리오와 동일한 내용을 보여줍니다. 이번에는 메뉴가 프로그래밍적으로 렌더링됩니다. index3.xhtml
<html xmlns="https://www.w3.org/1999/xhtml"
	xmlns:ui="https://java.sun.com/jsf/facelets"
	xmlns:h="https://java.sun.com/jsf/html"
	xmlns:f="https://java.sun.com/jsf/core"
	xmlns:p="https://primefaces.org/ui">
<h:head>
	<script name="jquery/jquery.js" library="primefaces"></script>
</h:head>
<h:form>
	<p:growl id="message"></p:growl>
	<p:menu overlay="true" trigger="triggerButton" my="left top" at="right top" model="#{menuManagedBean.menu}">
	</p:menu>
	<p:commandButton id="triggerButton" value="Trigger Menu"></p:commandButton>
</h:form>
</html>
MenuManagedBean.java
package com.journaldev.prime.faces.beans;

import javax.faces.application.FacesMessage;
import javax.faces.bean.ManagedBean;
import javax.faces.bean.SessionScoped;
import javax.faces.context.FacesContext;

import org.primefaces.model.menu.DefaultMenuItem;
import org.primefaces.model.menu.DefaultMenuModel;
import org.primefaces.model.menu.DefaultSeparator;
import org.primefaces.model.menu.DefaultSubMenu;
import org.primefaces.model.menu.MenuModel;

@ManagedBean
@SessionScoped
public class MenuManagedBean {
	private MenuModel menu = new DefaultMenuModel();

	public MenuManagedBean(){
		// 서브메뉴 생성
		DefaultSubMenu file = new DefaultSubMenu("File");
		// 서브메뉴 생성
		DefaultSubMenu help = new DefaultSubMenu("Help");
		// 메뉴항목 생성
		DefaultMenuItem open = new DefaultMenuItem("Open");
		// 메뉴항목 생성
		DefaultMenuItem edit = new DefaultMenuItem("Edit");
		// 메뉴항목 생성
		DefaultMenuItem exit = new DefaultMenuItem("Exit");

		// 메뉴항목 생성
		DefaultMenuItem about = new DefaultMenuItem("About Primefaces");
		// 메뉴항목 생성
		DefaultMenuItem contact = new DefaultMenuItem("Contact Us");
		// 메뉴항목 생성
		DefaultMenuItem helpMenuItem = new DefaultMenuItem("Help");

		// 메뉴항목 작업 결정
		open.setCommand("#{menuManagedBean.openAction}");

		// 메뉴항목을 서브메뉴와 연관시킴
		file.addElement(open);
		file.addElement(edit);
		file.addElement(new DefaultSeparator());
		file.addElement(exit);

		help.addElement(about);
		help.addElement(contact);
		help.addElement(new DefaultSeparator());
		help.addElement(helpMenuItem);

		// 서브메뉴를 메뉴와 연관시킴
		menu.addElement(file);
		menu.addElement(help);
	}

	public MenuModel getMenu() {
		return menu;
	}

	public void setMenu(MenuModel menu) {
		this.menu = menu;
	}

	public String openAction(){
		FacesContext.getCurrentInstance().addMessage(null, new FacesMessage("Open action has activiated asynchrounsly !"));
		return "";
	}
}
Primefaces 메뉴바 – 기본 정보
메뉴바는 수평 네비게이션 구성 요소입니다.
| Tag | Menubar |
|---|---|
| Component Class | org.primefaces.component.menubar.Menubar |
| Component Type | org.primefaces.component.Menubar |
| Component Family | org.primefaces.component |
| Renderer Type | org.primefaces.component.MenubarRenderer |
| Renderer Class | org.primefaces.component.menubar.MenubarRenderer |
Primefaces 메뉴바 – 속성
| Name | Default | Type | Description |
|---|---|---|---|
| id | null | String | Unique identifier of the component. |
| rendered | true | Boolean | Boolean value to specify the rendering of the component, when set to false component will not be rendered. |
| binding | null | Object | An el expression that maps to a server side UIComponent instance in a backing bean. |
| widgetVar | null | String | Name of the client side widget |
| model | null | MenuModel | MenuModel instance to create menus |
| programmatically | |||
| style | null | String | Inline style of menubar |
| styleClass | null | String | Style class of menubar |
| autoDisplay | false | Boolean | Defines whether the first level of submenus will be displayed on mouseover or not. When set to false, click event is required to display. |
프라임페이스 메뉴바 – 시작하기
메뉴 구성 요소와 유사하게, Menubar는 메뉴바를 구성하기 위해 p:submenu 및 p:menuitem을 자식으로 필요로 합니다. 
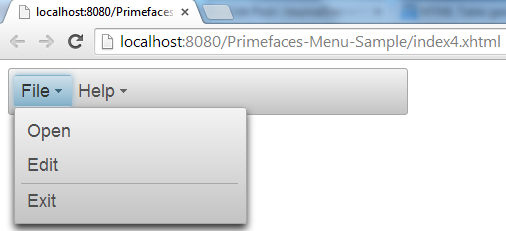

프라임페이스 메뉴바 – 중첩된 메뉴
Menubar는 중첩된 메뉴를 지원하며, 다른 부모 하위 메뉴 내에서 서브메뉴를 제공함으로써 가능합니다. index5.xhtml
<html xmlns="https://www.w3.org/1999/xhtml"
	xmlns:ui="https://java.sun.com/jsf/facelets"
	xmlns:h="https://java.sun.com/jsf/html"
	xmlns:f="https://java.sun.com/jsf/core"
	xmlns:p="https://primefaces.org/ui">
<h:head>
	<script name="jquery/jquery.js" library="primefaces"></script>
</h:head>
<h:form style="width:400px;">
	<p:menubar>
		<p:submenu label="File">
			<p:submenu label="Open">
				<p:menuitem value="Open Excel File"></p:menuitem>
				<p:menuitem value="Open Word File"></p:menuitem>
				<p:menuitem value="Open Power Point File"></p:menuitem>
			</p:submenu>
			<p:menuitem value="Edit"></p:menuitem>
			<p:separator/>
			<p:menuitem value="Exit"></p:menuitem>
		</p:submenu>
		<p:submenu label="Help">
			<p:menuitem value="About JournalDev"></p:menuitem>
			<p:menuitem value="Contact Us"></p:menuitem>
			<p:separator/>
			<p:menuitem value="Help"></p:menuitem>
		</p:submenu>
	</p:menubar>
</h:form>
</html>
프라임페이스 메뉴바 – 루트 메뉴아이템
Menubar도 루트 메뉴 항목을 지원했으며, 이는 p:menubar 내에서 직접 p:menuitem 하위 구성 요소를 제공함으로써 가능합니다. index6.xhtml
<html xmlns="https://www.w3.org/1999/xhtml"
	xmlns:ui="https://java.sun.com/jsf/facelets"
	xmlns:h="https://java.sun.com/jsf/html"
	xmlns:f="https://java.sun.com/jsf/core"
	xmlns:p="https://primefaces.org/ui">
<h:head>
	<script name="jquery/jquery.js" library="primefaces"></script>
</h:head>
<h:form style="width:400px;">
	<p:menubar>
		<p:menuitem value="Open"></p:menuitem>
	</p:menubar>
</h:form>
</html>
Primefaces 메뉴바 – Ajax 및 비 Ajax 동작
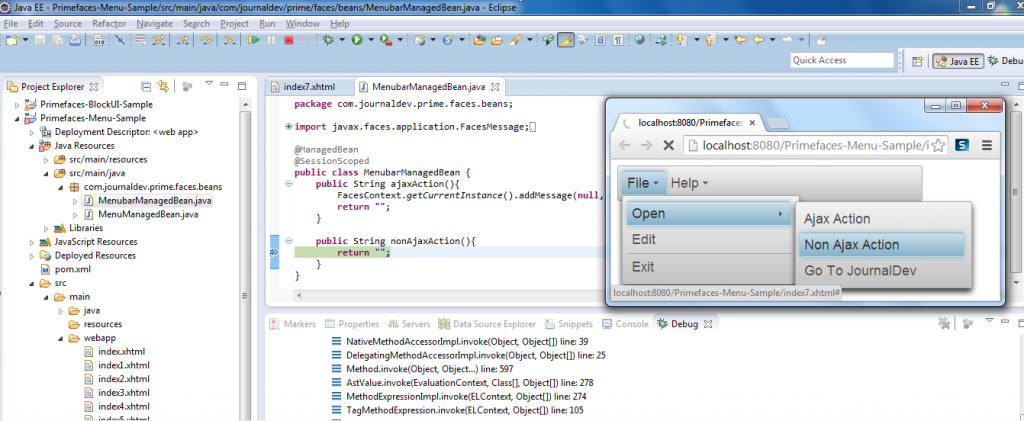
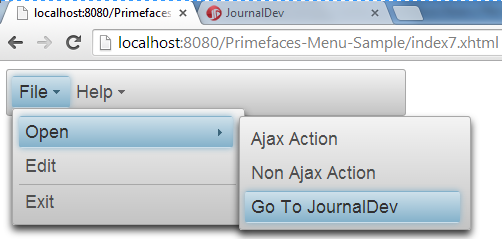
마찬가지로 p:commandButton 구성 요소처럼 p:menuitem도 동작을 Ajax화하는 것을 지원합니다. 이미 p:menu 섹션에서 이를 경험했을 것입니다. p:menuitem을 사용하여 동작을 수행할 수 있으며, Ajax 및 비 Ajax 동작, 그리고 네비게이션에도 사용할 수 있습니다. 다음 샘플에서는 p:menuitem의 다른 사용법을 보여줍니다. index7.xhtml
<html xmlns="https://www.w3.org/1999/xhtml"
	xmlns:ui="https://java.sun.com/jsf/facelets"
	xmlns:h="https://java.sun.com/jsf/html"
	xmlns:f="https://java.sun.com/jsf/core"
	xmlns:p="https://primefaces.org/ui">
<h:head>
	<script name="jquery/jquery.js" library="primefaces"></script>
</h:head>
<h:form style="width:400px;">
<p:growl id="message"></p:growl>
	<p:menubar>
		<p:submenu label="File">
			<p:submenu label="Open">
				<p:menuitem value="Ajax Action" action="#{menubarManagedBean.ajaxAction}" update="message"></p:menuitem>
				<p:menuitem value="Non Ajax Action" action="#{menubarManagedBean.nonAjaxAction}" ajax="false"></p:menuitem>
				<p:menuitem value="Go To JournalDev" url="https://www.journaldev.com"></p:menuitem>
			</p:submenu>
			<p:menuitem value="Edit"></p:menuitem>
			<p:separator/>
			<p:menuitem value="Exit"></p:menuitem>
		</p:submenu>
		<p:submenu label="Help">
			<p:menuitem value="About JournalDev"></p:menuitem>
			<p:menuitem value="Contact Us"></p:menuitem>
			<p:separator/>
			<p:menuitem value="Help"></p:menuitem>
		</p:submenu>
	</p:menubar>
</h:form>
</html>
MenubarManagedBean.java
package com.journaldev.prime.faces.beans;

import javax.faces.application.FacesMessage;
import javax.faces.bean.ManagedBean;
import javax.faces.bean.SessionScoped;
import javax.faces.context.FacesContext;

@ManagedBean
@SessionScoped
public class MenubarManagedBean {
	public String ajaxAction(){
		FacesContext.getCurrentInstance().addMessage(null, new FacesMessage("Ajax Update"));
		return "";
	}

	public String nonAjaxAction(){
		return "";
	}
}
Primefaces 메뉴바 – 동적 메뉴
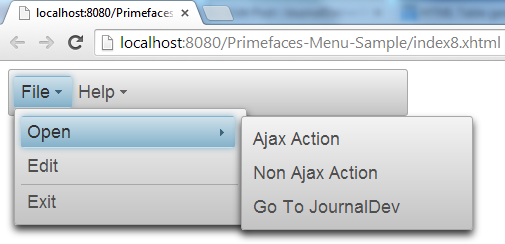
메뉴바는 동적으로 생성되며, 프로그래밍 방식으로 메뉴바를 만들고 Ajax, 비-Ajax 및 URL 동작을 제공할 수 있습니다. Ajax 및 비-Ajax 동작 섹션에서 수행한 것과 마찬가지로입니다. index8.xhtml
<html xmlns="https://www.w3.org/1999/xhtml"
	xmlns:ui="https://java.sun.com/jsf/facelets"
	xmlns:h="https://java.sun.com/jsf/html"
	xmlns:f="https://java.sun.com/jsf/core"
	xmlns:p="https://primefaces.org/ui">
<h:head>
	<script name="jquery/jquery.js" library="primefaces"></script>
</h:head>
<h:form style="width:400px;">
<p:growl id="message"></p:growl>
	<p:menubar model="#{menubarManagedBean.menubar}">
	</p:menubar>
</h:form>
</html>
MenubarManagedBean.java
package com.journaldev.prime.faces.beans;

import javax.faces.application.FacesMessage;
import javax.faces.bean.ManagedBean;
import javax.faces.bean.SessionScoped;
import javax.faces.context.FacesContext;

import org.primefaces.model.menu.DefaultMenuItem;
import org.primefaces.model.menu.DefaultMenuModel;
import org.primefaces.model.menu.DefaultSeparator;
import org.primefaces.model.menu.DefaultSubMenu;
import org.primefaces.model.menu.MenuModel;

@ManagedBean
@SessionScoped
public class MenubarManagedBean {

	private MenuModel menubar = new DefaultMenuModel();

	public MenubarManagedBean(){
		// 필요한 하위 메뉴 생성
		DefaultSubMenu file = new DefaultSubMenu("File");
		DefaultSubMenu open = new DefaultSubMenu("Open");
		DefaultSubMenu help = new DefaultSubMenu("Help");

		// 필요한 메뉴 항목 생성
		DefaultMenuItem edit = new DefaultMenuItem("Edit");
		DefaultMenuItem exit = new DefaultMenuItem("Exit");

		// 필요한 메뉴 항목 생성
		DefaultMenuItem ajaxAction = new DefaultMenuItem("Ajax Action");
		ajaxAction.setUpdate("message");
		ajaxAction.setCommand("#{menubarManagedBean.ajaxAction}");

		DefaultMenuItem nonAjaxAction = new DefaultMenuItem("Non Ajax Action");
		nonAjaxAction.setAjax(false);
		nonAjaxAction.setCommand("#{menubarManagedBean.nonAjaxAction}");

		DefaultMenuItem urlAction = new DefaultMenuItem("Go To JournalDev");
		urlAction.setUrl("https://www.journaldev.com");

		DefaultMenuItem about = new DefaultMenuItem("About JournalDev");
		DefaultMenuItem contactUs = new DefaultMenuItem("Contact Us");
		DefaultMenuItem helpMenuItem = new DefaultMenuItem("Help");

		// 오픈 서브메뉴에 메뉴 항목 연결
		open.addElement(ajaxAction);
		open.addElement(nonAjaxAction);
		open.addElement(urlAction);

		// 도움말 서브메뉴에 메뉴 항목 연결
		help.addElement(about);
		help.addElement(contactUs);
		help.addElement(new DefaultSeparator());
		help.addElement(helpMenuItem);

		// 열린 서브메뉴를 파일 서브메뉴에 연결
		file.addElement(open);
		file.addElement(edit);
		file.addElement(new DefaultSeparator());
		file.addElement(exit);

		// 서브메뉴를 메뉴바에 연결
		this.menubar.addElement(file);
		this.menubar.addElement(help);

	}

	public MenuModel getMenubar() {
		return menubar;
	}

	public void setMenubar(MenuModel menubar) {
		this.menubar = menubar;
	}

	public String ajaxAction(){
		FacesContext.getCurrentInstance().addMessage(null, new FacesMessage("Ajax Update"));
		return "";
	}

	public String nonAjaxAction(){
		return "";
	}
}
Primefaces 메뉴 버튼 – 기본 정보
메뉴 버튼은 팝업 메뉴에 다른 명령을 표시합니다.
| Tag | menuButton |
|---|---|
| Component Class | org.primefaces.component.menubutton.MenuButton |
| Component Type | org.primefaces.component.MenuButton |
| Component Family | org.primefaces.component |
| Renderer Type | org.primefaces.component.MenuButtonRenderer |
| Renderer Class | org.primefaces.component.menubutton.MenuButtonRenderer |
Primefaces 메뉴 버튼 – 속성
| Name | Default | Type | Description |
|---|---|---|---|
| id | null | String | Unique identifier of the component. |
| rendered | true | Boolean | Boolean value to specify the rendering of the component, when set to false component will not be rendered. |
| binding | null | Object | An el expression that maps to a server side UIComponent instance in a backing bean. |
| value | null | String | Label of the button |
| style | null | String | Style of the main container element |
| styleClass | null | String | Style class of the main container element |
| widgetVar | null | String | Name of the client side widget |
| model | null | MenuModel | MenuModel instance to create menus programmatically |
| disabled | false | Boolean | Disables or enables the button. |
| iconPos | left | String | Position of the icon, valid values are left and right. |
| appendTo | null | String | Appends the overlay to the element defined by search expression. Defaults to document body. |
Primefaces MenuButton – 시작하기
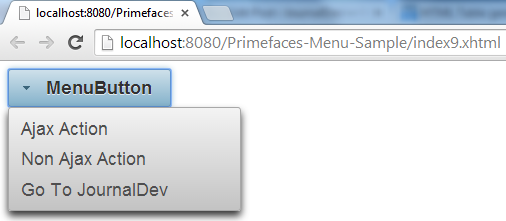
MenuButton은 하나 이상의 메뉴 항목으로 구성됩니다. 정의된 메뉴 항목들은 이미 사용된 것과 동일한 유사성을 가집니다. 여기에는 Ajax, 비-Ajax 및 탐색 동작도 지원됩니다. index9.xhtml
<html xmlns="https://www.w3.org/1999/xhtml"
	xmlns:ui="https://java.sun.com/jsf/facelets"
	xmlns:h="https://java.sun.com/jsf/html"
	xmlns:f="https://java.sun.com/jsf/core"
	xmlns:p="https://primefaces.org/ui">
<h:head>
	<script name="jquery/jquery.js" library="primefaces"></script>
</h:head>
<h:form style="width:400px;">
	<p:growl id="message"></p:growl>
	<p:menuButton value="MenuButton">
		<p:menuitem value="Ajax Action" action="#{menuButtonManagedBean.ajaxAction}" update="message"></p:menuitem>
		<p:menuitem value="Non Ajax Action" action="#{menuButtonManagedBean.nonAjaxAction}" ajax="false"></p:menuitem>
		<p:menuitem value="Go To JournalDev" url="https://www.journaldev.com"></p:menuitem>
	</p:menuButton>
</h:form>
</html>
MenuButtonManagedBean.java
package com.journaldev.prime.faces.beans;

import javax.faces.application.FacesMessage;
import javax.faces.bean.ManagedBean;
import javax.faces.bean.SessionScoped;
import javax.faces.context.FacesContext;

import org.primefaces.model.menu.DefaultMenuItem;
import org.primefaces.model.menu.DefaultMenuModel;
import org.primefaces.model.menu.DefaultSeparator;
import org.primefaces.model.menu.DefaultSubMenu;
import org.primefaces.model.menu.MenuModel;

@ManagedBean(name="menuButtonManagedBean")
@SessionScoped
public class MenuButtonManagedBean {
	private MenuModel menuButton = new DefaultMenuModel();

	public MenuButtonManagedBean(){

	}

	public MenuModel getMenuButton() {
		return menuButton;
	}

	public void setMenuButton(MenuModel menuButton) {
		this.menuButton = menuButton;
	}

	public String ajaxAction(){
		FacesContext.getCurrentInstance().addMessage(null, new FacesMessage("Ajax Update"));
		return "";
	}

	public String nonAjaxAction(){
		return "";
	}
}
Primefaces MenuButton – 동적 메뉴
MenuButton은 프로그래밍 방식으로도 생성할 수 있습니다. 이전 섹션에서 제공된 MenuButton의 동일한 예제는 프로그래밍 방법론을 사용하여 실제로 아래와 같이 구현되었습니다. index10.xhtml
<html xmlns="https://www.w3.org/1999/xhtml"
	xmlns:ui="https://java.sun.com/jsf/facelets"
	xmlns:h="https://java.sun.com/jsf/html"
	xmlns:f="https://java.sun.com/jsf/core"
	xmlns:p="https://primefaces.org/ui">
<h:head>
	<script name="jquery/jquery.js" library="primefaces"></script>
</h:head>
<h:form style="width:400px;">
	<p:growl id="message"></p:growl>
	<p:menuButton value="MenuButton" model="#{menuButtonManagedBean.menuButton}">
	</p:menuButton>
</h:form>
</html>
MenuButtonManagedBean.java
package com.journaldev.prime.faces.beans;

import javax.faces.application.FacesMessage;
import javax.faces.bean.ManagedBean;
import javax.faces.bean.SessionScoped;
import javax.faces.context.FacesContext;

import org.primefaces.model.menu.DefaultMenuItem;
import org.primefaces.model.menu.DefaultMenuModel;
import org.primefaces.model.menu.MenuModel;

@ManagedBean(name="menuButtonManagedBean")
@SessionScoped
public class MenuButtonManagedBean {
	private MenuModel menuButton = new DefaultMenuModel();

	public MenuButtonManagedBean(){

		// 필요한 메뉴 항목 생성
		DefaultMenuItem ajaxAction = new DefaultMenuItem("Ajax Action");
		ajaxAction.setUpdate("message");
		ajaxAction.setCommand("#{menubarManagedBean.ajaxAction}");

		DefaultMenuItem nonAjaxAction = new DefaultMenuItem("Non Ajax Action");
		nonAjaxAction.setAjax(false);
		nonAjaxAction.setCommand("#{menubarManagedBean.nonAjaxAction}");

		DefaultMenuItem urlAction = new DefaultMenuItem("Go To JournalDev");
		urlAction.setUrl("https://www.journaldev.com");

		this.menuButton.addElement(ajaxAction);
		this.menuButton.addElement(nonAjaxAction);
		this.menuButton.addElement(urlAction);

	}

	public MenuModel getMenuButton() {
		return menuButton;
	}

	public void setMenuButton(MenuModel menuButton) {
		this.menuButton = menuButton;
	}

	public String ajaxAction(){
		FacesContext.getCurrentInstance().addMessage(null, new FacesMessage("Ajax Update"));
		return "";
	}

	public String nonAjaxAction(){
		return "";
	}
}
Primefaces TieredMenu – 기본 정보
TieredMenu는 중첩된 하위 메뉴를 오버레이로 표시하는 데 사용됩니다.
| Tag | TieredMenu |
|---|---|
| Component Class | org.primefaces.component.tieredmenu.TieredMenu |
| Component Type | org.primefaces.component.TieredMenu |
| Component Family | org.primefaces.component |
| Renderer Type | org.primefaces.component.TieredMenuRenderer |
| Renderer Class | org.primefaces.component.tieredmenu.TieredMenuRenderer |
Primefaces TieredMenu – 속성
| Name | Default | Type | Description |
|---|---|---|---|
| id | null | String | Unique identifier of the component |
| rendered | true | Boolean | Boolean value to specify the rendering of the component, when set to false component will not be rendered. |
| binding | null | Object | An el expression that maps to a server side UIComponent instance in a backing bean |
| widgetVar | null | String | Name of the client side widget. |
| model | null | MenuModel | MenuModel instance for programmatic menu. |
| style | null | String | Inline style of the component. |
| styleClass | null | String | Style class of the component. |
| autoDisplay | true | Boolean | Defines whether the first level of submenus will be displayed on mouseover or not. When set to false, click event is required to display. |
| trigger | null | String | Id of the component whose triggerEvent will show the dynamic positioned menu. |
| my | null | String | Corner of menu to align with trigger element. |
| at | null | String | Corner of trigger to align with menu element. |
| overlay | false | Boolean | Defines positioning, when enabled menu is displayed with absolute position relative to the trigger. Default is false, meaning static positioning. |
| triggerEvent | click | String | Event name of trigger that will show the dynamic positioned menu. |
Primefaces TieredMenu – 시작하기
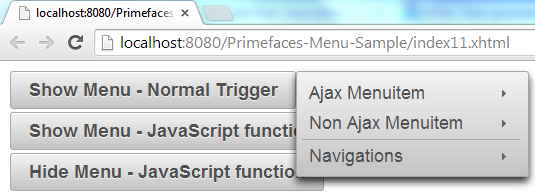
TieredMenu는 하위 메뉴와 메뉴 항목으로 구성되며, 하위 메뉴는 중첩될 수 있으며 각 중첩된 하위 메뉴는 오버레이로 표시됩니다. p:tieredMenu 구성 요소 내에서 참여하는 메뉴 항목은 모두 이전에 사용된 것과 같이 Ajax, 비-Ajax 및 탐색 작업을 위한 대상입니다. 다음 예제는 p:tieredMenu에 대한 가장 간단한 적용 예를 보여줍니다. 혼합된 작업 집합을 포함하는 index11.xhtml
<html xmlns="https://www.w3.org/1999/xhtml"
	xmlns:ui="https://java.sun.com/jsf/facelets"
	xmlns:h="https://java.sun.com/jsf/html"
	xmlns:f="https://java.sun.com/jsf/core"
	xmlns:p="https://primefaces.org/ui">
<h:head>
	<script name="jquery/jquery.js" library="primefaces"></script>
</h:head>
<h:form style="width:400px;">
	<p:growl id="message"></p:growl>
	<p:tieredMenu>
		<p:submenu label="Ajax Menuitem">
			<p:menuitem value="Ajax Action" action="#{tieredMenuManagedBean.ajaxAction}" update="message"></p:menuitem>
		</p:submenu>
		<p:submenu label="Non Ajax Menuitem">
			<p:menuitem value="Non Ajax Action" action="#{tieredMenuManagedBean.nonAjaxAction}"></p:menuitem>
		</p:submenu>
		<p:separator/>
		<p:submenu label="Navigations">
			<p:submenu label="Primefaces links">
				<p:menuitem value="Prime" url="https://www.prime.com.tr"></p:menuitem>
				<p:menuitem value="Primefaces" url="https://www.primefaces.org"></p:menuitem>
			</p:submenu>
			<p:submenu label="Prime Blogs">
				<p:menuitem value="JournalDev" url="https://www.journaldev.com"></p:menuitem>
			</p:submenu>
		</p:submenu>
	</p:tieredMenu>
</h:form>
</html>
TieredMenuManagedBean.java
package com.journaldev.prime.faces.beans;

import javax.faces.application.FacesMessage;
import javax.faces.bean.ManagedBean;
import javax.faces.bean.SessionScoped;
import javax.faces.context.FacesContext;

@ManagedBean
@SessionScoped
public class TieredMenuManagedBean {
	public String ajaxAction(){
		FacesContext.getCurrentInstance().addMessage(null, new FacesMessage("Ajax Update"));
		return "";
	}

	public String nonAjaxAction(){
		return "";
	}
}
Primefaces TieredMenu – AutoDisplay
기본적으로 하위 메뉴가 표시되는 루트 메뉴 항목 위로 마우스를 가져갈 때 설정된 autoDisplay가 false로 설정되어 있다면 자동 표시 모드를 활성화하려면 루트 메뉴 항목을 클릭해야 합니다. 같은 예제가 autoDisplay를 false로 설정하기 위해 p:tieredMenu 구성 요소에 대해 사용됩니다. 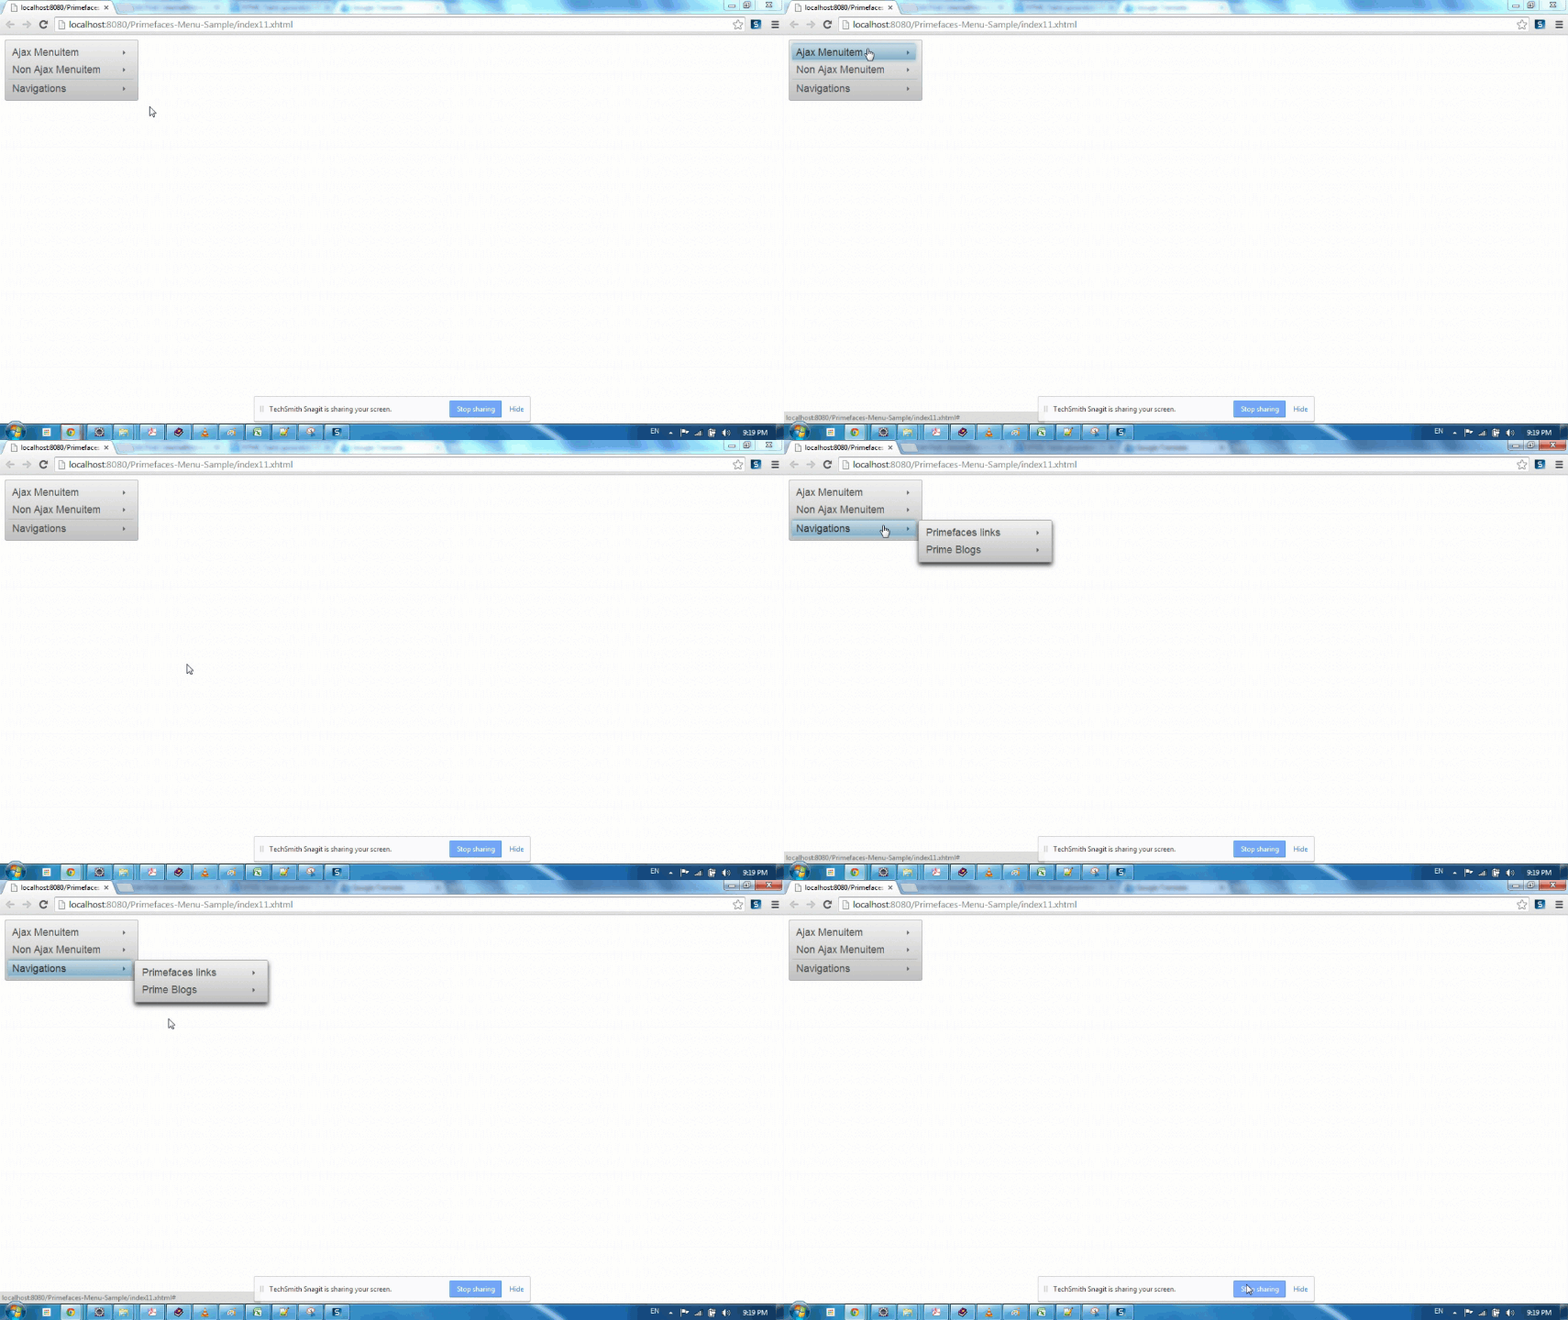
Primefaces TieredMenu – Overlay
마찬가지로 메뉴 구성 요소와 같이 TieredMenu도 메뉴 구성 요소를 오버레이하는 방식으로 오버레이할 수 있습니다(메뉴 오버레이 참조). index11.xhtml
<html xmlns="https://www.w3.org/1999/xhtml"
	xmlns:ui="https://java.sun.com/jsf/facelets"
	xmlns:h="https://java.sun.com/jsf/html"
	xmlns:f="https://java.sun.com/jsf/core"
	xmlns:p="https://primefaces.org/ui">
<h:head>
	<script name="jquery/jquery.js" library="primefaces"></script>
</h:head>
<h:form style="width:400px;">
	<p:growl id="message"></p:growl>
	<p:tieredMenu autoDisplay="false" trigger="triggerBtn" overlay="true" my="left top" at="right top">
		<p:submenu label="Ajax Menuitem">
			<p:menuitem value="Ajax Action" action="#{tieredMenuManagedBean.ajaxAction}" update="message"></p:menuitem>
		</p:submenu>
		<p:submenu label="Non Ajax Menuitem">
			<p:menuitem value="Non Ajax Action" action="#{tieredMenuManagedBean.nonAjaxAction}"></p:menuitem>
		</p:submenu>
		<p:separator/>
		<p:submenu label="Navigations">
			<p:submenu label="Primefaces links">
				<p:menuitem value="Prime" url="https://www.prime.com.tr"></p:menuitem>
				<p:menuitem value="Primefaces" url="https://www.primefaces.org"></p:menuitem>
			</p:submenu>
			<p:submenu label="Prime Blogs">
				<p:menuitem value="JournalDev" url="https://www.journaldev.com"></p:menuitem>
			</p:submenu>
		</p:submenu>
	</p:tieredMenu>
	<p:commandButton value="Show Menu" id="triggerBtn"></p:commandButton>
</h:form>
</html>
Primefaces TieredMenu – Client Side API
또한 Primefaces의 클라이언트 측 API를 사용하여 TieredMenu 구성 요소를 제어할 수 있습니다.
| Method | Params | Return Type | Description |
|---|---|---|---|
| show() | – | void | Shows overlay menu. |
| hide() | – | void | Hides overlay menu. |
| align() | – | void | Aligns overlay menu with trigger. |
index11.xhtml
<html xmlns="https://www.w3.org/1999/xhtml"
	xmlns:ui="https://java.sun.com/jsf/facelets"
	xmlns:h="https://java.sun.com/jsf/html"
	xmlns:f="https://java.sun.com/jsf/core"
	xmlns:p="https://primefaces.org/ui">
<h:head>
	<script name="jquery/jquery.js" library="primefaces"></script>
	<script>
		function showMenu(){
			PF('tieredMenu').show();
		}
		function hideMenu(){
			PF('tieredMenu').hide();
		}
	</script>
</h:head>
<h:form style="width:400px;">
	<p:growl id="message"></p:growl>
	<p:tieredMenu autoDisplay="false" trigger="triggerBtn" overlay="true" my="left top" at="right top" widgetVar="tieredMenu">
		<p:submenu label="Ajax Menuitem">
			<p:menuitem value="Ajax Action" action="#{tieredMenuManagedBean.ajaxAction}" update="message"></p:menuitem>
		</p:submenu>
		<p:submenu label="Non Ajax Menuitem">
			<p:menuitem value="Non Ajax Action" action="#{tieredMenuManagedBean.nonAjaxAction}"></p:menuitem>
		</p:submenu>
		<p:separator/>
		<p:submenu label="Navigations">
			<p:submenu label="Primefaces links">
				<p:menuitem value="Prime" url="https://www.prime.com.tr"></p:menuitem>
				<p:menuitem value="Primefaces" url="https://www.primefaces.org"></p:menuitem>
			</p:submenu>
			<p:submenu label="Prime Blogs">
				<p:menuitem value="JournalDev" url="https://www.journaldev.com"></p:menuitem>
			</p:submenu>
		</p:submenu>
	</p:tieredMenu>
	<p:commandButton value="Show Menu - Normal Trigger" id="triggerBtn"></p:commandButton>
	<p:commandButton value="Show Menu - JavaScript function" onclick="showMenu()"></p:commandButton>
	<p:commandButton value="Hide Menu - JavaScript function" onclick="hideMenu()"></p:commandButton>
</h:form>
</html>
Primefaces SlideMenu – 기본 정보
SlideMenu는 슬라이딩 애니메이션으로 중첩된 하위 메뉴를 표시하는 데 사용됩니다.
| Tag | slideMenu |
|---|---|
| Component Class | org.primefaces.component.slidemenu.SlideMenu |
| Component Type | org.primefaces.component.SlideMenu |
| Component Family | org.primefaces.component |
| Renderer Type | org.primefaces.component.SlideMenuRenderer |
| Renderer Class | org.primefaces.component.slidemenu.SlideMenuRenderer |
Primefaces Slide Menu – 속성
| Name | Default | Type | Description |
|---|---|---|---|
| id | null | String | Unique identifier of the component |
| rendered | true | Boolean | Boolean value to specify the rendering of the component, when set to false component will not be rendered. |
| binding | null | Object | An el expression that maps to a server side UIComponent instance in a backing bean |
| widgetVar | null | String | Name of the client side widget. |
| model | null | MenuModel | MenuModel instance for programmatic menu. |
| style | null | String | Inline style of the component. |
| styleClass | null | String | Style class of the component. |
| backLabel | Back | String | Text for back link. |
| trigger | null | String | Id of the component whose triggerEvent will show the dynamic positioned menu. |
| my | null | String | Corner of menu to align with trigger element. |
| at | null | String | Corner of trigger to align with menu element. |
| overlay | false | Boolean | Defines positioning, when enabled menu is displayed with absolute position relative to the trigger. Default is false, meaning static positioning. |
| triggerEvent | click | String | Event name of trigger that will show the dynamic positioned menu. |
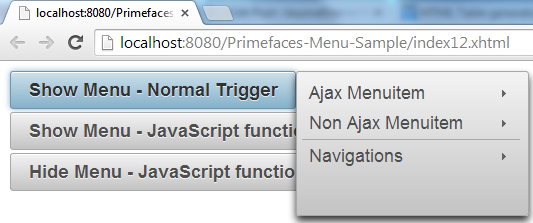
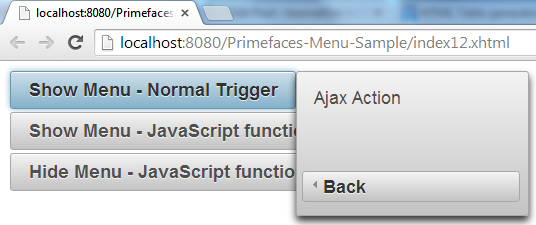
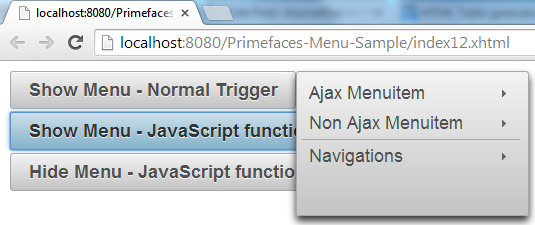
Primefaces Slide Menu – 시작하기 – 오버레이 및 클라이언트 측 API
SlideMenu는 하위 메뉴와 메뉴 항목으로 구성되며, 하위 메뉴는 중첩될 수 있으며 각 중첩된 하위 메뉴는 슬라이드 애니메이션으로 표시됩니다. SlideMenu의 기능은 이전 섹션에서 설명된 TieredMenu에서 정의된 것과 유사합니다. index12.xhtml
<html xmlns="https://www.w3.org/1999/xhtml"
	xmlns:ui="https://java.sun.com/jsf/facelets"
	xmlns:h="https://java.sun.com/jsf/html"
	xmlns:f="https://java.sun.com/jsf/core"
	xmlns:p="https://primefaces.org/ui">
<h:head>
	<script name="jquery/jquery.js" library="primefaces"></script>
	<script>
		function showMenu(){
			PF('tieredMenu').show();
		}
		function hideMenu(){
			PF('tieredMenu').hide();
		}
	</script>
</h:head>
<h:form style="width:400px;">
	<p:growl id="message"></p:growl>
	<p:slideMenu autoDisplay="false" trigger="triggerBtn" overlay="true" my="left top" at="right top" widgetVar="tieredMenu">
		<p:submenu label="Ajax Menuitem">
			<p:menuitem value="Ajax Action" action="#{slideMenuManagedBean.ajaxAction}" update="message"></p:menuitem>
		</p:submenu>
		<p:submenu label="Non Ajax Menuitem">
			<p:menuitem value="Non Ajax Action" action="#{slideMenuManagedBean.nonAjaxAction}"></p:menuitem>
		</p:submenu>
		<p:separator/>
		<p:submenu label="Navigations">
			<p:submenu label="Primefaces links">
				<p:menuitem value="Prime" url="https://www.prime.com.tr"></p:menuitem>
				<p:menuitem value="Primefaces" url="https://www.primefaces.org"></p:menuitem>
			</p:submenu>
			<p:submenu label="Prime Blogs">
				<p:menuitem value="JournalDev" url="https://www.journaldev.com"></p:menuitem>
			</p:submenu>
		</p:submenu>
	</p:slideMenu>
	<p:commandButton value="Show Menu - Normal Trigger" id="triggerBtn"></p:commandButton>
	<p:commandButton value="Show Menu - JavaScript function" onclick="showMenu()"></p:commandButton>
	<p:commandButton value="Hide Menu - JavaScript function" onclick="hideMenu()"></p:commandButton>
</h:form>
</html>
SlideMenuManagedBean.java
package com.journaldev.prime.faces.beans;

import javax.faces.application.FacesMessage;
import javax.faces.bean.ManagedBean;
import javax.faces.bean.SessionScoped;
import javax.faces.context.FacesContext;

@ManagedBean
@SessionScoped
public class SlideMenuManagedBean {
	public String ajaxAction(){
		FacesContext.getCurrentInstance().addMessage(null, new FacesMessage("Ajax Update"));
		return "";
	}

	public String nonAjaxAction(){
		return "";
	}
}
요약
Primefaces는 개발자가 선택할 수 있는 다양한 Primefaces UI 메뉴 구성 요소를 제공합니다. 이 자습서는 이러한 메뉴 유형 중 일부를 명확하게 설명하기 위한 것입니다. 아래에 의견을 남겨 주시고이 자습서의 소스 코드를 찾아서 기여해 주십시오.


