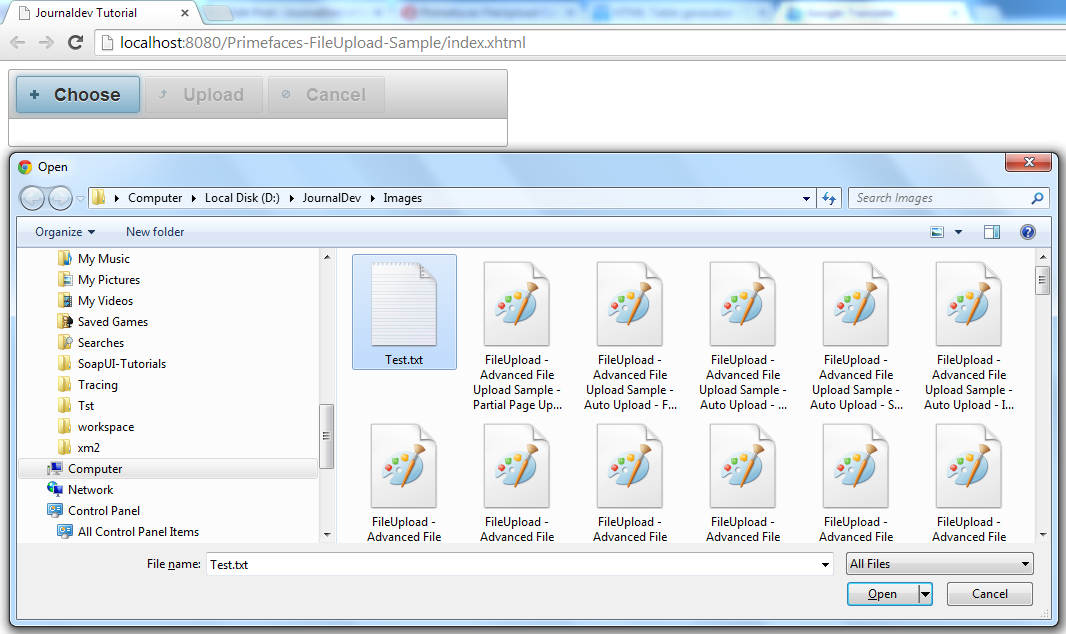
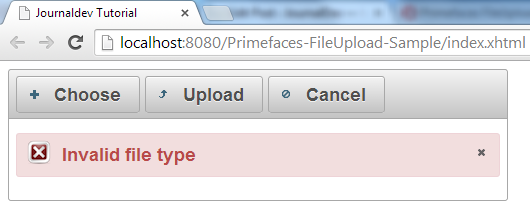
오늘은 Primefaces FileUpload 구성 요소를 살펴볼 것입니다. HTML은 파일을 선택하는 파일 입력 태그를 제공하지만, 파일을 서버에 업로드하려면 훨씬 더 많은 작업이 필요합니다. Primefaces는 그 부담을 제거하고 서버에 파일을 업로드하는 데 도움이 되는 준비가 된 FileUpload 구성 요소를 제공합니다. 이는 아름다운 UI를 생성하고 백엔드에서 파일을 업로드하는 데 도움이 됩니다.
Primefaces FileUpload
이 튜토리얼에서는 응용 프로그램에서 사용할 수 있는 Primefaces FileUpload 구성 요소의 기능을 살펴보겠습니다. 이 튜토리얼은 Primeface의 기본 지식이 있다고 가정합니다. 그렇지 않은 경우 Primefaces 예제를 참고하십시오.
Primefaces FileUpload 기본 정보
| Tag | fileUpload |
|---|---|
| Component Class | org.primefaces.component.fileupload.FileUpload |
| Component Type | org.primefaces.component.FileUpload |
| Component Family | org.primefaces.component |
| Renderer Type | org.primefaces.component.FileUploadRenderer |
| Renderer Class | org.primefaces.component.fileupload.FileUploadRenderer |
Primefaces FileUpload 속성
| Name | Default | Type | Description |
|---|---|---|---|
| id | null | String | Unique identifier of the component. |
| rendered | true | boolean | Boolean value to specify the rendering of the component, when set to false component will not be rendered |
| binding | null | Object | An el expression that maps to a server side UIComponent instance in a backing bean |
| value | null | Object | Value of the component than can be either an EL expression of a literal text |
| converter | null | Converter/String | An el expression or a literal text that defines a converter for the component. When it’s an EL expression, it’s resolved to a converter instance. In case it’s a static text, it must refer to a converter id. |
| immediate | false | Boolean | When set true, process validations logic is executed at apply request values phase for this component |
| required | false | Boolean | Marks component as required. |
| validator | null | MethodExpr | A method expression that refers to a method validating the input |
| valueChangeListener | null | MethodExpr | A method expression that refers to a method for handling a valueChangeEvent |
| requiredMessage | null | String | Message to be displayed when required field validation fails |
| converterMessage | null | String | Message to be displayed when conversion fails. |
| validatorMessage | null | String | Message to be displayed when validation fails. |
| widgetVar | null | String | Name of the client side widget. |
| update | null | String | Component(s) to update after fileupload completes. |
| process | null | String | Component(s) to process in fileupload request. |
| fileUploadListener | null | MethodExpr | Method to invoke when a file is uploaded. |
| multiple | false | Boolean | Allows choosing of multi file uploads from native |
| auto | false | Boolean | When set to true, selecting a file starts the upload process implicitly |
| label | Choose | String | Label of the browse button. |
| allowTypes | null | String | Regular expression for accepted file types, |
| sizeLimit | null | Integer | Individual file size limit in bytes. |
| fileLimit | null | Integer | Maximum number of files allowed to upload. |
| style | null | String | Inline style of the component. |
| styleClass | null | String | Style class of the component. |
| mode | advanced | String | Mode of the fileupload, can be simple or advanced. |
| uploadLabel | Upload | String | Label of the upload button. |
| cancelLabel | Cancel | String | Label of the cancel button. |
| invalidSizeMessage | null | String | Message to display when size limit exceeds. |
| invalidFileMessage | null | String | Message to display when file is not accepted. |
| fileLimitMessage | null | String | Message to display when file limit exceeds. |
| dragDropSupport | true | Boolean | Specifies dragdrop based file selection from filesystem, default is true and works only on supported browsers |
| onstart | null | String | Client side callback to execute when upload begins. |
| onerror | null | String | Callback to execute if fileupload request fails. |
| oncomplete | null | String | Client side callback to execute when upload ends. |
| disabled | false | Boolean | Disables component when set true. |
| messageTemplate | {name} {size} | String | Message template to use when displaying file validation errors |
| previewWidth | 80 | Integer | Width for image previews in pixels. |
Primefaces 파일 업로드 예제
FileUpload를 사용하려면 아래 값 중 하나를 사용하여 primefaces.UPLOADER 웹 배포 매개변수를 추가해야 합니다: web.xml
<context-param>
  <param-name>primefaces.UPLOADER</param-name>
  <param-value>auto|native|commons</param-value>
</context-param>
- auto: 이것은 기본 모드이며 Primefaces는 실행 환경을 확인하여 최상의 방법을 감지하려고 합니다. JSF 런타임이 적어도 2.2인 경우 네이티브 업로더가 선택되고, 그렇지 않으면 commons가 선택됩니다.
- native: 네이티브 모드는 서블릿 3.x Part API를 사용하여 파일을 업로드하며, JSF 런타임이 2.2 미만인 경우 예외가 발생합니다.
- commons: 이 옵션은 commons fileUpload을 선택합니다. 배치 설명자에 다음 필터 구성이 필요합니다.
web.xml
<filter>
 <filter-name>PrimeFaces FileUpload Filter</filter-name>
 <filter-class>
  org.primefaces.webapp.filter.FileUploadFilter
 </filter-class>
</filter>
<filter-mapping>
 <filter-name>PrimeFaces FileUpload Filter</filter-name>
 <servlet-name>Faces Servlet</servlet-name>
</filter-mapping>
서블릿 이름은 이 경우 Faces Servlet로 구성된 JSF 서블릿의 구성된 이름과 일치해야 합니다. 또는 URL 패턴을 기반으로 구성할 수도 있습니다.
Primefaces 간단한 파일 업로드
간단한 파일 업로드 모드는 레거시 브라우저에서 작동하며, 값이 UploadedFile 인스턴스여야 하는 파일 입력을 사용합니다. Ajax 업로드는 간단한 업로드에서 지원되지 않습니다. 간단한 파일 업로드 예제를 만들기 위해 필요한 파일은 아래에 나와 있습니다. index.xhtml
<html xmlns="https://www.w3.org/1999/xhtml"
	xmlns:ui="https://java.sun.com/jsf/facelets"
	xmlns:h="https://java.sun.com/jsf/html"
	xmlns:f="https://java.sun.com/jsf/core"
	xmlns:p="https://primefaces.org/ui">
	<h:head>
		<title>Journaldev Tutorial</title>
	</h:head>
	<h:body>
		<h:form enctype="multipart/form-data">
				<p:fileUpload value="#{fileUploadManagedBean.file}"  mode="simple"></p:fileUpload>
				<p:separator/>
				<h:commandButton value="Dummy Action" action="#{fileUploadManagedBean.dummyAction}"></h:commandButton>
		</h:form>
	</h:body>
</html>
package com.journaldev.prime.faces.beans;

import javax.faces.bean.ManagedBean;
import javax.faces.bean.SessionScoped;

import org.primefaces.model.UploadedFile;

@ManagedBean
@SessionScoped
public class FileUploadManagedBean {
	UploadedFile file;

	public UploadedFile getFile() {
		return file;
	}

	public void setFile(UploadedFile file) {
		this.file = file;
	}

	public String dummyAction(){
		System.out.println("Uploaded File Name Is :: "+file.getFileName()+" :: Uploaded File Size :: "+file.getSize());
		return "";
	}
}
web.xml
<?xml version="1.0" encoding="UTF-8"?>
<web-app xmlns:xsi="https://www.w3.org/2001/XMLSchema-instance"
	xmlns="https://java.sun.com/xml/ns/javaee" xmlns:web="https://java.sun.com/xml/ns/javaee/web-app_2_5.xsd"
	xsi:schemaLocation="https://java.sun.com/xml/ns/javaee
	https://java.sun.com/xml/ns/javaee/web-app_2_5.xsd"
	id="WebApp_ID" version="2.5" metadata-complete="true">
	<servlet>
		<servlet-name>Faces Servlet</servlet-name>
		<servlet-class>javax.faces.webapp.FacesServlet</servlet-class>
		<load-on-startup>1</load-on-startup>
	</servlet>
	<servlet-mapping>
		<servlet-name>Faces Servlet</servlet-name>
		<url-pattern>/faces/*</url-pattern>
	</servlet-mapping>
	<servlet-mapping>
		<servlet-name>Faces Servlet</servlet-name>
		<url-pattern>*.xhtml</url-pattern>
	</servlet-mapping>
	<context-param>
		<description>State saving method: 'client' or 'server' (=default). See JSF Specification 2.5.2</description>
		<param-name>javax.faces.STATE_SAVING_METHOD</param-name>
		<param-value>client</param-value>
	</context-param>
	<context-param>
		<param-name>primefaces.UPLOADER</param-name>
		<param-value>auto</param-value>
	</context-param>
	<listener>
		<listener-class>com.sun.faces.config.ConfigureListener</listener-class>
	</listener>
</web-app>
pom.xml
<project xmlns="https://maven.apache.org/POM/4.0.0" xmlns:xsi="https://www.w3.org/2001/XMLSchema-instance"
  xsi:schemaLocation="https://maven.apache.org/POM/4.0.0 https://maven.apache.org/maven-v4_0_0.xsd">
  <modelVersion>4.0.0</modelVersion>
  <groupId>com.journaldev</groupId>
  <artifactId>Primefaces-FileUpload-Sample</artifactId>
  <packaging>war</packaging>
  <version>0.0.1-SNAPSHOT</version>
  <name>Primefaces-FileUpload-Sample Maven Webapp</name>
   <url>https://maven.apache.org</url>
	<repositories>
		<repository>
			<id>prime-repo</id>
			<name>PrimeFaces Maven Repository</name>
			<url>https://repository.primefaces.org</url>
			<layout>default</layout>
		</repository>
	</repositories>
	<dependencies>
		<!-- Servlet -->
		<dependency>
			<groupId>javax.servlet</groupId>
			<artifactId>servlet-api</artifactId>
			<version>2.5</version>
			<scope>provided</scope>
		</dependency>
		<!-- Faces Implementation -->
		<dependency>
			<groupId>com.sun.faces</groupId>
			<artifactId>jsf-impl</artifactId>
			<version>2.2.4</version>
		</dependency>
		<!-- Faces Library -->
		<dependency>
			<groupId>com.sun.faces</groupId>
			<artifactId>jsf-api</artifactId>
			<version>2.2.4</version>
		</dependency>
		<!-- Primefaces Version 5 -->
		<dependency>
			<groupId>org.primefaces</groupId>
			<artifactId>primefaces</artifactId>
			<version>5.0</version>
		</dependency>
		<!-- JSP Library -->
		<dependency>
			<groupId>javax.servlet.jsp</groupId>
			<artifactId>javax.servlet.jsp-api</artifactId>
			<version>2.3.1</version>
		</dependency>
		<!-- JSTL Library -->
		<dependency>
			<groupId>javax.servlet</groupId>
			<artifactId>jstl</artifactId>
			<version>1.1.2</version>
		</dependency>
	</dependencies>
</project>
요약하면:
- Primefaces FileUpload 엔진으로 사용되는 것은 자동입니다.
- fileUpload 구성 요소의 값 속성은 UploadedFile 인스턴스와 관련이 있습니다.
- fileUpload 사용에는 form 내에 fileUpload 구성 요소를 포함해야 하며, enctype은 multipart/form-data여야 합니다.
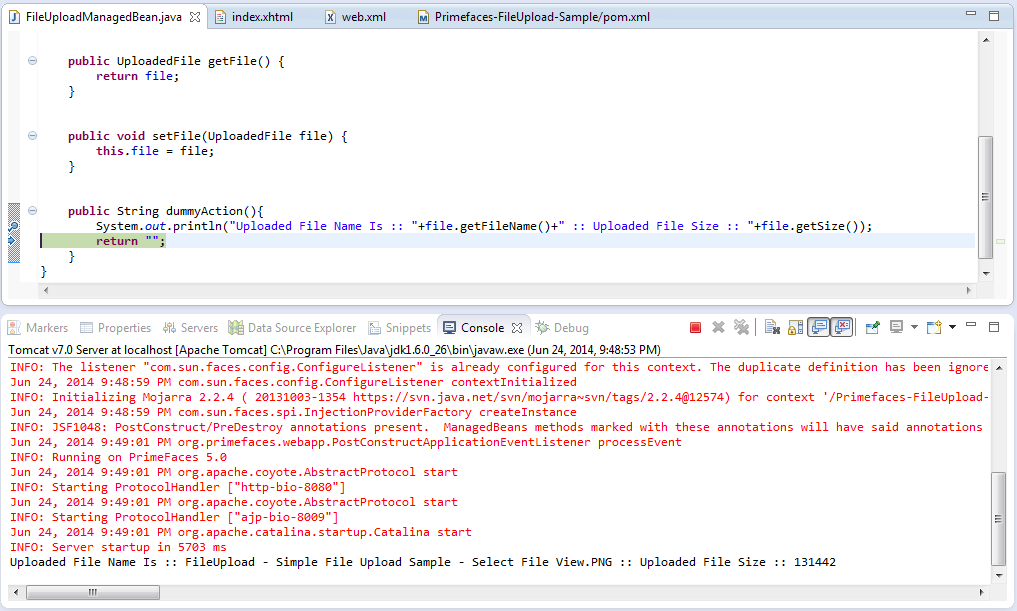
- 제공된 더미 액션은 업로드된 파일의 이름과 크기를 출력하기 위해 사용됩니다.
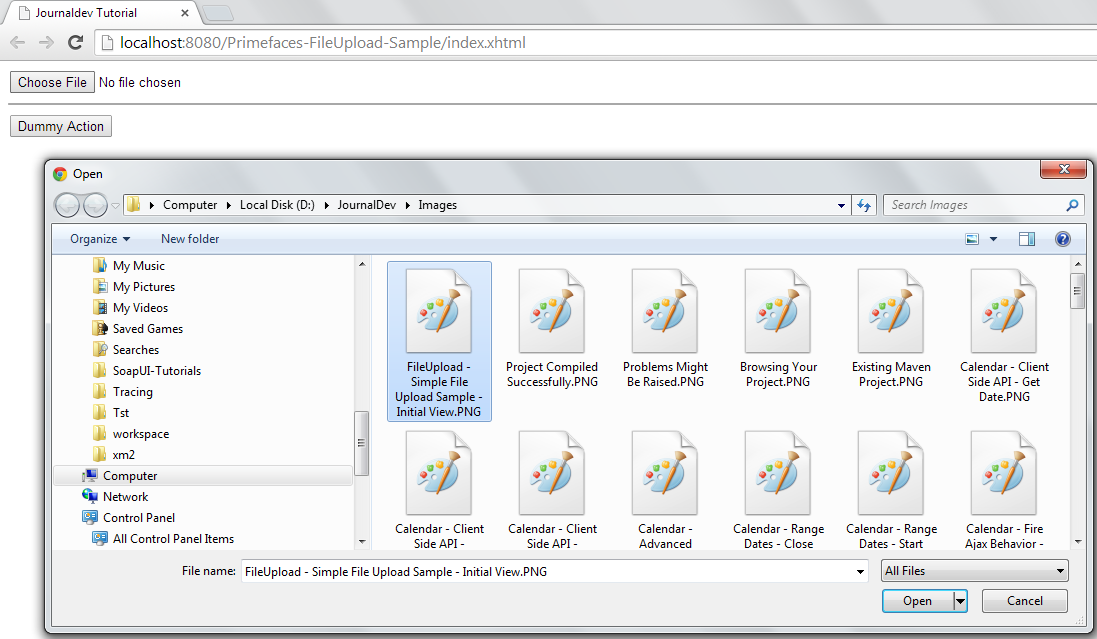
어디에서도 데모 결과가 나타날 것입니다: 간단한 입력 버튼이 브라우저에 렌더링되었습니다. 
 그리고 더미 작업을 클릭하면 더미 작업 방법이 실행되고 업로드된 파일의 정보가 아래와 같이 콘솔에 인쇄됩니다.
Primefaces 고급 파일 업로드
FileUpload 구성 요소는 간단한 보기와 고급 보기를 제공합니다. 고급 보기를 선택하면 업로드된 파일에 액세스할 수 있는 유일한 방법은 FileUploadListener를 통해입니다. 파일이 업로드되고 FileUploadEvent가 매개변수로 리스너로 전달되면 이 리스너가 처리됩니다. 아래에는 고급 모드를 사용하는 데 도움이 되는 필수 파일이 나와 있습니다. index.xhtml
<html xmlns="https://www.w3.org/1999/xhtml"
	xmlns:ui="https://java.sun.com/jsf/facelets"
	xmlns:h="https://java.sun.com/jsf/html"
	xmlns:f="https://java.sun.com/jsf/core"
	xmlns:p="https://primefaces.org/ui">
	<h:head>
		<title>Journaldev Tutorial</title>
	</h:head>
	<h:body>
		<h:form enctype="multipart/form-data" style="width:500px">
				<p:fileUpload value="#{fileUploadManagedBean.file}" mode="advanced"
								fileUploadListener="#{fileUploadManagedBean.fileUploadListener}"></p:fileUpload>
		</h:form>
	</h:body>
</html>
package com.journaldev.prime.faces.beans;

import javax.faces.bean.ManagedBean;
import javax.faces.bean.SessionScoped;

import org.primefaces.event.FileUploadEvent;
import org.primefaces.model.UploadedFile;

@ManagedBean
@SessionScoped
public class FileUploadManagedBean {
	UploadedFile file;

	public UploadedFile getFile() {
		return file;
	}

	public void setFile(UploadedFile file) {
		this.file = file;
	}

	public void fileUploadListener(FileUploadEvent e){
		// FileUploadEvent에서 업로드된 파일 가져오기
		this.file = e.getFile();
		// 파일 정보 출력
		System.out.println("Uploaded File Name Is :: "+file.getFileName()+" :: Uploaded File Size :: "+file.getSize());
	}
}
요약하면:
- 웹.xml 및 pom.xml은 변경되지 않았으므로 언급되지 않았습니다.
- FileUpload 구성 요소의 value 속성은 UploadedFile 인스턴스와 관련되며, 구성 요소는 FileUploadListener에도 응답합니다.
- FileUploadListener는 FileUploadEvent를 매개변수로 받습니다.
- Upload 동작을 클릭하면 FileUploadListener가 실행되고 FileUploadEvent가 생성되어 전달됩니다.
어디, 데모 결과물은 두 개의 추가 버튼이 있는 업로드 컴포넌트의 새로운 뷰가 될 것입니다. 하나는 업로드용이고 나머지 하나는 취소용입니다. 
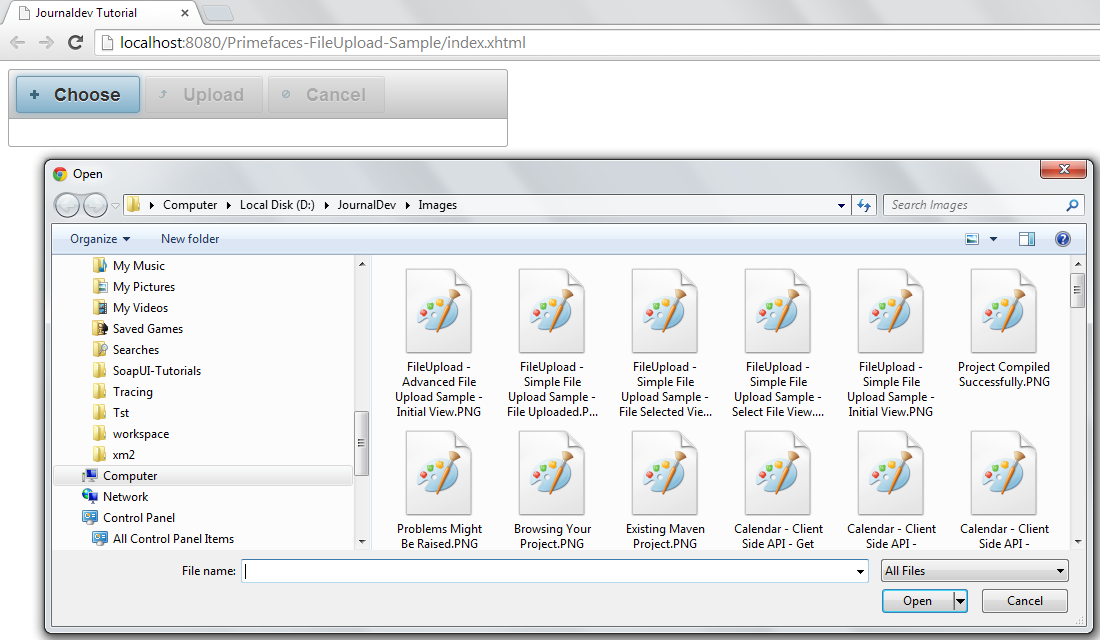
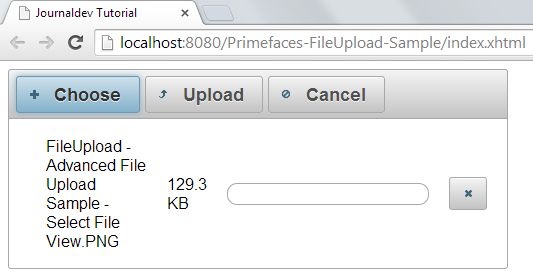
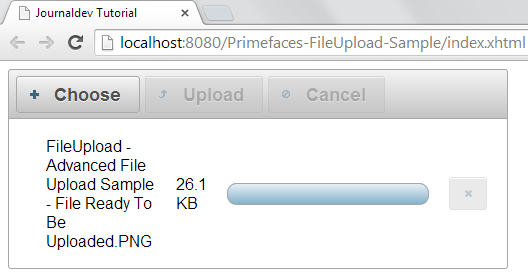
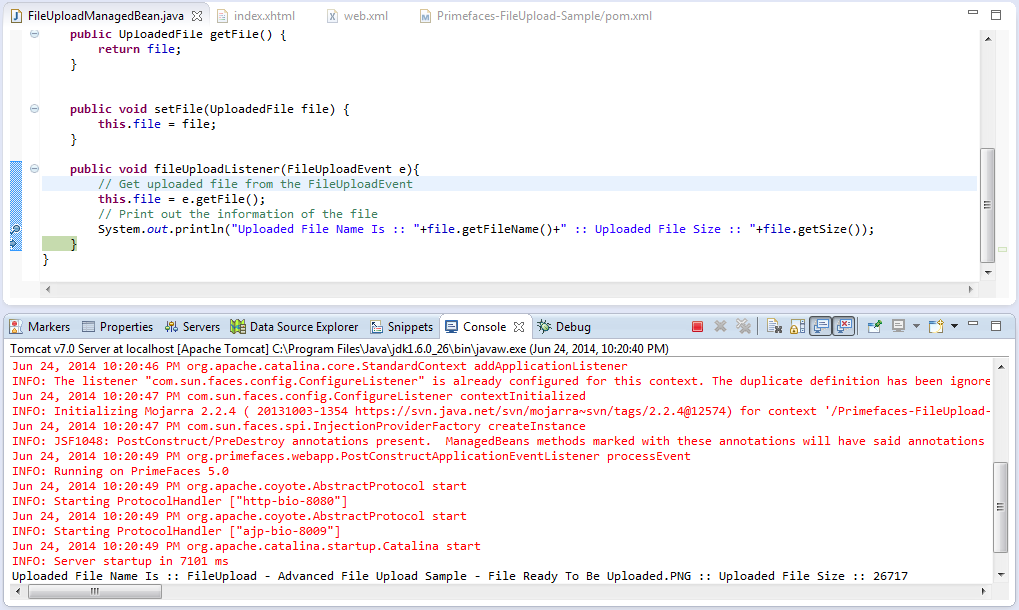 실행 결과로 다음 사항에 유의하는 것이 중요합니다:
- 업로드된 파일은 FileUploadEvent를 통해 전달되며, e.getFile()를 이벤트 객체에 대해 호출하여 UploadedFile 인스턴스를 반환할 수 있습니다.
- 업로드 프로세스는 취소 대신 업로드를 클릭한 경우 완전히 취소됩니다. 업로드를 취소하면 청취자가 호출되지 않습니다.
Primefaces 다중 파일 업로드
FileUpload 구성 요소를 사용하여 여러 파일을 업로드하는 것이 브라우저 대화 상자에서 여러 파일을 선택할 수 있도록 합니다. 여러 업로드는 이전 버전의 브라우저에서 지원되지 않습니다. 파일의 다중 속성을 true로 설정하여 여러 파일을 선택할 수 있지만, 이는 모든 파일이 하나의 요청을 사용하여 서버로 전송되지 않음을 의미합니다. 그러나 파일은 하나씩 전송됩니다. 다중 선택이 가능하게 하는 필요한 변경 내용은 아래에 나와 있습니다. index.xhtml
<html xmlns="https://www.w3.org/1999/xhtml"
	xmlns:ui="https://java.sun.com/jsf/facelets"
	xmlns:h="https://java.sun.com/jsf/html"
	xmlns:f="https://java.sun.com/jsf/core"
	xmlns:p="https://primefaces.org/ui">
	<h:head>
		<title>Journaldev Tutorial</title>
	</h:head>
	<h:body>
		<h:form enctype="multipart/form-data" style="width:500px">
				<p:fileUpload value="#{fileUploadManagedBean.file}" mode="advanced" multiple="true"
								fileUploadListener="#{fileUploadManagedBean.fileUploadListener}"></p:fileUpload>
		</h:form>
	</h:body>
</html>
package com.journaldev.prime.faces.beans;

import javax.faces.bean.ManagedBean;
import javax.faces.bean.SessionScoped;

import org.primefaces.event.FileUploadEvent;
import org.primefaces.model.UploadedFile;

@ManagedBean
@SessionScoped
public class FileUploadManagedBean {
	UploadedFile file;

	public UploadedFile getFile() {
		return file;
	}

	public void setFile(UploadedFile file) {
		this.file = file;
	}

	public void fileUploadListener(FileUploadEvent e){
		// FileUploadEvent에서 업로드된 파일 가져오기
		this.file = e.getFile();
		// 파일의 정보를 출력합니다.
		System.out.println("Uploaded File Name Is :: "+file.getFileName()+" :: Uploaded File Size :: "+file.getSize());
	}
}
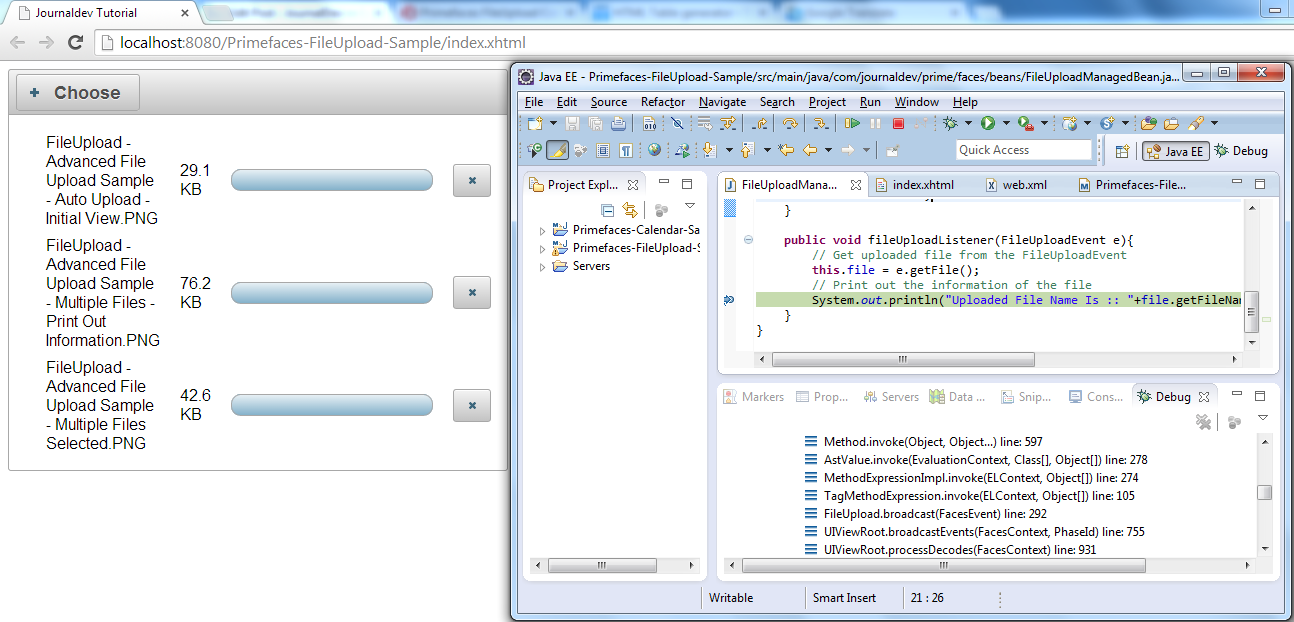
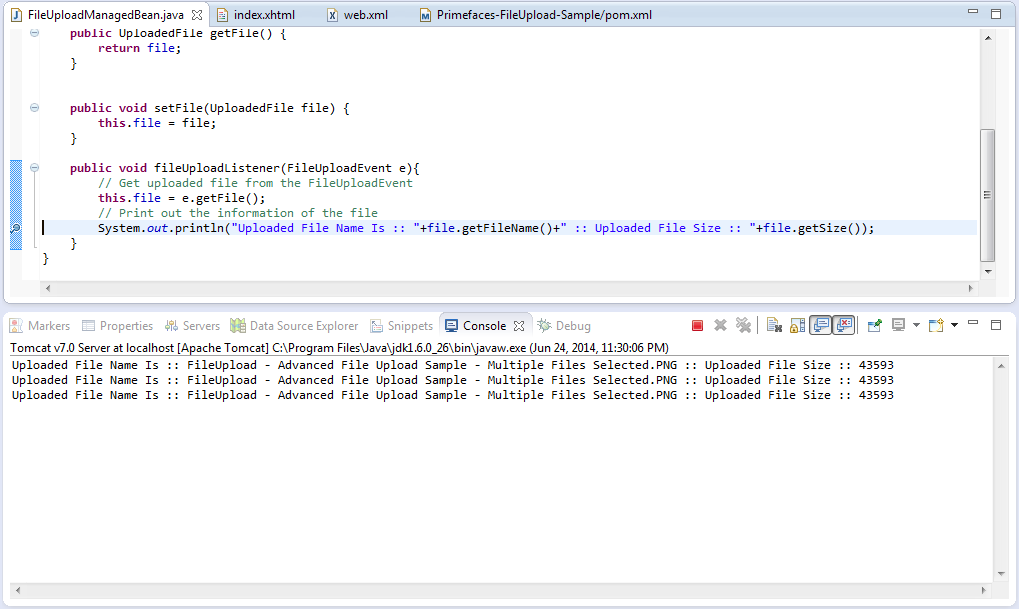
어디에서 애플리케이션 실행 결과는 아래와 같습니다. 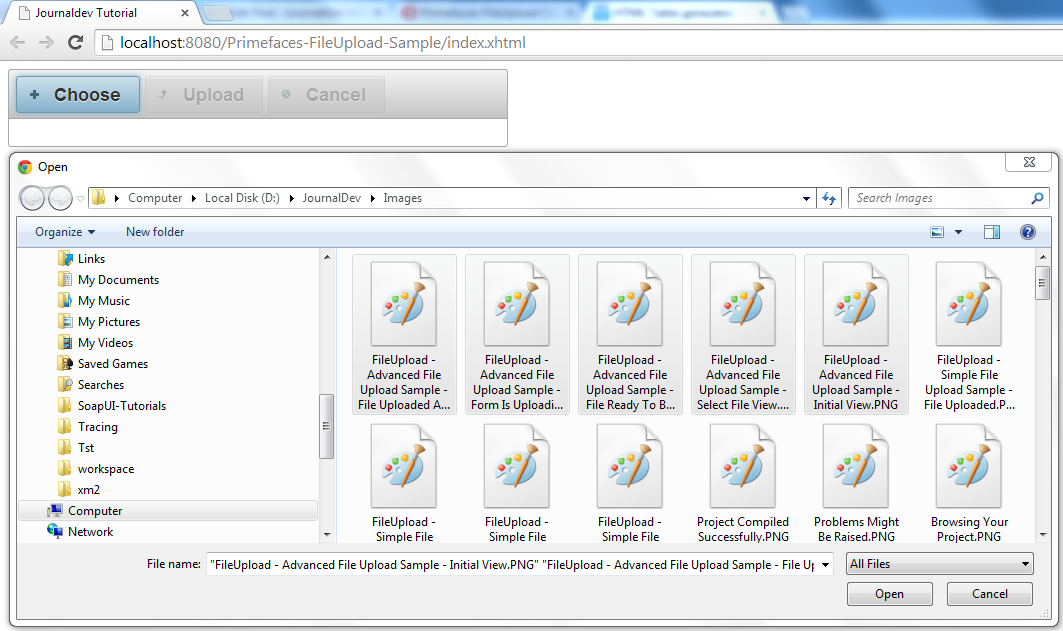
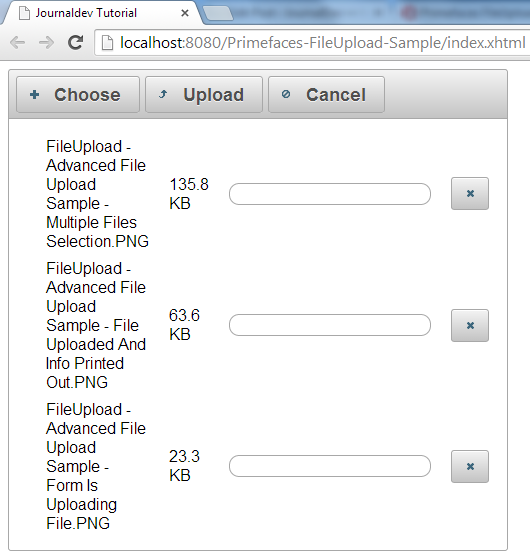
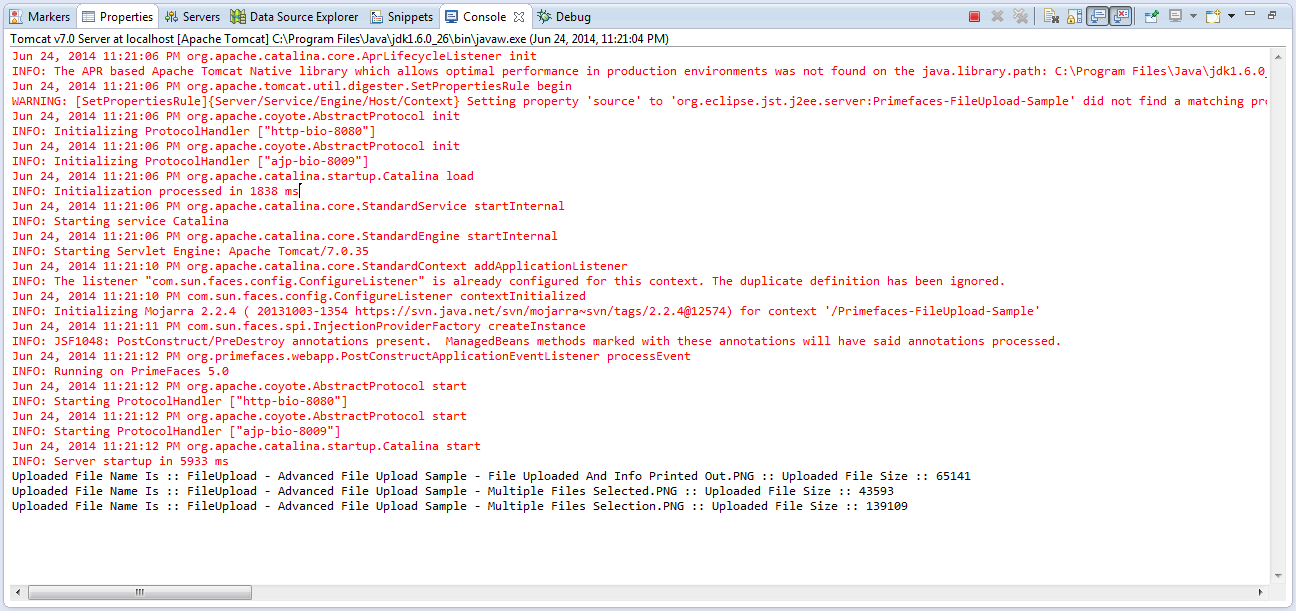 데모에서 다음 점들을 주목하는 것이 중요합니다:
- “취소” 버튼을 사용하여 업로드를 취소하는 경우, 모든 파일의 업로드 프로세스를 취소해야합니다.
- 업로드할 각 파일 옆에있는 X 아이콘을 클릭하면 해당 파일의 업로드가 취소됩니다.
- 업로드 작업을 클릭하면 로드되는 파일의 수에 따라 리스너가 호출됩니다.
Primefaces 자동 파일 업로드
기본 동작은 사용자가 업로드 프로세스를 트리거하도록 필요합니다. auto를 true로 설정하여이 방법을 변경할 수 있습니다. 자동 업로드는 대화 상자에서 파일이 선택되자마자 트리거됩니다. 자동 업로드를 적용하는 필수 변경 내용은 아래에 나와 있습니다. index.xhtml
<html xmlns="https://www.w3.org/1999/xhtml"
	xmlns:ui="https://java.sun.com/jsf/facelets"
	xmlns:h="https://java.sun.com/jsf/html"
	xmlns:f="https://java.sun.com/jsf/core"
	xmlns:p="https://primefaces.org/ui">
	<h:head>
		<title>Journaldev Tutorial</title>
	</h:head>
	<h:body>
		<h:form enctype="multipart/form-data" style="width:500px">
				<p:fileUpload value="#{fileUploadManagedBean.file}" mode="advanced" multiple="true" auto="true"
								fileUploadListener="#{fileUploadManagedBean.fileUploadListener}"></p:fileUpload>
		</h:form>
	</h:body>
</html>
실행 결과는 다음과 같습니다: 
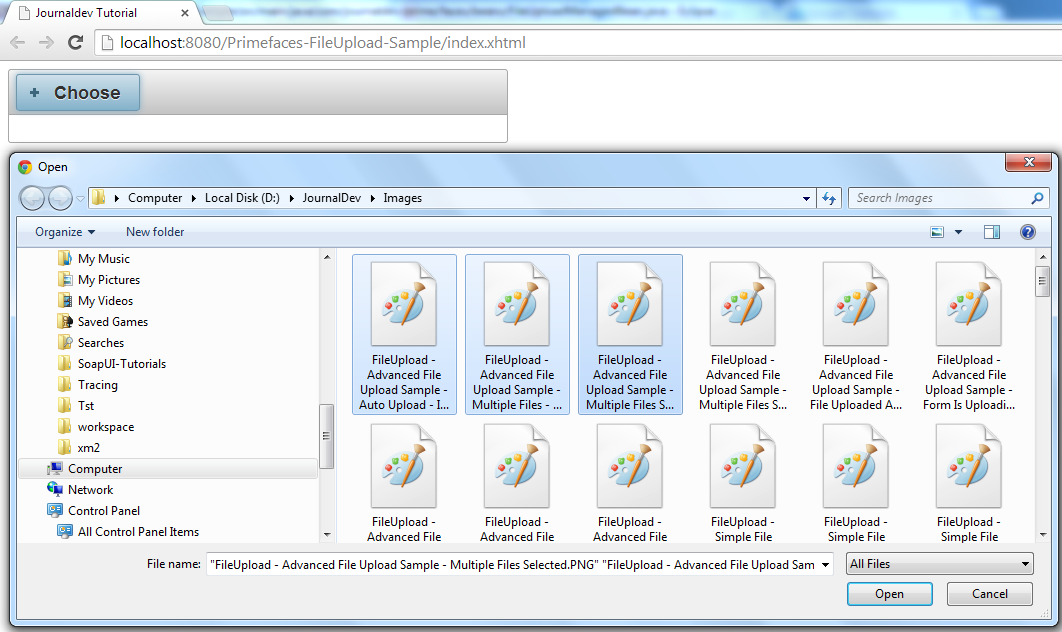 브라우저 창에서 Open을 클릭 한 후에는 업로드 프로세스가 즉시 시작됩니다.
프라임페이스 파일 업로드 부분 페이지 업데이트
파일 업로드 프로세스가 완료되면 프라임페이스 PPR (부분 페이지 렌더링)을 사용하여 페이지의 모든 구성 요소를 업데이트할 수 있습니다. 이를 위해 FileUpload에는 update 속성이 있습니다. 다음 예제는 파일 업로드 후 growl 구성 요소를 사용하여 “파일 업로드 성공” 메시지를 표시합니다. 메시지가 메시지로 표시될 때는 나중에 Growl 구성 요소에 대해 설명하겠습니다. 다음 코드 조각은 파일이 업로드된 후 메시지를 표시하는 데 도움이 됩니다. index.xhtml
<html xmlns="https://www.w3.org/1999/xhtml"
	xmlns:ui="https://java.sun.com/jsf/facelets"
	xmlns:h="https://java.sun.com/jsf/html"
	xmlns:f="https://java.sun.com/jsf/core"
	xmlns:p="https://primefaces.org/ui">
	<h:head>
		<title>Journaldev Tutorial</title>
	</h:head>
	<h:body>
		<h:form enctype="multipart/form-data" style="width:500px">
				<p:growl id="msg"></p:growl>
				<p:fileUpload value="#{fileUploadManagedBean.file}" mode="advanced"
								fileUploadListener="#{fileUploadManagedBean.fileUploadListener}" update="msg"></p:fileUpload>
		</h:form>
	</h:body>
</html>
package com.journaldev.prime.faces.beans;

import javax.faces.application.FacesMessage;
import javax.faces.bean.ManagedBean;
import javax.faces.bean.SessionScoped;
import javax.faces.context.FacesContext;

import org.primefaces.event.FileUploadEvent;
import org.primefaces.model.UploadedFile;

@ManagedBean
@SessionScoped
public class FileUploadManagedBean {
	UploadedFile file;

	public UploadedFile getFile() {
		return file;
	}

	public void setFile(UploadedFile file) {
		this.file = file;
	}

	public void fileUploadListener(FileUploadEvent e){
		// FileUploadEvent에서 업로드된 파일 가져오기
		this.file = e.getFile();
		// 파일 정보 출력
		System.out.println("Uploaded File Name Is :: "+file.getFileName()+" :: Uploaded File Size :: "+file.getSize());
		// 메시지 추가
		FacesContext.getCurrentInstance().addMessage(null,new FacesMessage("File Uploaded Successfully"));
	}
}
여기서, 실행 결과는 아래와 같습니다: 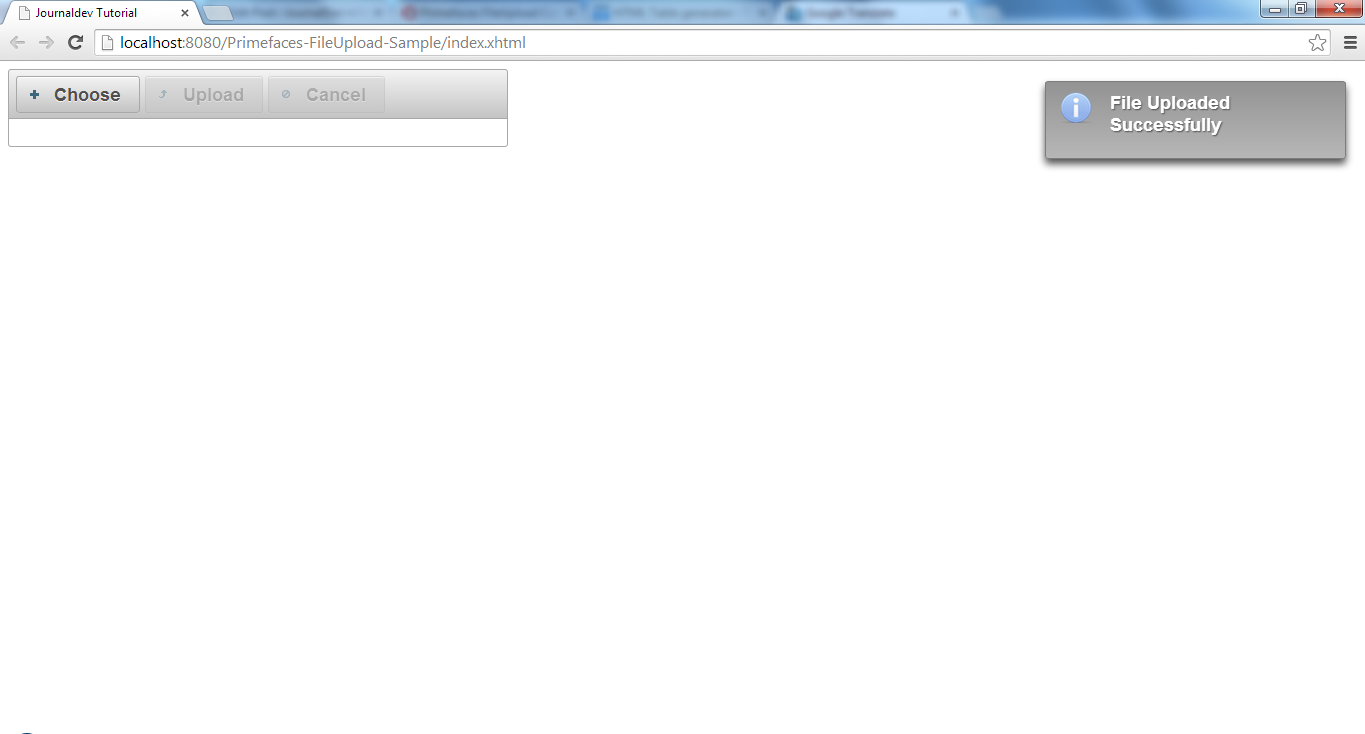 메시지가 FacesContext에 추가되고 FileUpload 구성 요소가 update 속성을 정의하여 Ajax 메커니즘을 통해 메시지가 렌더링되도록합니다. Ajax 동작은 나중에 별도의 자습서에서 설명됩니다.
파일 업로드 필터
사용자는 구성한 파일 유형만 선택하도록 제한될 수 있으며 아래 예시에서는 이미지만 허용하는 방법을 보여줍니다. index.xhtml
<html xmlns="https://www.w3.org/1999/xhtml"
	xmlns:ui="https://java.sun.com/jsf/facelets"
	xmlns:h="https://java.sun.com/jsf/html"
	xmlns:f="https://java.sun.com/jsf/core"
	xmlns:p="https://primefaces.org/ui">
	<h:head>
		<title>Journaldev Tutorial</title>
	</h:head>
	<h:body>
		<h:form enctype="multipart/form-data" style="width:500px">
				<p:growl id="msg"></p:growl>
				<p:fileUpload value="#{fileUploadManagedBean.file}" mode="advanced" allowTypes="/(\.|\/)(gif|jpe?g|png)$/"
								fileUploadListener="#{fileUploadManagedBean.fileUploadListener}" update="msg"></p:fileUpload>
		</h:form>
	</h:body>
</html>
Primefaces 파일 업로드 크기 제한 및 파일 제한
가끔은 업로드된 파일의 크기 또는 업로드할 파일의 수를 제한해야 할 때가 있습니다. Primefaces FileUpload 구성 요소를 사용하면 이러한 제한을 손쉽게 적용할 수 있습니다. FileUpload 자체에 각각 sizeLimit 및 fileLimit 속성을 제공함으로써 이러한 제한을 적용할 수 있습니다. 사용자를 제한하는 코드 조각은 다음과 같습니다: index.xhtml
<html xmlns="https://www.w3.org/1999/xhtml"
	xmlns:ui="https://java.sun.com/jsf/facelets"
	xmlns:h="https://java.sun.com/jsf/html"
	xmlns:f="https://java.sun.com/jsf/core"
	xmlns:p="https://primefaces.org/ui">
	<h:head>
		<title>Journaldev Tutorial</title>
	</h:head>
	<h:body>
		<h:form enctype="multipart/form-data" style="width:500px">
				<p:growl id="msg"></p:growl>
				<p:fileUpload value="#{fileUploadManagedBean.file}" mode="advanced" multiple="true" fileLimit="3" sizeLimit="2048"
								fileUploadListener="#{fileUploadManagedBean.fileUploadListener}" update="msg"></p:fileUpload>
		</h:form>
	</h:body>
</html>
다음과 같이 세 개 이상의 파일을 업로드하려고 하거나 파일 크기가 제한을 초과하면 아래와 같은 오류 메시지가 표시됩니다: 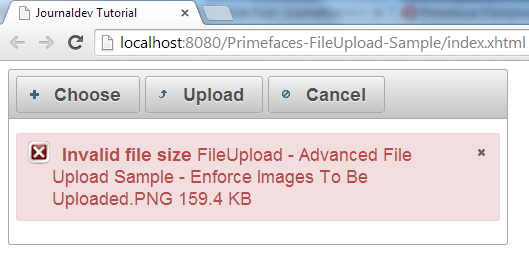
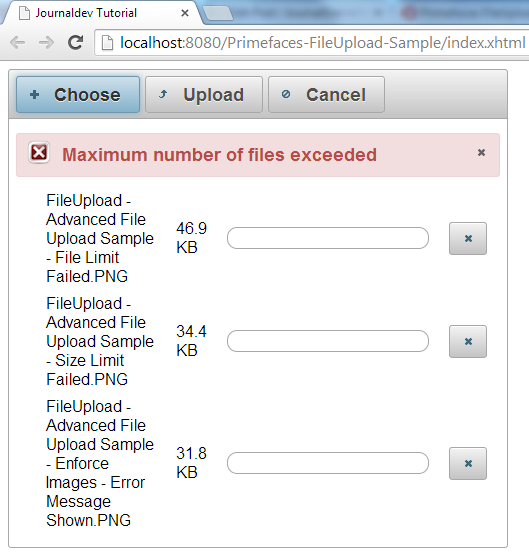
Primefaces 파일 업로드 유효성 검사 메시지
invalidFileMessage, invalidSizeMessage, 그리고 fileLimitMessage 옵션을 제공하여 사용자에게 유효성 검사 메시지를 표시할 수 있습니다. 이러한 유효성 검사를 위한 메시지를 사용자에게 제공할 수 있습니다. 아래 제공된 예시를 참조하세요. index.xhtml
<html xmlns="https://www.w3.org/1999/xhtml"
	xmlns:ui="https://java.sun.com/jsf/facelets"
	xmlns:h="https://java.sun.com/jsf/html"
	xmlns:f="https://java.sun.com/jsf/core"
	xmlns:p="https://primefaces.org/ui">
	<h:head>
		<title>Journaldev Tutorial</title>
	</h:head>
	<h:body>
		<h:form enctype="multipart/form-data" style="width:500px">
				<p:growl id="msg"></p:growl>
				<p:fileUpload value="#{fileUploadManagedBean.file}"
								invalidSizeMessage="JournalDev: Invalid Size"
								invalidFileMessage="JournalDev: Invalid File Type"
								fileLimitMessage="JournalDev: Invalid File Limit"
								mode="advanced" multiple="true" fileLimit="3" sizeLimit="2048"
								allowTypes="/(\.|\/)(gif|jpe?g|png)$/"
								fileUploadListener="#{fileUploadManagedBean.fileUploadListener}"
								update="msg"></p:fileUpload>
		</h:form>
	</h:body>
</html>

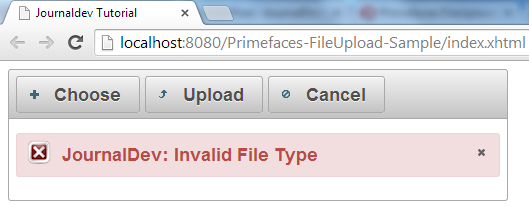
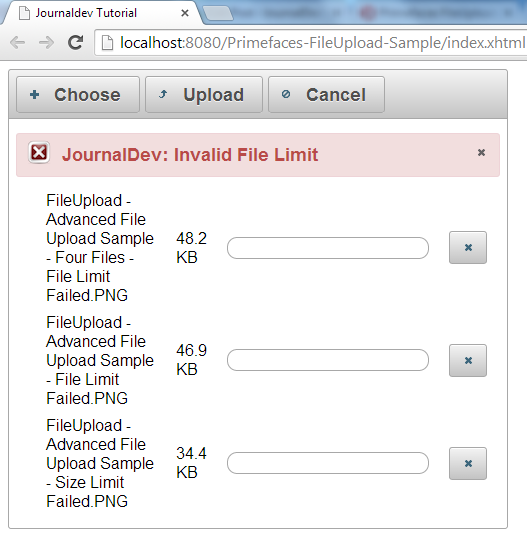 만약 메시지가 변경되었고 다른 텍스트 값이 제공된 경우 주의하였다면, 관리 빈 코드에서 파일에 대해 아무 작업도 수행하지 않고 있음을 알 수 있습니다. 그러나 실제 상황에서는
 UploadedFile의 getInputstream() 메서드를 사용하여 파일 데이터를 가져와 서버 또는 데이터베이스에 파일로 저장할 수 있습니다.
Primefaces FileUpload 요약
이 튜토리얼은 FileUpload Primefaces 컴포넌트 사용에 대한 자세한 설명을 제공하는 것을 목적으로합니다.. FileUpload 컴포넌트는 비슷한 기능을 구현하려고 시도하는 대신 비즈니스에 집중할 수 있도록 많은 기능을 갖추고 있습니다. 아래 링크에서 샘플 프로젝트를 다운로드하여 다른 fileUpload 속성을 알아보십시오.
Source:
https://www.digitalocean.com/community/tutorials/primefaces-fileupload-component-example-tutorial


