


봄 @PropertySource 주석은 Spring 환경에 속성 파일을 제공하는 데 사용됩니다. 이 주석은 @Configuration 클래스와 함께 사용됩니다. Spring PropertySource 주석은 반복 가능하며, 즉 하나의 구성 클래스에 여러 PropertySource를 가질 수 있습니다. 이 기능은 Java 8 이상 버전을 사용하는 경우에 사용할 수 있습니다.
Spring PropertySource 예제
간단한 스프링 애플리케이션을 빠르게 살펴보겠습니다. 여기서는 속성 파일에서 데이터베이스 구성 세부 정보를 읽어와 데이터베이스 연결을 생성합니다. 데이터베이스의 일부 메타데이터 정보를 콘솔에 출력합니다. 간단한 메이븐 프로젝트를 만들고 Spring 및 MySQL 종속성을 추가합니다. 예를 들어 다른 데이터베이스를 사용할 수도 있으며, 그에 따라 구성을 변경하면 됩니다.
<dependency>
	<groupId>org.springframework</groupId>
	<artifactId>spring-context</artifactId>
	<version>5.0.6.RELEASE</version>
</dependency>
<dependency>
	<groupId>mysql</groupId>
	<artifactId>mysql-connector-java</artifactId>
	<version>5.1.46</version>
</dependency>
아래 이미지는 프로젝트의 최종 구조를 보여줍니다. 우리는 중요한 구성 요소를 하나씩 살펴보겠습니다. 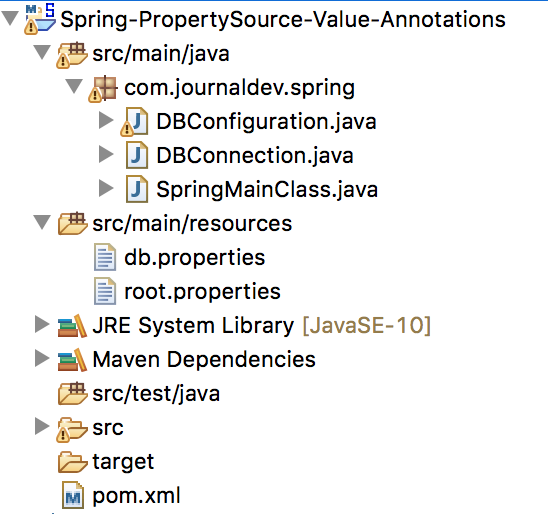 여기는 데이터베이스 연결을 생성하는 우리의 클래스입니다.
package com.journaldev.spring;

import java.sql.Connection;
import java.sql.DriverManager;
import java.sql.SQLException;

public class DBConnection {

	private String driverClass;
	private String dbURL;
	private String userName;
	private char[] password;
	private Connection con;

	public DBConnection(String driverClass, String dbURL, String userName, char[] password) {
		this.driverClass = driverClass;
		this.dbURL = dbURL;
		this.userName = userName;
		this.password = password;
	}

	public Connection getConnection() {
		if (this.con != null)
			return con;

		Connection con = null;
		try {
			System.out.println("Creating DB Connection");
			Class.forName(driverClass);
			con = DriverManager.getConnection(dbURL, userName, String.valueOf(password));
			System.out.println("Successfully Created DB Connection");
		} catch (ClassNotFoundException | SQLException e) {
			e.printStackTrace();
		}
		this.con = con;
		return con;
	}

	public void close() {
		System.out.println("DBConnection close called");
		if (this.con != null) {
			try {
				con.close();
			} catch (SQLException e) {
				e.printStackTrace();
			}
		}
	}
}
NOTE: 만약 실제 애플리케이션을 개발 중이라면, Spring ORM을(를) 사용할 수 있습니다. 이렇게 하면 Spring이 데이터베이스 연결 관리를 처리하고 비즈니스 로직 작성에 집중할 수 있습니다. 이제 Spring 구성 클래스를 생성하여 PropertySource 어노테이션을 사용할 것입니다.
package com.journaldev.spring;

import org.springframework.beans.factory.annotation.Autowired;
import org.springframework.context.annotation.Bean;
import org.springframework.context.annotation.Configuration;
import org.springframework.context.annotation.PropertySource;
import org.springframework.core.env.Environment;

@Configuration
@PropertySource("classpath:db.properties")
@PropertySource("classpath:root.properties")
public class DBConfiguration {

	@Autowired
    Environment env;

	@Bean
    public DBConnection getDBConnection() {
		System.out.println("Getting DBConnection Bean for App: "+env.getProperty("APP_NAME"));
		DBConnection dbConnection = new DBConnection(env.getProperty("DB_DRIVER_CLASS"), env.getProperty("DB_URL"), env.getProperty("DB_USERNAME"), env.getProperty("DB_PASSWORD").toCharArray());
        return dbConnection;
    }

}
여러 프로퍼티 파일을 Spring 환경에 로드하고 있는 점에 유의하십시오. 이러한 프로퍼티 파일 내용을 살펴보겠습니다. db.properties
#MYSQL 데이터베이스 구성
DB_DRIVER_CLASS=com.mysql.jdbc.Driver
DB_URL=jdbc:mysql://localhost:3306/Test
DB_USERNAME=journaldev
DB_PASSWORD=journaldev
root.properties
APP_NAME=PropertySource Example
주요 클래스를 생성하고 데이터베이스 세부 정보를 가져오겠습니다.
package com.journaldev.spring;

import java.sql.Connection;
import java.sql.SQLException;

import org.springframework.context.annotation.AnnotationConfigApplicationContext;

public class SpringMainClass {

	public static void main(String[] args) throws SQLException {
		AnnotationConfigApplicationContext context = new AnnotationConfigApplicationContext();
		context.scan("com.journaldev.spring");
		context.refresh();

		DBConnection dbConnection = context.getBean(DBConnection.class);

		Connection con = dbConnection.getConnection();

		System.out.println(con.getMetaData().getDatabaseProductName());
		System.out.println(con.getMetaData().getDatabaseProductVersion());

		// Spring 컨텍스트를 닫습니다
		context.close();
	}

}
위의 클래스를 Java 애플리케이션으로 실행하면 다음 출력이 생성됩니다.
Getting DBConnection Bean for App: PropertySource Example
Creating DB Connection
Successfully Created DB Connection
MySQL
5.7.18
DBConnection close called
가독성을 높이기 위해 Spring이 콘솔에 생성하는 디버그 메시지를 제거했습니다.
Spring @PropertySource 다중 파일 – @PropertySources
구성 클래스에 여러 프로퍼티 파일을 로드하는 또 다른 방법이 있습니다.
@PropertySources({
@PropertySource("classpath:db.properties"),
@PropertySource("classpath:root.properties")})
public class DBConfiguration {
}
Java 8 이후로 PropertySource 어노테이션이 반복 가능하게 되었습니다. 이전 자바 버전에서는 @PropertySources를 사용하여 여러 프로퍼티 파일을 구성 클래스에 제공하는 방법이었습니다.
Spring PropertySource 값 재정의
Spring 환경에 여러 프로퍼티 파일을 로드할 수 있습니다. 여러 파일에서 동일한 키가 있는 경우에는 마지막으로 로드된 프로퍼티 파일이 이전 값들을 재정의합니다. 따라서 프로퍼티로부터 원치 않는 값이 나오는 경우, 동일한 키가 다른 프로퍼티 파일에 있는지 확인하고 이러한 프로퍼티 파일들의 로드 순서를 확인하십시오.
Spring PropertySource 외부 파일
때로는 구성 파일이 특정 위치에 있고 프로젝트 클래스 패스의 일부가 아닌 경우가 있습니다. 파일 시스템에서 프로퍼티 파일을 로드하도록 PropertySource를 구성할 수 있습니다.
@PropertySource("file:/Users/pankaj/db.properties")
Spring PropertySource 환경 변수
알림: 위의 설정은 외부 위치에서 속성 파일을 읽을 것이며, 내 시스템에서는 작동하지만 다른 사람이나 서버에서는 작동하지 않습니다. 우리는 PropertySource에서 시스템 변수를 읽을 수도 있으므로 아래 구성은 모두에게 작동합니다.
@PropertySource("file:${HOME}/db.properties")
Spring PropertySource FileNotFoundException 무시
속성 파일을 찾을 수 없는 경우 FileNotFoundException이 발생합니다. 때로는 응용 프로그램이 기본 값과 함께 작동할 수 있기 때문에 예외를 throw 하고 싶지 않을 수도 있습니다. 파일을 찾을 수 없으면 예외를 throw하지 않도록 Spring 프레임워크에게 알리기 위해 PropertySource ignoreResourceNotFound를 true로 설정할 수 있습니다.
@PropertySource(value = "classpath:root.properties", ignoreResourceNotFound=true)
이것으로 Spring PropertySource 예제에 대한 설명이 끝났습니다. GitHub Repository에서 소스 코드와 메이븐 프로젝트를 확인할 수 있습니다.
Source:
https://www.digitalocean.com/community/tutorials/spring-propertysource