


Spring Batch 예제에 오신 것을 환영합니다. Spring Batch는 일괄 작업 실행을 위한 스프링 프레임워크 모듈입니다. 우리는 스프링 배치를 사용하여 일련의 작업을 처리할 수 있습니다.
Spring Batch 예제
스프링 배치 예제 프로그램을 진행하기 전에, 스프링 배치 용어에 대해 약간의 개념을 이해해 보겠습니다.
- A job can consist of ‘n’ number of steps. Each step contains Read-Process-Write task or it can have single operation, which is called tasklet.
- Read-Process-Write는 기본적으로 데이터베이스, CSV 등과 같은 소스에서 읽은 다음 데이터를 처리하고 데이터베이스, CSV, XML 등과 같은 소스에 씁니다.
- Tasklet은 연결 정리, 처리 후 리소스 해제와 같은 단일 작업이나 작업을 수행하는 것을 의미합니다.
- Read-Process-Write와 tasklet은 함께 연결되어 작업을 실행할 수 있습니다.
Spring Batch 예제
스프링 배치 구현을 위한 작동 예제를 고려해 보겠습니다. 구현 목적을 위해 다음 시나리오를 고려합니다. 데이터가 포함된 CSV 파일을 XML로 변환해야 하며, 데이터와 태그는 열 이름에 따라 지정됩니다. 스프링 배치 예제에 사용된 중요한 도구와 라이브러리는 다음과 같습니다.
- Apache Maven 3.5.0 – 프로젝트 빌드 및 종속성 관리에 사용됩니다.
- Eclipse Oxygen Release 4.7.0 – Spring Batch Maven 애플리케이션을 생성하기 위한 IDE입니다.
- Java 1.8
- Spring Core 4.3.12.RELEASE
- Spring OXM 4.3.12.RELEASE
- Spring JDBC 4.3.12.RELEASE
- Spring Batch 3.0.8.RELEASE
- MySQL Java Driver 5.1.25 – MySQL 설치에 따라 사용합니다. 이는 Spring Batch 메타데이터 테이블에 필요합니다.
Spring Batch 예제 디렉토리 구조
아래 이미지는 Spring Batch 예제 프로젝트의 모든 구성 요소를 보여줍니다. 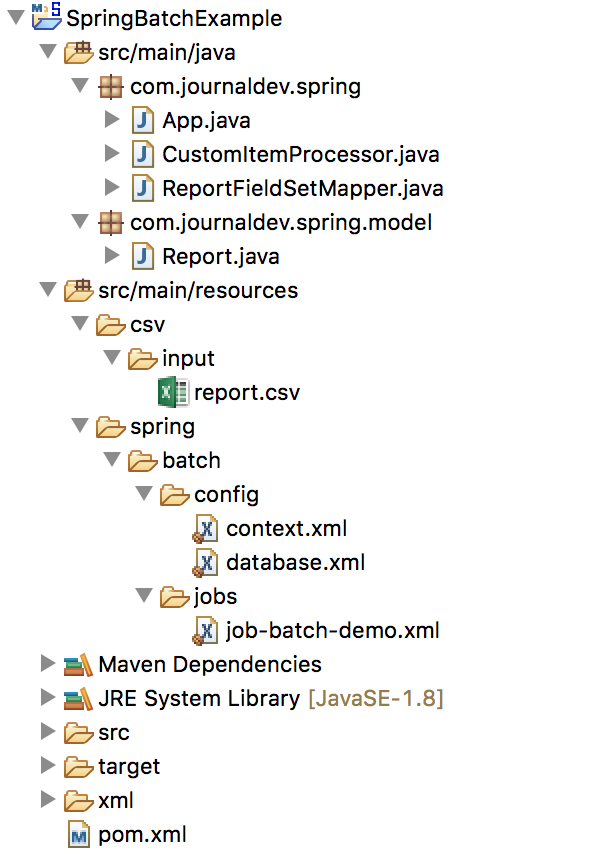
Spring Batch Maven 종속성
아래는 spring batch 예제 프로젝트에 필요한 모든 종속성이 포함된 pom.xml 파일의 내용입니다.
<project xmlns="https://maven.apache.org/POM/4.0.0" xmlns:xsi="https://www.w3.org/2001/XMLSchema-instance"
	xsi:schemaLocation="https://maven.apache.org/POM/4.0.0 https://maven.apache.org/xsd/maven-4.0.0.xsd">
	<modelVersion>4.0.0</modelVersion>

	<groupId>com.journaldev.spring</groupId>
	<artifactId>SpringBatchExample</artifactId>
	<version>0.0.1-SNAPSHOT</version>
	<packaging>jar</packaging>

	<name>SpringBatchDemo</name>
	<url>https://maven.apache.org</url>

	<properties>
		<jdk.version>1.8</jdk.version>
		<spring.version>4.3.12.RELEASE</spring.version>
		<spring.batch.version>3.0.8.RELEASE</spring.batch.version>
		<mysql.driver.version>5.1.25</mysql.driver.version>
		<junit.version>4.11</junit.version>
	</properties>

	<dependencies>

		<!-- Spring Core -->
		<dependency>
			<groupId>org.springframework</groupId>
			<artifactId>spring-core</artifactId>
			<version>${spring.version}</version>
		</dependency>

		<!-- Spring jdbc, for database -->
		<dependency>
			<groupId>org.springframework</groupId>
			<artifactId>spring-jdbc</artifactId>
			<version>${spring.version}</version>
		</dependency>

		<!-- Spring XML to/back object -->
		<dependency>
			<groupId>org.springframework</groupId>
			<artifactId>spring-oxm</artifactId>
			<version>${spring.version}</version>
		</dependency>

		<!-- MySQL database driver -->
		<dependency>
			<groupId>mysql</groupId>
			<artifactId>mysql-connector-java</artifactId>
			<version>${mysql.driver.version}</version>
		</dependency>

		<!-- Spring Batch dependencies -->
		<dependency>
			<groupId>org.springframework.batch</groupId>
			<artifactId>spring-batch-core</artifactId>
			<version>${spring.batch.version}</version>
		</dependency>
		<dependency>
			<groupId>org.springframework.batch</groupId>
			<artifactId>spring-batch-infrastructure</artifactId>
			<version>${spring.batch.version}</version>
		</dependency>

		<!-- Spring Batch unit test -->
		<dependency>
			<groupId>org.springframework.batch</groupId>
			<artifactId>spring-batch-test</artifactId>
			<version>${spring.batch.version}</version>
		</dependency>

		<!-- Junit -->
		<dependency>
			<groupId>junit</groupId>
			<artifactId>junit</artifactId>
			<version>${junit.version}</version>
			<scope>test</scope>
		</dependency>

		<dependency>
			<groupId>com.thoughtworks.xstream</groupId>
			<artifactId>xstream</artifactId>
			<version>1.4.10</version>
		</dependency>

	</dependencies>
	<build>
		<finalName>spring-batch</finalName>
		<plugins>
			<plugin>
				<groupId>org.apache.maven.plugins</groupId>
				<artifactId>maven-eclipse-plugin</artifactId>
				<version>2.9</version>
				<configuration>
					<downloadSources>true</downloadSources>
					<downloadJavadocs>false</downloadJavadocs>
				</configuration>
			</plugin>
			<plugin>
				<groupId>org.apache.maven.plugins</groupId>
				<artifactId>maven-compiler-plugin</artifactId>
				<version>2.3.2</version>
				<configuration>
					<source>${jdk.version}</source>
					<target>${jdk.version}</target>
				</configuration>
			</plugin>
		</plugins>
	</build>
</project>
Spring Batch Processing CSV 입력 파일
여기에는 스프링 배치 처리를 위한 샘플 CSV 파일의 내용이 있습니다.
1001,Tom,Moody, 29/7/2013
1002,John,Parker, 30/7/2013
1003,Henry,Williams, 31/7/2013
스프링 배치 작업 구성
구성 파일에서 스프링 빈과 스프링 배치 작업을 정의해야 합니다. 아래는 job-batch-demo.xml 파일의 내용으로, 스프링 배치 프로젝트에서 가장 중요한 부분입니다.
<beans xmlns="https://www.springframework.org/schema/beans"
	xmlns:batch="https://www.springframework.org/schema/batch" xmlns:xsi="https://www.w3.org/2001/XMLSchema-instance"
	xsi:schemaLocation="https://www.springframework.org/schema/batch
		https://www.springframework.org/schema/batch/spring-batch-3.0.xsd
		https://www.springframework.org/schema/beans
		https://www.springframework.org/schema/beans/spring-beans-4.3.xsd
	">

	<import resource="../config/context.xml" />
	<import resource="../config/database.xml" />

	<bean id="report" class="com.journaldev.spring.model.Report"
		scope="prototype" />
	<bean id="itemProcessor" class="com.journaldev.spring.CustomItemProcessor" />

	<batch:job id="DemoJobXMLWriter">
		<batch:step id="step1">
			<batch:tasklet>
				<batch:chunk reader="csvFileItemReader" writer="xmlItemWriter"
					processor="itemProcessor" commit-interval="10">
				</batch:chunk>
			</batch:tasklet>
		</batch:step>
	</batch:job>

	<bean id="csvFileItemReader" class="org.springframework.batch.item.file.FlatFileItemReader">

		<property name="resource" value="classpath:csv/input/report.csv" />

		<property name="lineMapper">
			<bean class="org.springframework.batch.item.file.mapping.DefaultLineMapper">
				<property name="lineTokenizer">
					<bean
						class="org.springframework.batch.item.file.transform.DelimitedLineTokenizer">
						<property name="names" value="id,firstname,lastname,dob" />
					</bean>
				</property>
				<property name="fieldSetMapper">
					<bean class="com.journaldev.spring.ReportFieldSetMapper" />

					<!-- if no data type conversion, use BeanWrapperFieldSetMapper to map
						by name <bean class="org.springframework.batch.item.file.mapping.BeanWrapperFieldSetMapper">
						<property name="prototypeBeanName" value="report" /> </bean> -->
				</property>
			</bean>
		</property>

	</bean>

	<bean id="xmlItemWriter" class="org.springframework.batch.item.xml.StaxEventItemWriter">
		<property name="resource" value="file:xml/outputs/report.xml" />
		<property name="marshaller" ref="reportMarshaller" />
		<property name="rootTagName" value="report" />
	</bean>

	<bean id="reportMarshaller" class="org.springframework.oxm.jaxb.Jaxb2Marshaller">
		<property name="classesToBeBound">
			<list>
				<value>com.journaldev.spring.model.Report</value>
			</list>
		</property>
	</bean>

</beans>
- CSV 파일을 읽기 위해
FlatFileItemReader를 사용하고, 데이터를 처리하기 위해CustomItemProcessor를 사용하며,StaxEventItemWriter를 사용하여 XML 파일에 작성합니다. batch:job– 이 태그는 생성하려는 작업을 정의합니다. Id 속성은 작업의 ID를 지정합니다. 하나의 XML 파일에 여러 작업을 정의할 수 있습니다.batch:step– 이 태그는 스프링 배치 작업의 다른 단계를 정의하는 데 사용됩니다.- Spring Batch Framework은 “TaskletStep Oriented” 및 “Chunk Oriented” 두 가지 다른 처리 스타일을 제공합니다. 이 예제에서는 Chunk Oriented 스타일이 사용되며 데이터를 하나씩 읽어들이고 트랜잭션 경계 내에서 ‘청크’를 작성합니다.
- reader: 데이터를 읽는 데 사용되는 Spring 빈입니다. 이 예제에서는
csvFileItemReader빈을 사용하며 이는FlatFileItemReader의 인스턴스입니다. - processor: 데이터를 처리하는 데 사용되는 클래스입니다. 이 예제에서는
CustomItemProcessor를 사용했습니다. - writer: 데이터를 xml 파일에 작성하는 데 사용되는 빈입니다.
- commit-interval: 이 속성은 처리가 완료된 후 커밋될 청크의 크기를 정의합니다. 기본적으로 ItemReader는 데이터를 하나씩 읽고 ItemProcessor도 동일한 방식으로 처리하지만 ItemWriter는 commit-interval의 크기와 동일해질 때만 데이터를 작성합니다.
- 이 프로젝트의 일부로 사용되는 세 가지 중요한 인터페이스는
org.springframework.batch.item패키지의ItemReader,ItemProcessor및ItemWriter입니다.
Spring Batch 모델 클래스
먼저 CSV 파일을 자바 객체로 읽어들이고, 그런 다음 JAXB를 사용하여 XML 파일에 쓰는 것입니다. 아래는 필요한 JAXB 주석이 있는 모델 클래스입니다.
package com.journaldev.spring.model;

import java.util.Date;

import javax.xml.bind.annotation.XmlAttribute;
import javax.xml.bind.annotation.XmlElement;
import javax.xml.bind.annotation.XmlRootElement;

@XmlRootElement(name = "record")
public class Report {

	private int id;
	private String firstName;
	private String lastName;
	private Date dob;

	@XmlAttribute(name = "id")
	public int getId() {
		return id;
	}

	public void setId(int id) {
		this.id = id;
	}

	@XmlElement(name = "firstname")
	public String getFirstName() {
		return firstName;
	}

	public void setFirstName(String firstName) {
		this.firstName = firstName;
	}

	@XmlElement(name = "lastname")
	public String getLastName() {
		return lastName;
	}

	public void setLastName(String lastName) {
		this.lastName = lastName;
	}

	@XmlElement(name = "dob")
	public Date getDob() {
		return dob;
	}

	public void setDob(Date dob) {
		this.dob = dob;
	}

	@Override
	public String toString() {
		return "Report [id=" + id + ", firstname=" + firstName + ", lastName=" + lastName + ", DateOfBirth=" + dob
				+ "]";
	}

}
모델 클래스의 필드는 스프링 배치 매퍼 구성에 정의된대로 동일해야 합니다. 즉, property name="names" value="id,firstname,lastname,dob"입니다.
스프링 배치 FieldSetMapper
A custom FieldSetMapper is needed to convert a Date. If no data type conversion is required, then only BeanWrapperFieldSetMapper should be used to map the values by name automatically. The java class which extends FieldSetMapper is ReportFieldSetMapper.
package com.journaldev.spring;

import java.text.ParseException;
import java.text.SimpleDateFormat;

import org.springframework.batch.item.file.mapping.FieldSetMapper;
import org.springframework.batch.item.file.transform.FieldSet;
import org.springframework.validation.BindException;

import com.journaldev.spring.model.Report;

public class ReportFieldSetMapper implements FieldSetMapper {

	private SimpleDateFormat dateFormat = new SimpleDateFormat("dd/MM/yyyy");

	public Report mapFieldSet(FieldSet fieldSet) throws BindException {

		Report report = new Report();
		report.setId(fieldSet.readInt(0));
		report.setFirstName(fieldSet.readString(1));
		report.setLastName(fieldSet.readString(2));

		// 기본 형식은 yyyy-MM-dd입니다.
		// fieldSet.readDate(4);
		String date = fieldSet.readString(3);
		try {
			report.setDob(dateFormat.parse(date));
		} catch (ParseException e) {
			e.printStackTrace();
		}

		return report;

	}

}
스프링 배치 Item Processor
이 작업 구성에 따라 itemWriter 이전에 itemProcessor가 실행됩니다. 우리는 이를 위해 CustomItemProcessor.java 클래스를 생성했습니다.
package com.journaldev.spring;

import org.springframework.batch.item.ItemProcessor;

import com.journaldev.spring.model.Report;

public class CustomItemProcessor implements ItemProcessor<Report, Report> {

	public Report process(Report item) throws Exception {

		System.out.println("Processing..." + item);
		String fname = item.getFirstName();
		String lname = item.getLastName();

		item.setFirstName(fname.toUpperCase());
		item.setLastName(lname.toUpperCase());
		return item;
	}

}
ItemProcessor 구현에서 데이터를 조작할 수 있습니다. 여기서는 first name과 last name 값을 대문자로 변환하고 있습니다.
스프링 구성 파일
우리의 스프링 배치 구성 파일에서는 context.xml과 database.xml 두 개의 추가 구성 파일을 가져왔습니다.
<beans xmlns="https://www.springframework.org/schema/beans"
	xmlns:xsi="https://www.w3.org/2001/XMLSchema-instance"
	xsi:schemaLocation="
		https://www.springframework.org/schema/beans
		https://www.springframework.org/schema/beans/spring-beans-4.3.xsd">

	<!-- stored job-meta in memory -->
	<!--
	<bean id="jobRepository"
		class="org.springframework.batch.core.repository.support.MapJobRepositoryFactoryBean">
		<property name="transactionManager" ref="transactionManager" />
	</bean>
 	 -->

 	 <!-- stored job-meta in database -->
	<bean id="jobRepository"
		class="org.springframework.batch.core.repository.support.JobRepositoryFactoryBean">
		<property name="dataSource" ref="dataSource" />
		<property name="transactionManager" ref="transactionManager" />
		<property name="databaseType" value="mysql" />
	</bean>

	<bean id="transactionManager"
		class="org.springframework.batch.support.transaction.ResourcelessTransactionManager" />

	<bean id="jobLauncher"
		class="org.springframework.batch.core.launch.support.SimpleJobLauncher">
		<property name="jobRepository" ref="jobRepository" />
	</bean>

</beans>
- jobRepository – JobRepository는 각 Java 객체를 해당하는 메타데이터 테이블에 저장하는 역할을 담당합니다. 스프링 배치에 대한 것입니다.
- transactionManager – 이는 커밋 간격의 크기와 처리된 데이터의 크기가 동일할 때 트랜잭션을 커밋하는 역할을 담당합니다.
- jobLauncher – 이것은 스프링 배치의 핵심입니다. 이 인터페이스에는 작업을 트리거하는 데 사용되는 run 메서드가 포함되어 있습니다.
<beans xmlns="https://www.springframework.org/schema/beans"
	xmlns:jdbc="https://www.springframework.org/schema/jdbc" xmlns:xsi="https://www.w3.org/2001/XMLSchema-instance"
	xsi:schemaLocation="https://www.springframework.org/schema/beans
		https://www.springframework.org/schema/beans/spring-beans-4.3.xsd
		https://www.springframework.org/schema/jdbc
		https://www.springframework.org/schema/jdbc/spring-jdbc-4.3.xsd">

	<!-- connect to database -->
	<bean id="dataSource"
		class="org.springframework.jdbc.datasource.DriverManagerDataSource">
		<property name="driverClassName" value="com.mysql.jdbc.Driver" />
		<property name="url" value="jdbc:mysql://localhost:3306/Test" />
		<property name="username" value="test" />
		<property name="password" value="test123" />
	</bean>

	<bean id="transactionManager"
		class="org.springframework.batch.support.transaction.ResourcelessTransactionManager" />

	<!-- create job-meta tables automatically -->
	<!-- <jdbc:initialize-database data-source="dataSource"> <jdbc:script location="org/springframework/batch/core/schema-drop-mysql.sql"
		/> <jdbc:script location="org/springframework/batch/core/schema-mysql.sql"
		/> </jdbc:initialize-database> -->
</beans>
스프링 배치는 일괄 작업 정보를 저장하기 위해 일부 메타데이터 테이블을 사용합니다. 우리는 스프링 배치 구성에서 이들을 생성할 수 있지만, SQL 파일을 실행하여 수동으로 생성하는 것이 좋습니다. 위의 주석 처리된 코드에서 확인할 수 있습니다. 보안상의 이유로 스프링 배치 데이터베이스 사용자에게 DDL 실행 권한을 부여하지 않는 것이 좋습니다.
스프링 배치 테이블
Spring Batch 테이블은 Java에서 나타내는 도메인 객체와 매우 유사합니다. 예를 들어 – JobInstance, JobExecution, JobParameters 및 StepExecution은 각각 BATCH_JOB_INSTANCE, BATCH_JOB_EXECUTION, BATCH_JOB_EXECUTION_PARAMS 및 BATCH_STEP_EXECUTION에 매핑됩니다. ExecutionContext는 BATCH_JOB_EXECUTION_CONTEXT와 BATCH_STEP_EXECUTION_CONTEXT에 모두 매핑됩니다. JobRepository는 각 자바 객체를 올바른 테이블에 저장하고 저장하는 역할을 담당합니다.  아래는 각 메타데이터 테이블의 세부 정보입니다.
- Batch_job_instance: BATCH_JOB_INSTANCE 테이블은 JobInstance와 관련된 모든 정보를 보유합니다.
- Batch_job_execution_params: BATCH_JOB_EXECUTION_PARAMS 테이블은 JobParameters 객체와 관련된 모든 정보를 보유합니다.
- Batch_job_execution: BATCH_JOB_EXECUTION 테이블은 JobExecution 객체와 관련된 데이터를 보유합니다. Job이 실행될 때마다 새로운 행이 추가됩니다.
- Batch_step_execution: BATCH_STEP_EXECUTION 테이블은 StepExecution 객체와 관련된 모든 정보를 보유합니다.
- Batch_job_execution_context: BATCH_JOB_EXECUTION_CONTEXT 테이블은 Job의 ExecutionContext와 관련된 데이터를 보유합니다. 각 JobExecution마다 정확히 하나의 Job ExecutionContext가 있으며, 해당 작업 실행에 필요한 모든 작업 수준 데이터를 포함합니다. 이 데이터는 일반적으로 작업이 실패한 후에 검색해야하는 상태를 나타냅니다. JobInstance가 실패한 곳부터 다시 시작할 수 있도록 합니다.
- Batch_step_execution_context: BATCH_STEP_EXECUTION_CONTEXT 테이블은 Step의 ExecutionContext와 관련된 데이터를 보유합니다. 각 StepExecution마다 정확히 하나의 ExecutionContext가 있으며, 특정 step 실행에 대해 유지되어야 하는 모든 데이터를 포함합니다. 이 데이터는 일반적으로 실패 후에 검색해야 하는 상태를 나타내며, JobInstance가 실패한 지점부터 다시 시작할 수 있도록 합니다.
- Batch_job_execution_seq: 이 테이블은 작업의 실행 순서 데이터를 보유합니다.
- Batch_step_execution_seq: 이 테이블은 단계 실행의 순서 데이터를 보유합니다.
- Batch_job_seq: 이 테이블은 여러 작업이 있는 경우 작업의 순서 데이터를 보유합니다. 여러 행을 얻게 됩니다.
Spring Batch 테스트 프로그램
Spring Batch 예제 프로젝트가 준비되었습니다. 마지막 단계는 이를 자바 프로그램으로 실행하는 테스트 클래스를 작성하는 것입니다.
package com.journaldev.spring;

import org.springframework.batch.core.Job;
import org.springframework.batch.core.JobExecution;
import org.springframework.batch.core.JobParameters;
import org.springframework.batch.core.JobParametersBuilder;
import org.springframework.batch.core.launch.JobLauncher;
import org.springframework.context.support.ClassPathXmlApplicationContext;

public class App {
	public static void main(String[] args) {

		String[] springConfig = { "spring/batch/jobs/job-batch-demo.xml" };

		ClassPathXmlApplicationContext context = new ClassPathXmlApplicationContext(springConfig);

		JobLauncher jobLauncher = (JobLauncher) context.getBean("jobLauncher");
		Job job = (Job) context.getBean("DemoJobXMLWriter");

		JobParameters jobParameters = new JobParametersBuilder().addLong("time", System.currentTimeMillis())
				.toJobParameters();

		try {

			JobExecution execution = jobLauncher.run(job, jobParameters);
			System.out.println("Exit Status : " + execution.getStatus());

		} catch (Exception e) {
			e.printStackTrace();
		}

		System.out.println("Done");
		context.close();
	}
}
위의 프로그램을 실행하면 아래와 같은 출력 xml을 얻을 수 있습니다.
<?xml version="1.0" encoding="UTF-8"?><report><record id="1001"><dob>2013-07-29T00:00:00+05:30</dob><firstname>TOM</firstname><lastname>MOODY</lastname></record><record id="1002"><dob>2013-07-30T00:00:00+05:30</dob><firstname>JOHN</firstname><lastname>PARKER</lastname></record><record id="1003"><dob>2013-07-31T00:00:00+05:30</dob><firstname>HENRY</firstname><lastname>WILLIAMS</lastname></record></report>
Spring Batch 예제에 대한 모든 내용은 아래 링크에서 최종 프로젝트를 다운로드할 수 있습니다.
참고: 공식 가이드
Source:
https://www.digitalocean.com/community/tutorials/spring-batch-example