


마이크로소프트가 리눅스(일반적으로 “마이크로소프트는 리눅스를 사랑한다”라고 알려진 마이크로소프트 러브즈 리눅스)와 사랑에 빠지고 나서, 파워셀은 원래 윈도우 전용 구성 요소였지만 2016년 8월 18일 오픈소스화되어 리눅스와 맥 OS에서 사용할 수 있게 되었습니다.
파워셀은 마이크로소프트에서 개발한 작업 자동화 및 구성 관리 시스템입니다. 이는 쉘이라고 불리는 명령어 언어 인터프리터와 .NET Framework를 기반으로 한 스크립팅 언어로 구성되어 있습니다.
이는 COM(구성 요소 개체 모델)과 WMI(윈도우 관리 인터페이스)에 완전한 접근을 제공하여 시스템 관리자가 로컬 및 원격 윈도우 시스템 관리 작업을 수행할 수 있게 해줍니다. 또한 WS-Management 및 CIM(공통 정보 모델)을 통해 원격 리눅스 시스템 및 네트워크 장치를 관리할 수 있습니다.
이 프레임워크 아래서 관리 작업은 특정 .NET 클래스인 cmdlets(콤마만드렛이라고 발음)에 의해 기본적으로 수행됩니다.
리눅스에서 셸 스크립트와 유사하게, 사용자는 특정 규칙을 따라 cmdlets 그룹을 파일에 저장하여 스크립트나 실행 가능한 파일을 작성할 수 있습니다. 이러한 스크립트는 독립적인 명령줄 유틸리티 또는 도구로 사용될 수 있습니다.
목차
Linux 시스템에서 PowerShell 설치하기
리눅스에서 PowerShell을 설치하기 위해 가장 인기 있는 리눅스 패키지 관리 도구인 apt-get 또는 apt 그리고 yum 또는 dnf을 통해 설치할 수 있는 공식 마이크로소프트 저장소를 사용할 것입니다.
우분투에서 PowerShell 설치
먼저 공개 저장소 GPG 키를 가져온 다음 Microsoft Ubuntu 저장소를 APT 패키지 소스 목록에 등록하여 Powershell을 설치합니다.
$ sudo apt-get update
$ sudo apt-get install -y wget apt-transport-https software-properties-common
$ wget -q "https://packages.microsoft.com/config/ubuntu/$(lsb_release -rs)/packages-microsoft-prod.deb"
$ sudo dpkg -i packages-microsoft-prod.deb
$ sudo apt-get update
$ sudo apt-get install -y powershell
데비안 11에서 PowerShell 설치
PowerShell은 데비안 배포판 릴리스를 위해 쉽게 설치하고 업데이트할 수 있는 패키지 저장소에 게시되어 있습니다.
$ sudo apt update
$ sudo apt install -y curl gnupg apt-transport-https
$ curl https://packages.microsoft.com/keys/microsoft.asc | sudo apt-key add -
$ sudo sh -c 'echo "deb [arch=amd64] https://packages.microsoft.com/repos/microsoft-debian-bullseye-prod bullseye main" > /etc/apt/sources.list.d/microsoft.list'
$ sudo apt update
$ sudo apt install -y powershell
Debian 10에서 PowerShell 설치하기
$ wget https://packages.microsoft.com/config/debian/10/packages-microsoft-prod.deb
$ sudo dpkg -i packages-microsoft-prod.deb
$ sudo apt-get update
$ sudo apt-get install -y powershell
RHEL 시스템에서 PowerShell 설치하기
PowerShell은 RHEL 기반 배포판 예를 들어 CentOS Stream, Rocky, 그리고 AlmaLinux에 대해 공식 마이크로소프트 저장소에 발행되어 쉬운 설치 및 업데이트를 제공합니다.
---------- On RHEL, CentOS, Rocky & AlmaLinux 9 ----------
$ curl https://packages.microsoft.com/config/rhel/9.0/prod.repo | sudo tee /etc/yum.repos.d/microsoft.repo
$ sudo dnf install --assumeyes powershell

---------- On RHEL, CentOS, Rocky & AlmaLinux 8 ----------
$ curl https://packages.microsoft.com/config/rhel/8/prod.repo | sudo tee /etc/yum.repos.d/microsoft.repo
$ sudo dnf install --assumeyes powershell

---------- On RHEL/CentOS 7 ----------
$ curl https://packages.microsoft.com/config/rhel/7/prod.repo | sudo tee /etc/yum.repos.d/microsoft.repo
$ sudo dnf install --assumeyes powershell
리눅스에서 Powershell 사용하기
이 섹션에서는 Powershell에 대한 간단한 소개를 할 것입니다. Powershell을 시작하는 방법, 기본적인 명령어를 실행하는 방법, 파일, 디렉토리 및 프로세스와 함께 작업하는 방법을 살펴본 후 모든 사용 가능한 명령어를 나열하는 방법, 명령어 도움말 및 별칭을 보여주는 방법에 대해 자세히 살펴볼 것입니다.
Powershell을 시작하려면 다음을 입력하세요:
$ pwsh

PowerShell 7.3.3
PS /root>
Powershell 버전을 확인하려면 아래 명령어를 사용하세요:
PS /root> $PSVersionTable

Name                           Value
----                           -----
PSVersion                      7.3.3
PSEdition                      Core
GitCommitId                    7.3.3
OS                             Linux 5.10.0-9-amd64 #1 SMP Debian 5.10.70-1 (2021-09-30)
Platform                       Unix
PSCompatibleVersions           {1.0, 2.0, 3.0, 4.0…}
PSRemotingProtocolVersion      2.3
SerializationVersion           1.1.0.1
WSManStackVersion              3.0
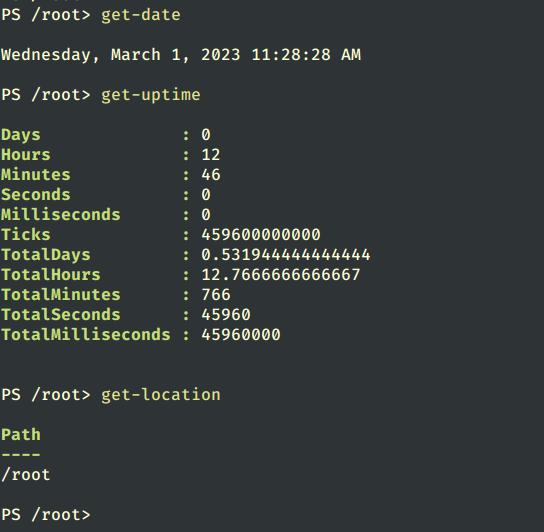
리눅스에서 기본 Powershell 명령어 실행하기.
get-date          [# Display current date]
get-uptime        [# Display server uptime]
get-location      [# Display present working directory]
Powershell에서 파일 및 디렉토리 작업하기
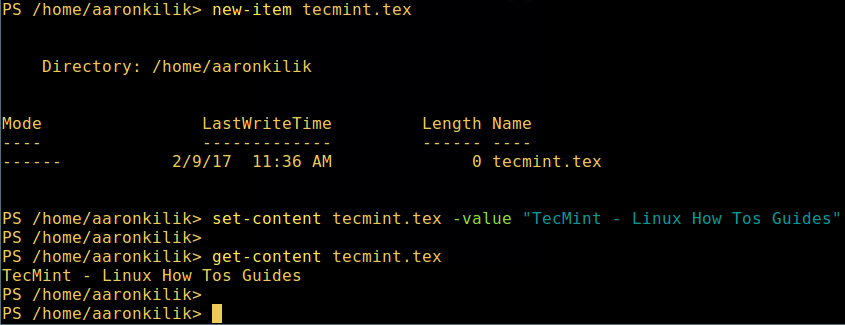
1. 아래 두 가지 방법으로 새로운 빈 파일을 생성하세요:
new-item  tecmint.tex
OR
“”>tecmint.tex
Then add content to it and view the file content.
set-content tecmint.tex -value "TecMint Linux How Tos Guides"
get-content tecmint.tex
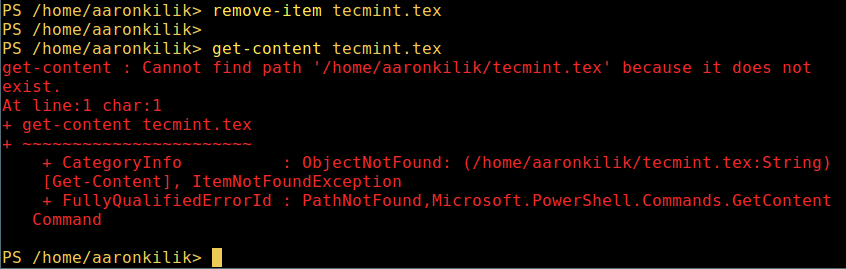
2. PowerShell에서 파일 삭제.
remove-item tecmint.tex
get-content tecmint.tex
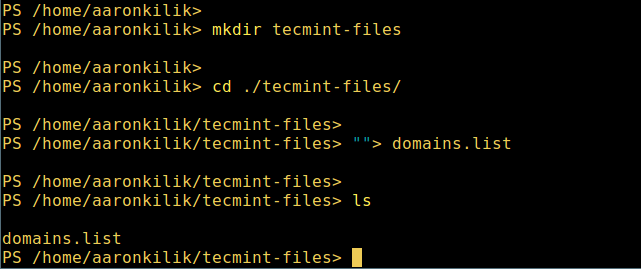
3. 새로운 디렉토리 생성.
mkdir  tecmint-files
cd  tecmint-files
“”>domains.list
ls
4. 상세 목록을 표시하려면, 파일/디렉토리의 상세 정보를 포함한 모드(파일 유형)와 마지막 수정 시간을 표시합니다.
dir

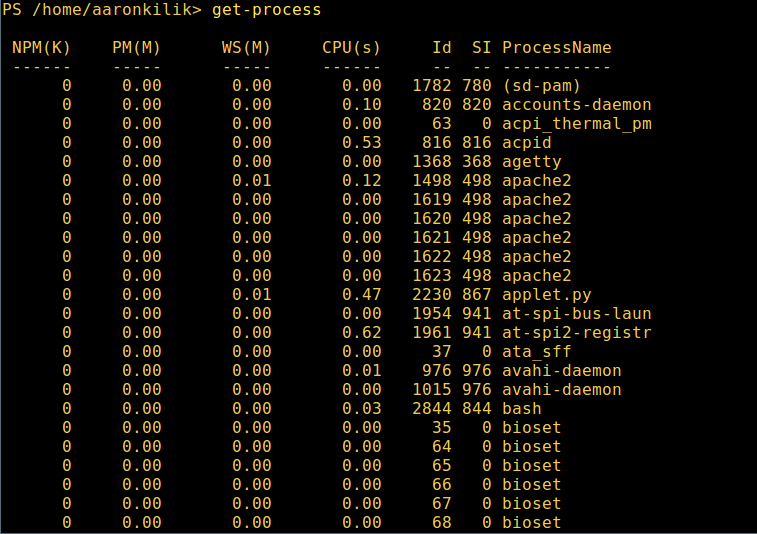
5. 시스템에서 실행 중인 모든 프로세스 보기:
get-process
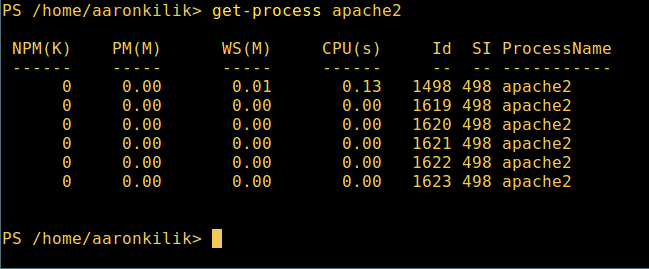
6. 지정된 이름의 단일/그룹 실행 프로세스의 세부 정보를 보려면, 이전 명령에 프로세스 이름을 인수로 제공합니다:
get-process apache2
위 출력에서 단위의 의미:
- NPM(K) – 프로세스가 사용하는 비페이지화된 메모리의 양, 킬로바이트単位.
- PM(K) – 프로세스가 사용하는 페이지화 가능한 메모리의 양, 킬로바이트単位.
- WS(K) – 프로세스의 작업 세트 크기, 킬로바이트単위. 작업 세트는 프로세스가 최근 참조한 메모리 페이지들로 구성됩니다.
- CPU(s) – 프로세스가 모든 프로세서에서 사용한 처리기 시간, 초単위.
- ID – 프로세스 ID (PID).
- ProcessName – 프로세스 이름.
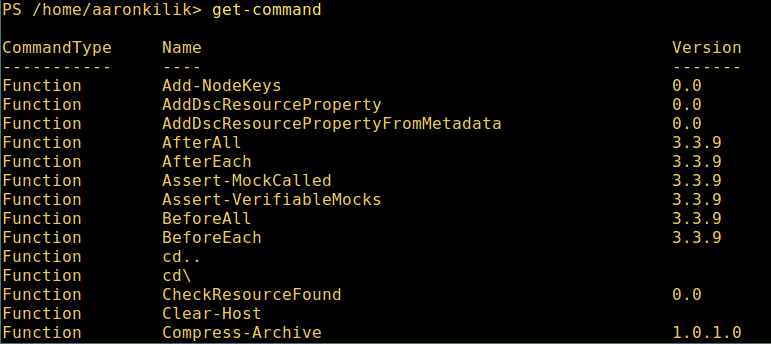
7. 다양한 작업을 위한 모든 PowerShell 명령어 목록을 가져오려면:
get-command
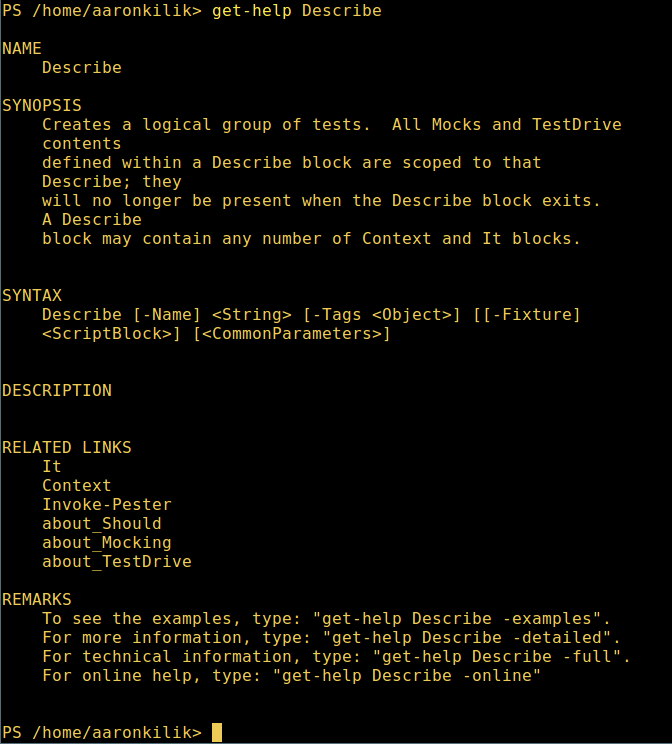
8. 명령어 사용법을 배우려면, 그의 도움말 페이지를 보십시오 (Unix/Linux의 man 페이지와 유사합니다); 이 예에서는 Describe 명령에 대한 도움말을 가져올 수 있습니다:
get-help Describe
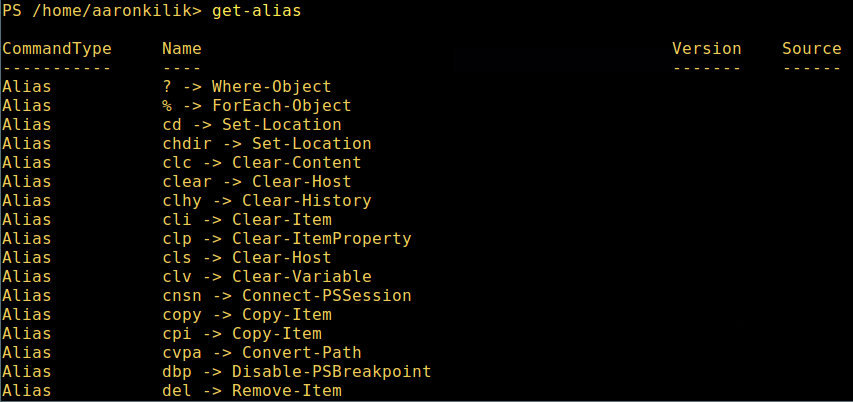
9. 모든 사용 가능한 명령 별칭을 보려면 다음을 입력하세요:
get-alias
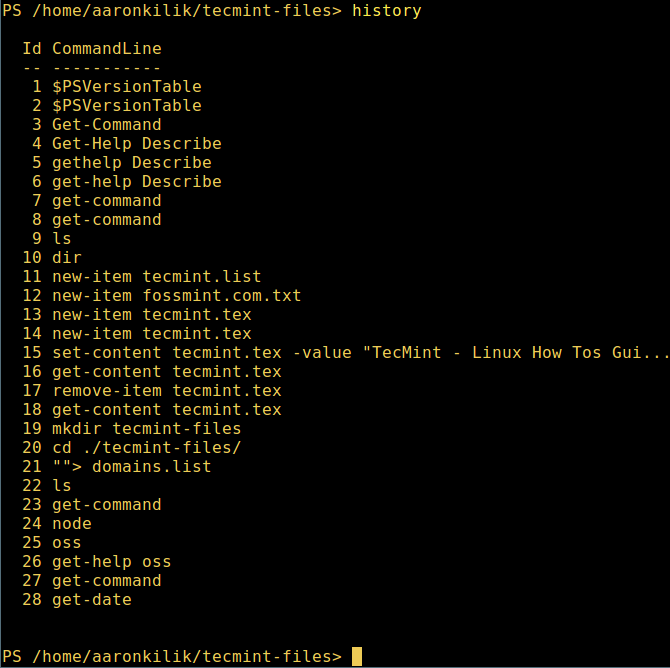
10. 마지막으로, 다음과 같이 명령 기록(이전에 실행한 명령 목록)을 표시합니다:
history
지금까지는 여기까지입니다. 이 기사에서는 Linux에 Microsoft의 Powershell을 설치하는 방법을 보여드렸습니다. 저에게는 Powershell이 명령 줄에서 기계를 작동하기 위해 더 나은, 더 흥미로운 기능을 제공하는 전통적인 Unix/Linux 쉘과 비교해 아주 멀었다고 생각합니다. 또한 프로그래밍(스크립팅) 목적으로도 매우 중요합니다.
Powershell Github 저장소를 방문하세요: https://github.com/PowerShell/PowerShell
하지만 시도해보고 의견을 댓글로 공유해 주십시오.
Source:
https://www.tecmint.com/install-powershell-in-linux/