


이 튜토리얼에서는 Android Intents에 대해 설명하고 Kotlin을 사용하여 응용 프로그램에 구현할 예정입니다.
무엇을 배우게 될까요?
- Intents란 무엇인가요?
- Intents의 종류는 무엇이 있나요?
- 액티비티 간의 Intents 사용하기
- Android Intents를 사용하여 데이터 전송하기
- Parcelable 및 Serializable을 사용하여 객체 전달하기
- 간편한 Intents 만들기
Android Intents
이름에서 알 수 있듯이 Intent는 Android 애플리케이션의 흐름에 따라 일부 동작을 수행하는 데 사용됩니다. Intents는 다음과 같이 사용할 수 있습니다:
- 새로운 액티비티를 시작하고 일부 데이터를 전달합니다.
- 프래그먼트를 시작하거나 프래그먼트 간에 통신합니다.
- 서비스를 시작하거나 종료합니다.
- 방송 수신기에서 액티비티를 시작합니다.
이 튜토리얼에서는 주로 액티비티를 처리하기 위한 Intents를 살펴볼 예정입니다. Intent 정의는 주로 현재 액티비티의 인스턴스로 구성됩니다. 호출할 액티비티의 완전히 정규화된 클래스 이름을 설정합니다. 이 유형의 Intent는 명시적 인텐트입니다. URL, 전화 번호, 위치와 같은 작업을 나타낼 수도 있습니다. 해당 유형의 모든 사용 가능한 애플리케이션을 표시합니다. 이는 암시적 인텐트 범주에 속합니다. Kotlin에서는 다음과 같이 액티비티를 생성할 수 있습니다.
val intent = Intent(this, OtherActivity::class.java)
startActivity(intent)
startActivity는 OtherActivity를 액티비티 스택에 추가하고 시작합니다. 우리 애플리케이션은 어떻게 첫 번째로 호출될 액티비티를 인식합니까? AndroidManifest.xml에서는 인텐트 필터에 android.intent.action.MAIN 동작과 android.intent.category.LAUNCHER 카테고리를 설정하여 애플리케이션이 열릴 때 첫 번째로 시작할 액티비티를 지정합니다. finish()는 액티비티를 종료하고 스택에서 제거하는 데 사용됩니다.
인텐트 플래그
플래그는 인텐트에 설정할 수 있는 옵션과 같습니다. 같은 액티비티를 매번 시작하면 새로운 인스턴스가 생성되고 액티비티 스택에 추가됩니다. 이를 방지하기 위해 다음과 같은 플래그를 사용할 수 있습니다: FLAG_ACTIVITY_SINGLE_TOP – 설정하면 액티비티가 이미 액티비티 스택의 맨 위에서 실행 중인 경우에는 시작되지 않습니다.
intent.flags = Intent.FLAG_ACTIVITY_SINGLE_TOP
마찬가지로 FLAT_ACTIVITY_CLEAR_TOP 플래그를 사용하면 이미 액티비티가 존재하는 경우에는 다른 인스턴스를 시작하지 않습니다. 이 플래그는 호출된 액티비티 위의 모든 액티비티를 지우고 스택의 맨 위에 설정합니다.
인텐트를 통한 데이터 전달
새로운 액티비티로 데이터를 전달하기 위해, 우리는 함수 putExtra, putStringArrayListExtra 등 안에 키-값 쌍을 사용합니다. putExtra는 일반적으로 Int, Float, Char, Double, Boolean, String과 함께 IntArray 등과 같은 기본 타입을 전달합니다.
val intent = Intent(this, OtherActivity::class.java)
intent.putExtra("keyString", "Androidly String data")
이러한 Extra 필드들은 내부적으로 Bundle 객체 안에 감싸져 전달됩니다. 다른 액티비티에서 데이터를 가져오기 위해서는 bundles 위의 extras 속성을 사용해야 합니다. 새로운 액티비티에서 데이터 가져오기
val bundle: Bundle? = intent.extras
val string: String? = intent.getString("keyString")
val myArray: ArrayList<String>? = intent.getStringArrayList("myArray")
intent, extras는 자바에서의 getIntent(), getExtras()와 동일한 역할을 합니다. 데이터가 존재하지 않을 때 NullPointerException을 방지하기 위해 nullable 타입인 Bundle?을 사용했습니다. 마찬가지로, 키를 사용하여 가져온 데이터에 대해서도 잘못된 키일 경우 발생할 수 있는 NPE를 방지하기 위해 nullable 타입을 사용했습니다.
Parcelable과 Serializable 데이터 사용하기
때로는 한 액티비티에서 다른 액티비티로 완전한 객체를 전달해야 할 때가 있습니다. Parcelable 또는 Serializable 인터페이스를 구현하지 않으면 이를 수행할 수 없습니다. Parcelable과 Serializable의 차이점
- Parcelable 인터페이스는 안드로이드 SDK의 일부입니다. Serializable은 자바의 표준 인터페이스입니다.
- Parcelable에서는 전달할 데이터를 Parcel 객체에 설정하고 writeToParcel() 메서드 등을 오버라이드해야합니다. Serializable에서는 인터페이스를 구현하는 것만으로 데이터를 전달하는 데 충분합니다.
- Parcelable은 Serializable보다 빠릅니다.
Parcelable 데이터 보내기
Kotlin은 Parcelable에 데이터를 설정하기 위해 writeToParcel() 메서드를 오버라이드하지 않아도 되는 편리한 어노테이션을 제공합니다. 대신 다음과 같이 @Parcelize 어노테이션을 사용할 수 있습니다:
@Parcelize
data class Student(
        val name: String = "Anupam",
        val age: Int = 24
) : Parcelable
참고: 현재 build.gradle에 다음 코드를 추가해야 @Parcelize 어노테이션이 작동합니다:
android {
    androidExtensions {
        experimental = true
    }
//..
....
}
Activity에서 다음을 수행합니다:
val student = Student()
val intent = Intent(this, OtherActivity::class.java)
intent.putExtra("studentData", student)
startActivity(intent)
Serializable 데이터 보내기
data class Blog(val name: String = "Androidly", val year: Int = 2018) : Serializable

val blog = Blog("a", 1)
val intent = Intent(this, OtherActivity::class.java)
intent.putExtra("blogData", blog as Serializable)
startActivity(intent)
이제 Android Studio 프로젝트에서 위에서 배운 내용을 사용해 봅시다.
프로젝트 구조

레이아웃 코드
<?xml version="1.0" encoding="utf-8"?>
<LinearLayout xmlns:android="http://schemas.android.com/apk/res/android"
    xmlns:tools="http://schemas.android.com/tools"
    android:layout_width="match_parent"
    android:layout_height="match_parent"
    android:gravity="center"
    android:orientation="vertical"
    tools:context=".MainActivity">

    <Button
        android:id="@+id/btnSimpleIntent"
        android:layout_width="wrap_content"
        android:layout_height="wrap_content"
        android:text="SIMPLE INTENT" />


    <Button
        android:id="@+id/btnSimpleIntentAndData"
        android:layout_width="wrap_content"
        android:layout_height="wrap_content"
        android:text="SIMPLE INTENT WITH DATA" />


    <Button
        android:id="@+id/btnParcelableIntent"
        android:layout_width="wrap_content"
        android:layout_height="wrap_content"
        android:text="Parcelable Intent" />


    <Button
        android:id="@+id/btnSerializableIntent"
        android:layout_width="wrap_content"
        android:layout_height="wrap_content"
        android:text="Serializable Intent" />

    <Button
        android:id="@+id/btnBrowserIntent"
        android:layout_width="wrap_content"
        android:layout_height="wrap_content"
        android:text="Browser Intent" />


    <Button
        android:id="@+id/btnMapsIntent"
        android:layout_width="wrap_content"
        android:layout_height="wrap_content"
        android:text="Maps Intent" />


    <Button
        android:id="@+id/btnGenericIntent"
        android:layout_width="wrap_content"
        android:layout_height="wrap_content"
        android:text="Generic Intent" />

</LinearLayout>
activity_main.xml 레이아웃의 코드는 다음과 같습니다:
<?xml version="1.0" encoding="utf-8"?>
<LinearLayout xmlns:android="http://schemas.android.com/apk/res/android"
    xmlns:tools="http://schemas.android.com/tools"
    android:layout_width="match_parent"
    android:layout_height="match_parent"
    android:gravity="center"
    android:orientation="vertical"
    tools:context=".MainActivity">

    <TextView
        android:id="@+id/textView"
        android:layout_width="wrap_content"
        android:layout_height="wrap_content"
        android:text="Intent Data goes here" />


</LinearLayout>
액티비티 코드
MainActivity.kt 클래스의 코드는 다음과 같습니다:
package net.androidly.androidlyintents

import android.app.Activity
import android.content.ComponentName
import android.content.Context
import android.content.Intent
import android.net.Uri
import android.support.v7.app.AppCompatActivity
import android.os.Bundle
import android.os.Parcelable
import android.view.View
import android.widget.Toast
import android.widget.Toast.LENGTH_LONG
import kotlinx.android.parcel.Parcelize
import kotlinx.android.synthetic.main.activity_main.*
import java.io.Serializable


@Parcelize
data class Student(
        val name: String = "Anupam",
        val age: Int = 24
) : Parcelable

data class Blog(val name: String = "Androidly", val year: Int = 2018) : Serializable


class MainActivity : AppCompatActivity(), View.OnClickListener {


    fun Context.gotoClass(targetType: Class<*>) =
            ComponentName(this, targetType)

    fun Context.startActivity(f: Intent.() -> Unit): Unit =
            Intent().apply(f).run(this::startActivity)

    inline fun <reified T : Activity> Context.start(
            noinline createIntent: Intent.() -> Unit = {}
    ) = startActivity {
        component = gotoClass(T::class.java)
        createIntent(this)
    }


    var arrayList = ArrayList<String>()

    override fun onCreate(savedInstanceState: Bundle?) {
        super.onCreate(savedInstanceState)
        setContentView(R.layout.activity_main)
        btnSimpleIntent.setOnClickListener(this)
        btnSimpleIntentAndData.setOnClickListener(this)
        btnParcelableIntent.setOnClickListener(this)
        btnSerializableIntent.setOnClickListener(this)
        btnBrowserIntent.setOnClickListener(this)
        btnMapsIntent.setOnClickListener(this)
        btnGenericIntent.setOnClickListener(this)

        arrayList.add("Androidly")
        arrayList.add("Android")
        arrayList.add("Intents")
    }

    override fun onClick(v: View?) {
        when (v?.id) {
            R.id.btnSimpleIntent -> {
                val intent = Intent(this, OtherActivity::class.java)
                startActivity(intent)
            }
            R.id.btnSimpleIntentAndData -> {
                val intent = Intent(this, OtherActivity::class.java)
                with(intent)
                {
                    putExtra("keyString", "Androidly String data")
                    putStringArrayListExtra("arrayList", arrayList)
                    putExtra("keyBoolean", true)
                    putExtra("keyFloat", 1.2f)
                }
                startActivity(intent)
            }
            R.id.btnParcelableIntent -> {

                val student = Student()
                val intent = Intent(this, OtherActivity::class.java)
                intent.putExtra("studentData", student)
                startActivity(intent)
            }
            R.id.btnSerializableIntent -> {
                val blog = Blog("a", 1)
                val intent = Intent(this, OtherActivity::class.java)
                intent.putExtra("blogData", blog as Serializable)
                startActivity(intent)
            }
            R.id.btnBrowserIntent -> {
                val url = "https://www.androidly.net"
                val uri = Uri.parse(url)
                val intent = Intent(Intent.ACTION_VIEW, uri)

                if (intent.resolveActivity(packageManager) != null) {
                    startActivity(intent)
                } else {
                    Toast.makeText(applicationContext, "No application found", LENGTH_LONG).show()
                }
            }
            R.id.btnMapsIntent -> {
                val loc = "12.9538477,77.3507442"

                val addressUri = Uri.parse("geo:0,0?q=" + loc)
                val intent = Intent(Intent.ACTION_VIEW, addressUri)


                if (intent.resolveActivity(packageManager) != null) {
                    startActivity(intent)
                } else {
                    Toast.makeText(applicationContext, "No application found", LENGTH_LONG).show()
                }
            }
            else -> start<OtherActivity> {
                putExtra("keyString", "Androidly Generic Intent")
            }
        }
    }

}
위의 코드에서는 각 유형의 인텐트에 대해 버튼을 사용했습니다. Kotlin의 with 표현을 사용하여 매번 intent 객체에 데이터를 설정하는 것을 방지했습니다. 또한, 이미 설명한 것과 별개로 세 가지 다른 인텐트를 생성했습니다. 브라우저 인텐트는 인텐트에 있는 URL을 브라우저 앱에서 열기 위해 사용됩니다. 이는 Intent(Intent.ACTION_VIEW, uri)를 사용합니다. 위치 인텐트는 위도, 경도 위치를 맵 애플리케이션에서 열기 위해 사용됩니다. 이 두 가지 모두 암시적 인텐트입니다. 마지막으로, 우리는 일반적인 인텐트를 사용했는데, Kotlin의 확장 함수와 람다 표현식을 사용하여 인텐트를 시작하는 단축 함수를 만들기 위해 사용합니다. 이를 위해 다음 함수들을 사용합니다:
fun Context.gotoClass(targetType: Class<*>) =
            ComponentName(this, targetType)

    fun Context.startActivity(createIntent: Intent.() -> Unit): Unit =
            Intent().apply(createIntent).run(this::startActivity)

    inline fun <reified T : Activity> Context.start(
            noinline createIntent: Intent.() -> Unit = {}
    ) = startActivity {
        component = gotoClass(T::class.java)
        createIntent(this)
    }
startActivity는 매개변수로 고차 함수를 찾는 확장 함수입니다. 이를 통해 몇 줄로도 인텐트를 실행할 수 있습니다: start<OtherActivity> 아래는 OtherActivity.kt 클래스의 코드입니다.
package net.androidly.androidlyintents

import android.content.Context
import android.support.v7.app.AppCompatActivity
import android.os.Bundle
import android.widget.Toast
import kotlinx.android.synthetic.main.activity_other.*

class OtherActivity : AppCompatActivity() {


    override fun onCreate(savedInstanceState: Bundle?) {
        super.onCreate(savedInstanceState)
        setContentView(R.layout.activity_other)

        val bundle: Bundle? = intent.extras

        bundle?.let {

            bundle.apply {
                //데이터가 있는 인텐트
                val string: String? = getString("keyString")
                textView.text = string

                val myArray: ArrayList? = getStringArrayList("myArray")
                showToast(message = "MyArrayList size:${myArray?.size}")

                val arrayList: ArrayList? = getStringArrayList("arrayList")
                showToast(message = "ArrayList size:${arrayList?.size}")

                val float: Float? = bundle.get("keyFloat") as Float?
                var boolean = bundle.get("boolean") as? Boolean

                showToast(message = "Float data is:$float")
                showToast(message = "Boolean data is:$boolean")
                boolean = bundle.get("keyBoolean") as? Boolean
                showToast(message = "Boolean correct key data is:$boolean")

            }


            bundle.apply {
                //Serializable 데이터
                val blog = getSerializable("blogData") as Blog?
                if (blog != null) {
                    textView.text = "Blog name is ${blog?.name}. Year started: ${blog?.year}"

                }
            }

            bundle.apply {
                //Parcelable 데이터
                val student: Student? = getParcelable("studentData")
                if (student != null) {
                    textView.text = "Name is ${student?.name}. Age: ${student?.age}"
                }
            }
        }
    }

    private fun showToast(context: Context = applicationContext, message: String, duration: Int = Toast.LENGTH_SHORT) {
        if (!message.contains("null"))
            Toast.makeText(context, message, duration).show()
    }
}
우리는 nullable 타입을 처리하고 매 줄마다 bundle.field를 하지 않도록하기 위해 let과 apply를 사용했습니다. 위 애플리케이션의 출력은 다음과 같습니다: 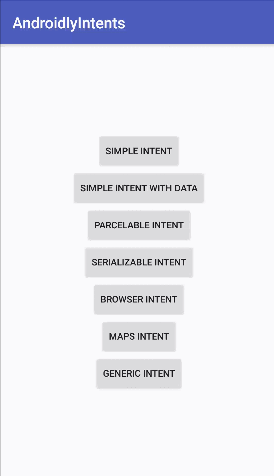 이로써 Kotlin에서 안드로이드 인텐트에 대한 튜토리얼을 마칩니다. 프로젝트는 아래 링크에서 다운로드할 수 있습니다.