


本日は、Spring Securityのロールベースのアクセスと認可の例を見てみましょう。ただし、この投稿を読む前に、「Spring 4 Security MVCログインログアウトの例」という前の投稿を確認して、Spring 4 Securityに関する基本的な知識を得てください。
Spring Securityロール
この投稿では、「USER」、「ADMIN」などのSpring WebアプリケーションでのSpring Securityロールの定義、使用、および管理方法について説明します。前回の投稿と同様に、この投稿の例もSpring 4 MVCセキュリティと「In-Memory Store」、Spring Java Configuration Featureを使用してアプリケーションを開発しています。つまり、web.xmlファイルは使用せず、Spring XML Configurationの一行も記述しません。ユーザーの資格情報を保存および管理するために「In-Memory Store」オプションを使用します。この例の開発にはSpring 4.0.2.RELEASE、Spring STS 3.7 Suite IDE、Spring TC Server 3.1、Java 1.8、およびMavenビルドツールを使用します。
Spring Securityロールベースのアクセス認可の例
- 以下の詳細を持つ「Simple Spring Web Maven」プロジェクトをSpring STS Suiteで作成してください。
プロジェクト名:SpringMVCSecruityMavenRolesApp2。前回の投稿から同じpom.xmlファイルを使用し、以下の変更を加えます。
<artifactId>SpringMVCSecruityMavenRolesApp</artifactId>

<build>
  <finalName>SpringMVCSecruityMavenRolesApp</finalName>
</build>
</project>
- 前回の投稿からすべてのJavaおよびJSPファイルを使用します。ここでは更新されたコンテンツまたは新しく追加されたコンテンツのみを議論します。
- LoginSecurityConfig.javaファイルを更新して、「USER」および「ADMIN」などのユーザーロールを設定します。LoginSecurityConfig.java
package com.journaldev.spring.secuity.config;

import org.springframework.beans.factory.annotation.Autowired;
import org.springframework.context.annotation.Configuration;
import org.springframework.security.config.annotation.authentication.builders.AuthenticationManagerBuilder;
import org.springframework.security.config.annotation.web.builders.HttpSecurity;
import org.springframework.security.config.annotation.web.configuration.EnableWebSecurity;
import org.springframework.security.config.annotation.web.configuration.WebSecurityConfigurerAdapter;

@Configuration
@EnableWebSecurity
public class LoginSecurityConfig extends WebSecurityConfigurerAdapter {

	@Autowired
	public void configureGlobal(AuthenticationManagerBuilder authenticationMgr) throws Exception {
		authenticationMgr.inMemoryAuthentication()
			.withUser("jduser").password("jdu@123").authorities("ROLE_USER")
			.and()
			.withUser("jdadmin").password("jda@123").authorities("ROLE_USER","ROLE_ADMIN");
	}

	@Override
	protected void configure(HttpSecurity http) throws Exception {


		http.authorizeRequests()
			.antMatchers("/homePage").access("hasRole('ROLE_USER') or hasRole('ROLE_ADMIN')")
			.antMatchers("/userPage").access("hasRole('ROLE_USER')")
			.antMatchers("/adminPage").access("hasRole('ROLE_ADMIN')")
			.and()
				.formLogin().loginPage("/loginPage")
				.defaultSuccessUrl("/homePage")
				.failureUrl("/loginPage?error")
				.usernameParameter("username").passwordParameter("password")
			.and()
				.logout().logoutSuccessUrl("/loginPage?logout");

	}
}
コードの説明
- configureGlobal()メソッドには、2つのユーザーが追加されています:1つは「ROLE_USER」ロールを持ち、もう1つは「ROLE_USER」と「ROLE_ADMIN」の両方のロールを持っています。これは、この2番目のユーザーが管理者ユーザーとして機能することを意味します。このようにして、任意の数のユーザーとロールを構成できます。
- アプリケーションでロールを構成するには、authorities(ROLE)またはroles(ROLE)メソッドのいずれかを使用できます。
- authorities()とroles()メソッドの違い:
- authorities()は「ROLE_USER」のような完全なロール名が必要です。
- roles()は「USER」のようなロール名が必要です。これにより、「USER」ロール名に「ROLE_」値が自動的に追加されます。
- configure()メソッドでは、必要なアクセスロールを持つ異なるURLを定義しています。
antMatchers("/homePage")
   .access("hasRole('ROLE_USER') or hasRole('ROLE_ADMIN')")
このコードスニペットは、「/homePage」がUSERとADMINの両方のロールで利用可能であることを設定しています。
 .antMatchers("/userPage").access("hasRole('ROLE_USER')")
 .antMatchers("/adminPage").access("hasRole('ROLE_ADMIN')")
このコードスニペットは、「/userPage」が「USER」ロールのみにアクセス可能であり、.「/adminPage」が「ADMIN」ロールのみにアクセス可能であることを設定しています。他のロールがこれらのページにアクセスすると、「403 アクセスが拒否されました」というエラーメッセージが表示されます。
- LoginController.java
package com.journaldev.spring.web.controller;

import org.springframework.stereotype.Controller;
import org.springframework.web.bind.annotation.RequestMapping;
import org.springframework.web.bind.annotation.RequestMethod;
import org.springframework.web.bind.annotation.RequestParam;
import org.springframework.web.servlet.ModelAndView;

@Controller
public class LoginController {

	@RequestMapping(value = { "/"}, method = RequestMethod.GET)
	public ModelAndView welcomePage() {
		ModelAndView model = new ModelAndView();
		model.setViewName("welcomePage");
		return model;
	}

	@RequestMapping(value = { "/homePage"}, method = RequestMethod.GET)
	public ModelAndView homePage() {
		ModelAndView model = new ModelAndView();
		model.setViewName("homePage");
		return model;
	}

	@RequestMapping(value = {"/userPage"}, method = RequestMethod.GET)
	public ModelAndView userPage() {
		ModelAndView model = new ModelAndView();
		model.setViewName("userPage");
		return model;
	}

	@RequestMapping(value = {"/adminPage"}, method = RequestMethod.GET)
	public ModelAndView adminPage() {
		ModelAndView model = new ModelAndView();
		model.setViewName("adminPage");
		return model;
	}

	@RequestMapping(value = "/loginPage", method = RequestMethod.GET)
	public ModelAndView loginPage(@RequestParam(value = "error",required = false) String error,
	@RequestParam(value = "logout",	required = false) String logout) {

		ModelAndView model = new ModelAndView();
		if (error != null) {
			model.addObject("error", "Invalid Credentials provided.");
		}

		if (logout != null) {
			model.addObject("message", "Logged out from JournalDEV successfully.");
		}

		model.setViewName("loginPage");
		return model;
	}

}
コードの説明以前の投稿例に加えて、以下に示すように2つの新しいURLを追加しました。
-
“/userPage”は、USERロールが通常のユーザー活動をアクセスおよび実行するために使用されます。
-
“/adminPage”は、ADMINロールが管理ユーザーの活動にアクセスして実行するために使用されます。ADMINロールは”/userPage”のURLにもアクセスできます。
-
ユーザーと管理者の役割に固有の活動を提供するために、homePage.jspファイルを更新しました。homePage.jsp
<%@taglib prefix="c" uri="https://java.sun.com/jsp/jstl/core"%>
<a href="${pageContext.request.contextPath}/userPage">JD User</a> | <a href="${pageContext.request.contextPath}/adminPage">JD Admin</a> | <a href="javascript:document.getElementById('logout').submit()">Logout</a>

<h3>Welcome to JournalDEV Tutorials</h3>
<ul>
   <li>Java 8 tutorial</li>
   <li>Spring tutorial</li>
   <li>Gradle tutorial</li>
   <li>BigData tutorial</li>
</ul>

<c:url value="/logout" var="logoutUrl" />
<form id="logout" action="${logoutUrl}" method="post" >
  <input type="hidden" name="${_csrf.parameterName}" value="${_csrf.token}" />
</form>
ここでは、上部フレームに3つのメニューオプションを追加しました。”ログアウト”は以前の投稿で既に説明しました。新しい2つのリンクは次のとおりです:
- JDユーザー:「USER」と「ADMIN」の両方がアクセス可能
- JD管理者:「ADMIN」のみがアクセス可能
注:リアルタイムアプリケーションでは、「JDユーザー」リンクのみを「USER」ロールに表示し、「JD管理者」リンクを非表示にします。このリンクが「USER」ロールによってアクセス可能かどうか、および正確なエラーメッセージを確認するために、このリンクを非表示にしていません。20. 「ADMIN」ロールのホームページとして機能する新しいadminPage.jspファイルを追加します。adminPage.jsp
<%@taglib prefix="c" uri="https://java.sun.com/jsp/jstl/core"%>
<h3>Welcome to JournalDEV Tutorials</h3>
<h3>Admin Page</h3>

<c:url value="/logout" var="logoutUrl" />
<form id="logout" action="${logoutUrl}" method="post" >
  <input type="hidden" name="${_csrf.parameterName}" value="${_csrf.token}" />
</form>
<c:if test="${pageContext.request.userPrincipal.name != null}">
	<a href="javascript:document.getElementById('logout').submit()">Logout</a>
</c:if>
- 新しいuserPage.jsp
<%@taglib prefix="c" uri="https://java.sun.com/jsp/jstl/core"%>
<h3>Welcome to JournalDEV Tutorials</h3>
<h3>User Page</h3>

<c:url value="/logout" var="logoutUrl" />
<form id="logout" action="${logoutUrl}" method="post" >
  <input type="hidden" name="${_csrf.parameterName}" value="${_csrf.token}" />
</form>
<c:if test="${pageContext.request.userPrincipal.name != null}">
	<a href="javascript:document.getElementById('logout').submit()">Logout</a>
</c:if>
「USER」ロールのホームページとして機能するように新しいuserPage.jspファイルを追加します。
Spring Security Rolesのサンプルアプリケーションテスト26. 最終プロジェクト構造は以下のようになります。
- 右クリックして、Spring STS IDEのプロジェクトを選択し、「Run AS >> Run on Server」オプションを選択します。
下記のように、デフォルトのアプリケーションウェルカムページにアクセスします: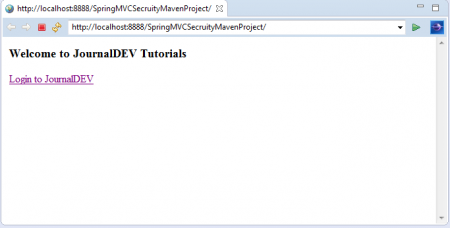 3.「Login to JournalDEV」リンクをクリックします。これでログインページに移動します。
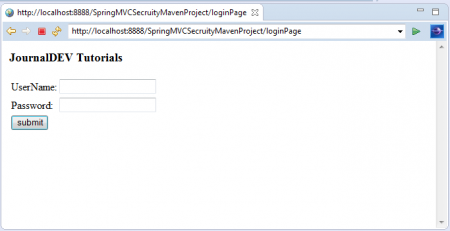 5.最初に、「USER」のロール資格情報でログインします:
ユーザー名:jduser パスワード:jdu@123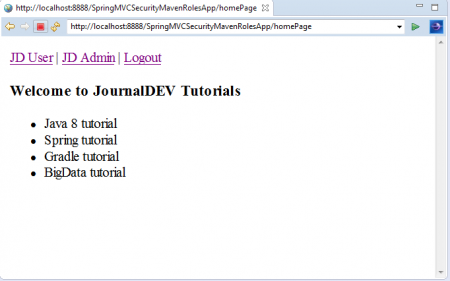 これで、3つのメニューオプションを持つアプリケーションのホームページが表示されます。「JDユーザー」、「JD管理者」、そして「ログアウト」のリンクをクリックします。「USER」のロール資格情報を使用してアプリケーションにログインしているため、以下のようにこのリンクにアクセスできます。
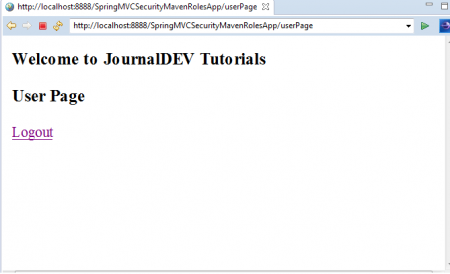 Spring STS IDEでバック矢印を使用し、この時点で「JD管理者」リンクをクリックします。
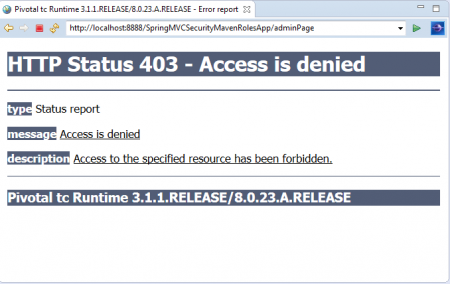 「USER」のロール資格情報でログインしているため、このリンクにアクセスできません。これが、このエラーメッセージが表示される理由です。「403 アクセスが拒否されました」。9.ログアウトし、再度ADMINのロール資格情報でログインします。
ユーザー名:jdadmin パスワード:jda@123 今度は、以下のように「JD管理者」リンクにアクセスできます。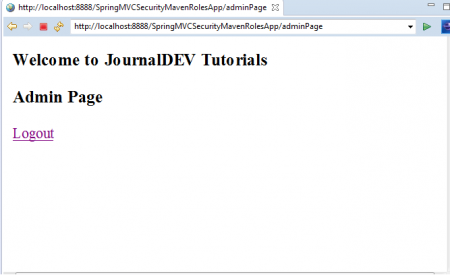 「ログアウト」リンクをテストして、アプリケーションからログアウトします。


{
“error”: “Upstream error…”
}