


Spring Bean Scopesを使用すると、Beanインスタンスの作成をより細かく制御できます。時には、Beanインスタンスをシングルトンとして作成したい場合もありますが、他の場合ではリクエストごとに作成したり、セッションごとに一度だけ作成したりしたい場合もあります。
Spring Bean Scopes
Spring Beanのスコープには5つのタイプがあります:spring beanのスコープは次のとおりです:
- singleton – springコンテナーにはSpring Beanのインスタンスが1つだけ作成されます。これはデフォルトのSpring Beanスコープです。このスコープを使用する際は、Beanが共有インスタンス変数を持っていないことを確認してください。そうしないと、データの不整合の問題が発生する可能性があります。
- prototype – BeanがSpringコンテナーから要求されるたびに新しいインスタンスが作成されます。
- request – これはprototypeスコープと同じですが、Webアプリケーションで使用するように設計されています。HTTPリクエストごとに新しいBeanのインスタンスが作成されます。
- session – Springコンテナーによって、HTTPセッションごとに新しいBeanが作成されます。
- global-session – これはPortletアプリケーションのグローバルセッションBeanを作成するために使用されます。
Spring Bean Singleton と Prototype スコープ
Spring ビーンのシングルトンとプロトタイプのスコープは、独立した Spring アプリケーションで使用できます。このスコープを @Scope アノテーションを使用して簡単に構成する方法を見てみましょう。Java ビーンクラスがあるとします。
package com.journaldev.spring;

public class MyBean {

	public MyBean() {
		System.out.println("MyBean instance created");
	}

}
Spring コンテナから MyBean インスタンスを取得するメソッドを定義する Spring 設定 クラスを定義しましょう。
package com.journaldev.spring;

import org.springframework.context.annotation.Bean;
import org.springframework.context.annotation.Configuration;
import org.springframework.context.annotation.Scope;

@Configuration
public class MyConfiguration {

	@Bean
	@Scope(value="singleton")
    public MyBean myBean() {
		return new MyBean();
	}

}
singleton がデフォルトのスコープであることに注意してください。したがって、上記のビーン定義から @Scope(value="singleton") を削除できます。今度はメインメソッドを作成してシングルトンスコープをテストしてみましょう。
package com.journaldev.spring;

import org.springframework.context.annotation.AnnotationConfigApplicationContext;

public class MySpringApp {

	public static void main(String[] args) {
		AnnotationConfigApplicationContext ctx = new AnnotationConfigApplicationContext();
		ctx.register(MyConfiguration.class);
		ctx.refresh();

		 MyBean mb1 = ctx.getBean(MyBean.class);
		 System.out.println(mb1.hashCode());

		 MyBean mb2 = ctx.getBean(MyBean.class);
		 System.out.println(mb2.hashCode());

		ctx.close();
	}

}
上記のプログラムを実行すると、以下のような出力が得られます。
MyBean instance created
867988177
867988177
両方の MyBean インスタンスが同じハッシュコードを持ち、コンストラクタが一度呼び出されたことに注目してください。これは、Spring コンテナが常に同じ MyBean インスタンスを返していることを意味します。今度はスコープを prototype に変更しましょう。
@Bean
@Scope(value="prototype")
public MyBean myBean() {
	return new MyBean();
}
今度は、メインメソッドを実行すると以下の出力が得られます。
MyBean instance created
867988177
MyBean instance created
443934570
MyBean インスタンスがリクエストされるたびに作成されることが明確です。次に、スコープを request に変更しましょう。
@Bean
@Scope(value="request")
public MyBean myBean() {
	return new MyBean();
}
この場合、以下の例外が発生します。
Exception in thread "main" java.lang.IllegalStateException: No Scope registered for scope name 'request'
	at org.springframework.beans.factory.support.AbstractBeanFactory.doGetBean(AbstractBeanFactory.java:347)
	at org.springframework.beans.factory.support.AbstractBeanFactory.getBean(AbstractBeanFactory.java:224)
	at org.springframework.beans.factory.support.DefaultListableBeanFactory.resolveNamedBean(DefaultListableBeanFactory.java:1015)
	at org.springframework.beans.factory.support.DefaultListableBeanFactory.getBean(DefaultListableBeanFactory.java:339)
	at org.springframework.beans.factory.support.DefaultListableBeanFactory.getBean(DefaultListableBeanFactory.java:334)
	at org.springframework.context.support.AbstractApplicationContext.getBean(AbstractApplicationContext.java:1107)
	at com.journaldev.spring.MySpringApp.main(MySpringApp.java:12)
それは、request、session、およびglobal-sessionスコープがスタンドアロンアプリケーションでは利用できないためです。
Spring Beanのリクエストおよびセッションスコープ
Spring Beanのリクエストおよびセッションスコープの例では、Spring Boot Webアプリケーションを作成します。 Spring Bootスタータープロジェクトを作成し、「web」を選択してWebアプリケーションとして実行できるようにします。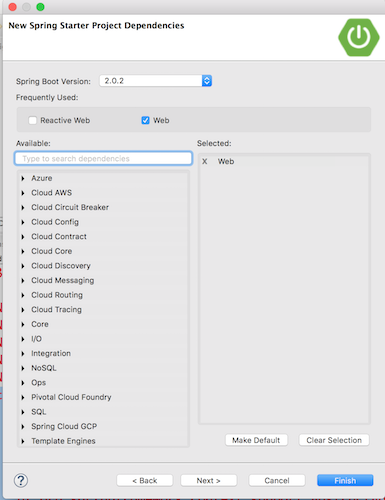 最終的なプロジェクトは以下の画像のようになります。
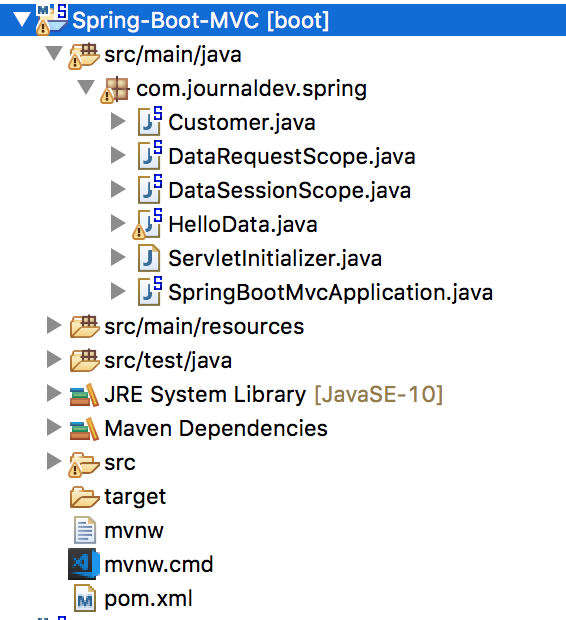
ServletInitializerとSpringBootMvcApplicationは、自動生成されたSpring Bootクラスです。 そこに変更を加える必要はありません。 以下は私のpom.xmlファイルです。 アプリケーションの依存関係に注目してください。 お使いのEclipseバージョンによっては、pom.xmlファイルが若干異なる場合があります。
<?xml version="1.0" encoding="UTF-8"?>
<project xmlns="https://maven.apache.org/POM/4.0.0" xmlns:xsi="https://www.w3.org/2001/XMLSchema-instance"
	xsi:schemaLocation="https://maven.apache.org/POM/4.0.0 https://maven.apache.org/xsd/maven-4.0.0.xsd">
	<modelVersion>4.0.0</modelVersion>

	<groupId>com.journaldev.spring</groupId>
	<artifactId>Spring-Boot-MVC</artifactId>
	<version>0.0.1-SNAPSHOT</version>
	<packaging>war</packaging>

	<name>Spring-Boot-MVC</name>
	<description>Spring Beans Scope MVC</description>

	<parent>
		<groupId>org.springframework.boot</groupId>
		<artifactId>spring-boot-starter-parent</artifactId>
		<version>2.0.2.RELEASE</version>
		<relativePath/> <!-- lookup parent from repository -->
	</parent>

	<properties>
		<project.build.sourceEncoding>UTF-8</project.build.sourceEncoding>
		<project.reporting.outputEncoding>UTF-8</project.reporting.outputEncoding>
		<java.version>10</java.version>
	</properties>

	<dependencies>
		<dependency>
			<groupId>org.springframework.boot</groupId>
			<artifactId>spring-boot-starter-web</artifactId>
		</dependency>

		<dependency>
			<groupId>org.springframework.boot</groupId>
			<artifactId>spring-boot-starter-tomcat</artifactId>
			<scope>provided</scope>
		</dependency>
		<dependency>
			<groupId>org.springframework.boot</groupId>
			<artifactId>spring-boot-starter-test</artifactId>
			<scope>test</scope>
		</dependency>
	</dependencies>

	<build>
		<plugins>
			<plugin>
				<groupId>org.springframework.boot</groupId>
				<artifactId>spring-boot-maven-plugin</artifactId>
			</plugin>
		</plugins>
	</build>


</project>
いくつかのSpringコンポーネントを作成し、それらをスプリングコンテナにrequestおよびsessionのスコープとして構成しましょう。
Spring Beanのリクエストスコープ
package com.journaldev.spring;

import org.springframework.context.annotation.Scope;
import org.springframework.context.annotation.ScopedProxyMode;
import org.springframework.stereotype.Component;

@Component
@Scope(value = "request", proxyMode = ScopedProxyMode.TARGET_CLASS)
public class DataRequestScope {

	private String name = "Request Scope";

	public DataRequestScope() {
		System.out.println("DataRequestScope Constructor Called");
	}

	public String getName() {
		return name;
	}

	public void setName(String name) {
		this.name = name;
	}
}
Spring Bean Session Scope
package com.journaldev.spring;

import org.springframework.context.annotation.Scope;
import java.time.LocalDateTime;
import org.springframework.context.annotation.ScopedProxyMode;
import org.springframework.stereotype.Component;

@Component
@Scope(value = "session", proxyMode = ScopedProxyMode.TARGET_CLASS)
public class DataSessionScope {

	private String name = "Session Scope";

	public DataSessionScope() {
		System.out.println("DataSessionScope Constructor Called at "+LocalDateTime.now());
	}

	public String getName() {
		return name;
	}

	public void setName(String name) {
		this.name = name;
	}
}
Spring Component
さて、Springコンポーネントを作成し、上記のビーンを自動で構成するためにSpringを使用しましょう。
package com.journaldev.spring;

import org.springframework.beans.factory.annotation.Autowired;
import org.springframework.stereotype.Component;

@Component
public class Customer {

	@Autowired
	private DataRequestScope dataRequestScope;

	@Autowired
	private DataSessionScope dataSessionScope;

	public DataRequestScope getDataRequestScope() {
		return dataRequestScope;
	}

	public void setDataRequestScope(DataRequestScope dataRequestScope) {
		this.dataRequestScope = dataRequestScope;
	}

	public DataSessionScope getDataSessionScope() {
		return dataSessionScope;
	}

	public void setDataSessionScope(DataSessionScope dataSessionScope) {
		this.dataSessionScope = dataSessionScope;
	}


}
Spring Rest Controller
最後に、テスト目的でいくつかのAPIエンドポイントを構成するために、RestControllerクラスを作成しましょう。
package com.journaldev.spring;

import org.springframework.beans.factory.annotation.Autowired;
import org.springframework.web.bind.annotation.RequestMapping;
import org.springframework.web.bind.annotation.RestController;

@RestController
public class HelloData {

	@Autowired
	private Customer customer;

	@RequestMapping("/nameRS")
	public String helloRS() {
		return customer.getDataRequestScope().getName();
	}

	@RequestMapping("/nameSSUpdated")
	public String helloSSUpdated() {
		customer.getDataSessionScope().setName("Session Scope Updated");
		return customer.getDataSessionScope().getName();
	}

	@RequestMapping("/nameSS")
	public String helloSS() {
		return customer.getDataSessionScope().getName();
	}
}
Spring Bootセッションタイムアウトの設定
最後に、Spring Bootセッションタイムアウト変数を構成する必要があります。以下のプロパティをsrc/main/resources/application.propertiesに追加してください。
server.session.cookie.max-age= 1
server.session.timeout= 1
これで、セッションスコープのSpringビーンは1分で無効になります。Spring BootアプリケーションとしてSpringBootMvcApplicationクラスを実行してください。構成されたエンドポイントに関する以下の出力が表示されるはずです。
2018-05-23 17:02:25.830  INFO 6921 --- [main] s.w.s.m.m.a.RequestMappingHandlerMapping : Mapped "{[/nameRS]}" onto public java.lang.String com.journaldev.spring.HelloData.helloRS()
2018-05-23 17:02:25.831  INFO 6921 --- [main] s.w.s.m.m.a.RequestMappingHandlerMapping : Mapped "{[/nameSSUpdated]}" onto public java.lang.String com.journaldev.spring.HelloData.helloSSUpdated()
2018-05-23 17:02:25.832  INFO 6921 --- [main] s.w.s.m.m.a.RequestMappingHandlerMapping : Mapped "{[/nameSS]}" onto public java.lang.String com.journaldev.spring.HelloData.helloSS()
Spring Bean Request Scope Test
どのブラウザでも開き、URL https://localhost:8080/nameRS に移動し、コンソール出力を確認してください。各リクエストごとに DataRequestScope Constructor Called が出力されているはずです。
Spring Bean Session Scope Test
Go to https://localhost:8080/nameSS、そして以下の出力が得られます。 今、
今、https://localhost:8080/nameSSUpdated に移動して、DataSessionScope の名前値がSession Scope Updatedに更新されるようにします。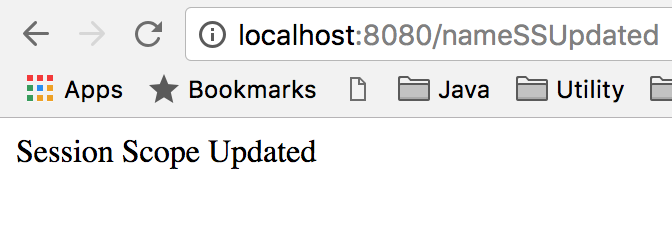 そして再び
そして再びhttps://localhost:8080/nameSSに移動し、更新された値が表示されるはずです。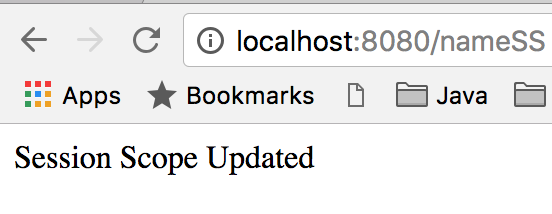 この時点で、コンソール出力に
DataSessionScope Constructor Called at XXXが1回だけ表示されるはずです。今度は1分間待機して、セッションスコープのビーンが無効になるのを待ちます。その後、再びhttps://localhost:8080/nameSSに移動し、元の出力が表示されるはずです。また、コンテナによるDataSessionScopeの再作成のためにコンソールメッセージを確認する必要があります。 これで、Spring Beansのスコープチュートリアルは終了です。
Spring BeansのスコープSpring Bootプロジェクトは、GitHubリポジトリからダウンロードできます。
Source:
https://www.digitalocean.com/community/tutorials/spring-bean-scopes