


今日は、Spring Securityのログイン例について学びます。この記事を読む前に、「Spring 4 Securityの紹介」をご覧ください。基礎知識を得るためです。
Spring Securityのログインとログアウトの例
この記事では、インメモリオプションを使用してログインとログアウトの機能を提供するSpring 4 MVC Security Webアプリケーションを開発します。この例では、Spring Java ConfigとSpringアノテーションを使用します。つまり、web.xmlとSpring XML設定(旧式)は使用しません。Spring 3.x Securityモジュールに慣れていない場合は、まず以下の記事を読んでSpring Securityのレシピを試してみてください。
- in-memory、UserDetailsService、JDBC認証を使用したSpring MVC Securityの例
- DAO、JDBC、インメモリ認証を使用したServlet WebアプリケーションのSpring Security
Spring 4 Securityモジュールでは、以下のオプションをサポートしています:
- インメモリストア
- リレーショナルデータベース(RDBMS)
- NoSQLデータストア
- LDAP
この例では、「In-Memory Store」オプションを使用します。他のオプションについては、今後の投稿で説明します。この例では、Spring 4.0.2.RELEASE、Spring STS 3.7 Suite IDE、Spring TC Server 3.1(Java 1.8)、およびMavenビルドツールを使用して開発します。
Springセキュリティログインの例
この例では、Spring 4セキュリティ機能を使用してログインおよびログアウトのロジックを開発します。このアプリケーションの主な目的は、「web.xml」を使用せず、Spring XML Beansの設定を一行も記述せずにアプリケーションを開発することです。つまり、SpringのJava Config機能とSpringのアノテーションを使用します。以下の機能を持つアプリケーションを開発します:
- ウェルカムページ
- ログインページ
- ホームページ
- ログアウト機能
このSpring 4セキュリティのシンプルなログインの例を開発し、探索するために、以下の手順を使用してください。
- Spring STS Suiteで「Simple Spring Web Maven」プロジェクトを作成します。以下の詳細を使用します。
Project Name : SpringMVCSecruityMavenApp
- pom.xmlを以下の内容で更新します。
<?xml version="1.0" encoding="UTF-8"?>
<project
   xsi:schemaLocation="https://maven.apache.org/POM/4.0.0
   https://maven.apache.org/xsd/maven-4.0.0.xsd"
   xmlns="https://maven.apache.org/POM/4.0.0"
   xmlns:xsi="https://www.w3.org/2001/XMLSchema-instance">

	<modelVersion>4.0.0</modelVersion>
	<groupId>com.journaldev</groupId>
	<artifactId>SpringMVCSecruityMavenApp</artifactId>
	<packaging>war</packaging>
	<version>1.0</version>

	<properties>
	    <java.version>1.8</java.version>
	    <spring.version>4.0.2.RELEASE</spring.version>
	    <spring.security.version>4.0.2.RELEASE</spring.security.version>
	    <servlet.api.version>3.1.0</servlet.api.version>
	    <jsp.api.version>2.2</jsp.api.version>
	    <jstl.version>1.2</jstl.version>
	</properties>

	<dependencies>
		<dependency>
			<groupId>org.springframework</groupId>
			<artifactId>spring-core</artifactId>
			<version>${spring.version}</version>
		</dependency>
		<dependency>
			<groupId>org.springframework</groupId>
			<artifactId>spring-web</artifactId>
			<version>${spring.version}</version>
		</dependency>
		<dependency>
			<groupId>org.springframework</groupId>
			<artifactId>spring-webmvc</artifactId>
			<version>${spring.version}</version>
		</dependency>
		<dependency>
			<groupId>org.springframework.security</groupId>
			<artifactId>spring-security-web</artifactId>
			<version>${spring.security.version}</version>
		</dependency>
		<dependency>
			<groupId>org.springframework.security</groupId>
			<artifactId>spring-security-config</artifactId>
			<version>${spring.security.version}</version>
		</dependency>
		<dependency>
			<groupId>javax.servlet</groupId>
			<artifactId>javax.servlet-api</artifactId>
			<version>${servlet.api.version}</version>
		</dependency>
		<dependency>
			<groupId>javax.servlet.jsp</groupId>
			<artifactId>jsp-api</artifactId>
			<version>${jsp.api.version}</version>
		</dependency>
		<dependency>
			<groupId>jstl</groupId>
			<artifactId>jstl</artifactId>
			<version>${jstl.version}</version>
		</dependency>
	</dependencies>

	<build>
	    <finalName>SpringMVCSecruityMavenApp</finalName>
	    <plugins>
		<plugin>
		     <groupId>org.apache.maven.plugins</groupId>
		     <artifactId>maven-compiler-plugin</artifactId>
		     <version>3.1</version>
		     <configuration>
			<source>${java.version}</source>
			<target>${java.version}</target>
		     </configuration>
		</plugin>
		<plugin>
	           <groupId>org.apache.maven.plugins</groupId>
	           <artifactId>maven-war-plugin</artifactId>
	           <configuration>
	              <failOnMissingWebXml>false</failOnMissingWebXml>
	           </configuration>
        	</plugin>
	    </plugins>
	</build>
</project>
注:「<failOnMissingWebXml>」フラグがわからない場合は、この投稿の最後でその要素の使用方法を理解するために読んでください。まず、Springの@Controllerアノテーションを使用してログインコントローラーを開発します。
LoginController.java
package com.journaldev.spring.web.controller;

import org.springframework.stereotype.Controller;
import org.springframework.web.bind.annotation.RequestMapping;
import org.springframework.web.bind.annotation.RequestMethod;
import org.springframework.web.bind.annotation.RequestParam;
import org.springframework.web.servlet.ModelAndView;

@Controller
public class LoginController {

	@RequestMapping(value = { "/"}, method = RequestMethod.GET)
	public ModelAndView welcomePage() {
		ModelAndView model = new ModelAndView();
		model.setViewName("welcomePage");
		return model;
	}

	@RequestMapping(value = { "/homePage"}, method = RequestMethod.GET)
	public ModelAndView homePage() {
		ModelAndView model = new ModelAndView();
		model.setViewName("homePage");
		return model;
	}

	@RequestMapping(value = "/loginPage", method = RequestMethod.GET)
	public ModelAndView loginPage(@RequestParam(value = "error",required = false) String error,
	@RequestParam(value = "logout",	required = false) String logout) {

		ModelAndView model = new ModelAndView();
		if (error != null) {
			model.addObject("error", "Invalid Credentials provided.");
		}

		if (logout != null) {
			model.addObject("message", "Logged out from JournalDEV successfully.");
		}

		model.setViewName("loginPage");
		return model;
	}

}
コードの説明:- 私たちは “LoginController” で3つのメソッドを定義しており、3つの異なる種類のクライアントリクエストを処理しています。
- welcomePage() は、URI が “/ ” を使用しているすべてのクライアントリクエストを処理します。
- homePage() は、URI が “/homePage” を使用しているすべてのクライアントリクエストを処理します。
- loginPage() は、URI が “/loginPage” を使用しているすべてのクライアントリクエストを処理します。
- loginPage() では、エラーとログアウトメッセージの処理に注意を払っています。
- その後、Spring 4 Security API を使用してログインとログアウトのセキュリティ機能を提供するために “LoginSecurityConfig” クラスを開発します。
LoginSecurityConfig.java
package com.journaldev.spring.secuity.config;

import org.springframework.beans.factory.annotation.Autowired;
import org.springframework.context.annotation.Configuration;
import org.springframework.security.config.annotation.authentication.builders.AuthenticationManagerBuilder;
import org.springframework.security.config.annotation.web.builders.HttpSecurity;
import org.springframework.security.config.annotation.web.configuration.EnableWebSecurity;
import org.springframework.security.config.annotation.web.configuration.WebSecurityConfigurerAdapter;

@Configuration
@EnableWebSecurity
public class LoginSecurityConfig extends WebSecurityConfigurerAdapter {

	@Autowired
	public void configureGlobal(AuthenticationManagerBuilder authenticationMgr) throws Exception {
		authenticationMgr.inMemoryAuthentication()
			.withUser("journaldev")
			.password("jd@123")
			.authorities("ROLE_USER");
	}

	@Override
	protected void configure(HttpSecurity http) throws Exception {
		http.authorizeRequests()
			.antMatchers("/homePage").access("hasRole('ROLE_USER')")
			.and()
				.formLogin().loginPage("/loginPage")
				.defaultSuccessUrl("/homePage")
				.failureUrl("/loginPage?error")
				.usernameParameter("username").passwordParameter("password")
			.and()
				.logout().logoutSuccessUrl("/loginPage?logout");

	}
}
コードの説明:- 私たちは “LoginSecurityConfig” で2つのメソッドを定義しており、ユーザーの資格情報を保存および管理し、ログインとログアウトのセキュリティ機能に注意を払っています。
- @EnableWebSecurity アノテーションは、任意のウェブアプリケーションでウェブセキュリティを有効にするために使用されます。
- @EnableWebMVCSecurityアノテーションは、Spring MVCベースのWebアプリケーションでウェブセキュリティを有効にするために使用されます。
注意:@EnableWebSecurity = @EnableWebMVCSecurity + 追加機能です。そのため、@EnableWebMVCSecurityアノテーションはSpring 4.x Frameworkで非推奨となっています。 - “LoginSecurityConfig”クラスまたはSpring Securityを設定するために指定された他のクラスは、”WebSecurityConfigurerAdapter”クラスを拡張するか、関連するインターフェースを実装する必要があります。
- configureGlobal()メソッドは、ユーザーの資格情報を保存および管理するために使用されます。
- configureGlobal()メソッドでは、authorities()メソッドを使用して「ROLE_USER」のようなアプリケーションのロールを定義することができます。同じ目的でroles()メソッドも使用できます。
- authorities()メソッドは、「ROLE_USER」といった完全なロール名が必要です。roles()メソッドは「USER」といったロール名を使用しますが、この「USER」ロール名に自動的に「ROLE_」の値が追加されます。注意:私たちは、今後の投稿で「USER」、「ADMIN」といったロールをデモンストレーションする別の例を開発します。
- ログインおよびログアウトセキュリティに注意を払うための重要なメソッドはconfigure(HttpSecurity http)です。
- 以下のコードスニペットは、「/homePage」への不正なアクセスを防ぐために使用されます。このページに直接アクセスしようとすると、「/loginPage」ページに自動的にリダイレクトされます。
.antMatchers("/homePage").access("hasRole('ROLE_USER')")
access(「hasRole(’ROLE_USER’)」)メソッド呼び出しを削除すると、アプリケーションにログインせずにこのページにアクセスできます。13. formLogin()およびlogout()メソッドを使用して、ログインおよびログアウトの機能を設定しました。
- Spring MVCの設定を有効にする
LoginApplicationConfig.java
package com.journaldev.spring.secuity.config;

import org.springframework.context.annotation.Bean;
import org.springframework.context.annotation.ComponentScan;
import org.springframework.context.annotation.Configuration;
import org.springframework.context.annotation.Import;
import org.springframework.web.servlet.config.annotation.EnableWebMvc;
import org.springframework.web.servlet.view.InternalResourceViewResolver;
import org.springframework.web.servlet.view.JstlView;

@EnableWebMvc
@Configuration
@ComponentScan({ "com.journaldev.spring.*" })
@Import(value = { LoginSecurityConfig.class })
public class LoginApplicationConfig {
	@Bean
	public InternalResourceViewResolver viewResolver() {
		InternalResourceViewResolver viewResolver = new InternalResourceViewResolver();
		viewResolver.setViewClass(JstlView.class);
		viewResolver.setPrefix("/WEB-INF/views/");
		viewResolver.setSuffix(".jsp");
		return viewResolver;
	}

}
コードの説明:-「LoginApplicationConfig」クラスを使用して、Spring MVCビューリゾルバーを定義し、「web.xml」ファイルを書く必要をなくします。
- @EnableWebMvcアノテーションは、SpringフレームワークでSpring Web MVCアプリケーション機能を有効にするために使用されます。
- @Importアノテーションは、このクラスにSpring Securityの設定クラスをインポートするために使用されます。
- @ComponentScanアノテーションは、指定されたパッケージでコンポーネントスキャンを実行するために使用されます。これは、Spring XMLの「context:component-scan」と同じです。
- Spring Securityの初期化
package com.journaldev.spring.secuity.config.core;

import org.springframework.security.web.context.AbstractSecurityWebApplicationInitializer;

public class SpringSecurityInitializer extends AbstractSecurityWebApplicationInitializer {

}
「SpringSecurityInitializer」は、DelegatingFilterProxyを登録してspringSecurityFilterChainを使用します。これにより、web.xmlファイルにフィルターの設定を記述する必要がありません。- Spring MVCアプリケーションの初期化
「SpringMVCWebAppInitializer」クラスは、アノテーションベースの構成でweb.xmlファイルを使用せずに「DispatcherServlet」を初期化するために使用されます。SpringMVCWebAppInitializer.java
package com.journaldev.spring.secuity.config.core;

import org.springframework.web.servlet.support.AbstractAnnotationConfigDispatcherServletInitializer;
import com.journaldev.spring.secuity.config.LoginApplicationConfig;

public class SpringMVCWebAppInitializer extends AbstractAnnotationConfigDispatcherServletInitializer {

	@Override
	protected Class<?>[] getRootConfigClasses() {
		return new Class[] { LoginApplicationConfig.class };
	}

	@Override
	protected Class<?>[] getServletConfigClasses() {
		return null;
	}

	@Override
	protected String[] getServletMappings() {
		return new String[] { "/" };
	}

}
注:
- 私たちがアプリケーションにアクセスすると、デフォルトでSpringMVCWebAppInitializerのgetServletMappings()によってルートURL「/」にアクセスできます。私たちは別のURLに転送するようにオーバーライドすることができます。
- SpringまたはPivotalチームは、この問題を解決するためにアノテーションの導入により、このような多くのJavaコードを避けるために取り組んでいます。以下を参照してください:https://jira.spring.io/browse/SPR-10359。
- welcomePage.jspファイルを開発する
<h3>Welcome to JournalDEV Tutorials</h3>
<a href="${pageContext.request.contextPath}/loginPage">Login to Journal</a>
- loginPage.jspファイルを開発する
<%@ taglib prefix="c" uri="https://java.sun.com/jsp/jstl/core"%>
<html>
<body onload='document.loginForm.username.focus();'>
	<h3>JournalDEV Tutorials</h3>

	<c:if test="${not empty error}"><div>${error}</div></c:if>
	<c:if test="${not empty message}"><div>${message}</div></c:if>

	<form name='login' action="<c:url value='/loginPage' />" method='POST'>
		<table>
			<tr>
				<td>UserName:</td>
				<td><input type='text' name='username' value=''></td>
			</tr>
			<tr>
				<td>Password:</td>
				<td><input type='password' name='password' /></td>
			</tr>
			<tr>
				<td colspan='2'><input name="submit" type="submit" value="submit" /></td>
			</tr>
		</table>
		<input type="hidden" name="${_csrf.parameterName}" value="${_csrf.token}" />
	</form>
</body>
</html>
- homepage.jspファイルを開発する
<%@taglib prefix="c" uri="https://java.sun.com/jsp/jstl/core"%>
<h3>Welcome to JournalDEV Tutorials</h3>
<ul>
	<li>Java 8 tutorial</li>
	<li>Spring tutorial</li>
	<li>Gradle tutorial</li>
	<li>BigData tutorial</li>
</ul>

<c:url value="/logout" var="logoutUrl" />
<form id="logout" action="${logoutUrl}" method="post" >
  <input type="hidden" name="${_csrf.parameterName}" value="${_csrf.token}" />
</form>
<c:if test="${pageContext.request.userPrincipal.name != null}">
	<a href="javascript:document.getElementById('logout').submit()">Logout</a>
</c:if>
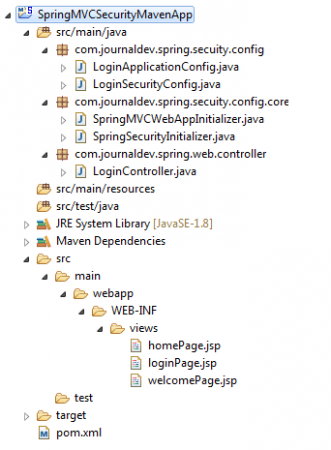
- 最終的なプロジェクト構造は次のようになります:

Spring Security MVCログインログアウトの例を実行する
このSpring Webアプリケーションを実行するには、Spring 4およびJava 8環境をサポートするWebコンテナが必要です。Servlet 3.1.0コンテナで展開および実行します。
- Spring STS SuiteでSpring TC Serverにデプロイして実行します
- 次に示すように、アプリケーションのウェルカムページのURLに自動的にアクセスします。
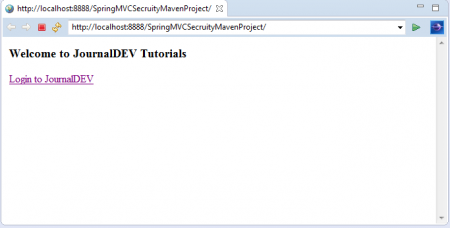 – 「JournalDEVにログイン」リンクをクリックしてログインページにアクセスします。
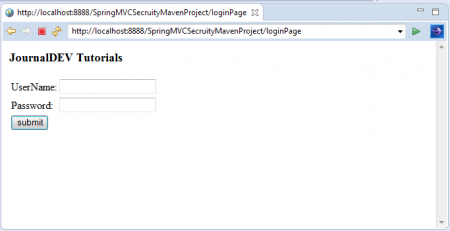 – 今、誤ったログイン詳細を入力し、「ログイン」ボタンをクリックします。
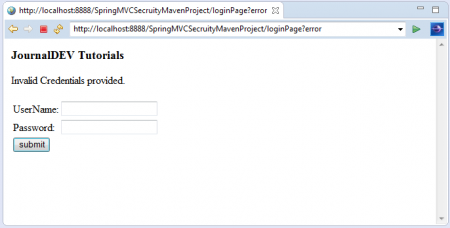 ここで、「無効な資格情報が提供されました」というエラーメッセージが表示されます。-「LoginSecurityConfig」クラスで構成された正しいログイン詳細を入力します。
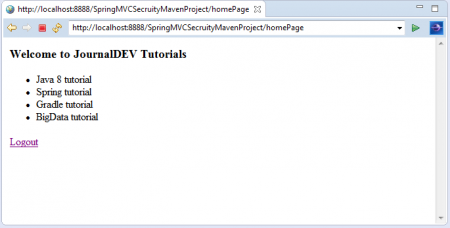 アプリケーションへのログインに成功すると、「ログアウト」リンクがあるアプリケーションのホームページが表示されます。-「ログアウト」リンクをクリックしてアプリケーションからログアウトします。
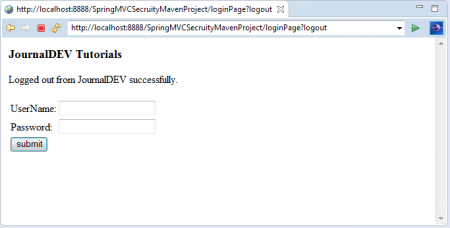 ここで、アプリケーションから正常にログアウトし、再びログインページにリダイレクトされることがわかります。このログインページにはログアウト成功のメッセージが表示されます。


注意:この例を観察すると、web.xmlファイルを使用していません。Webアプリケーションであるため、Mavenはweb.xmlファイルを検索し、アプリケーション内に見つからない場合にいくつかのエラーを表示します。Maven関連の問題を回避するために、pom.xmlファイルに「<failOnMissingWebXml>」フラグを設定する必要があります。これで、Spring 4セキュリティモジュールのシンプルな例については以上です。私は今後の投稿で役立つリアルタイムの例をいくつか開発します。例えば、役割の管理、Remember-Me機能、WebSocketセキュリティなどです。私の投稿が気に入ったり、問題や提案がある場合は、コメントを残してください。
Source:
https://www.digitalocean.com/community/tutorials/spring-4-security-mvc-login-logout-example