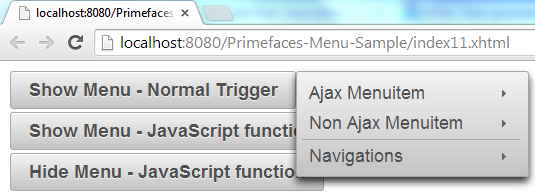
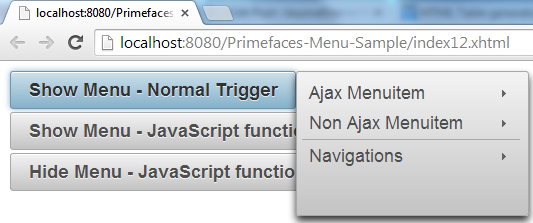
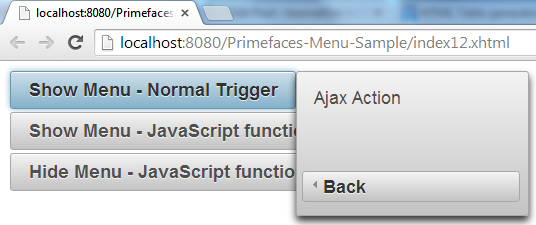
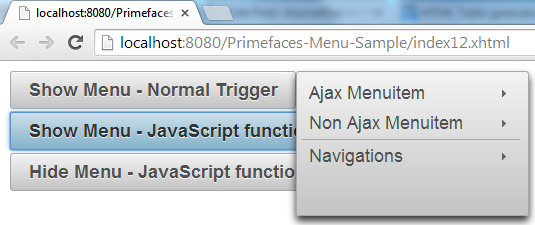
このチュートリアルの主な目的は、Primefacesの実装で使用されるメインメニューコンポーネントをカバーすることです。通常、インターネット上に広がっている多くのアプリケーションでは、異なる形式のメニューが使用されています。このチュートリアルでは、次のタイプのメニューをカバーします:
- メニュー:サブメニューとメニューアイテムを持つナビゲーションコンポーネントです。
- メニューバー:水平なナビゲーションコンポーネントです。
- メニューボタン:ポップアップメニューで異なるコマンドを表示するために使用されます。
- ティアードメニュー:オーバーレイでネストされたサブメニューを表示するために使用されます。
- スライドメニュー:スライドアニメーションでネストされたサブメニューを表示するために使用されます。
これらのメニュータイプのすべての説明を始めましょう。Primefacesがこの種のコンポーネントに提供するすべての機能を確認しましょう。
Primefacesメニュー-基本情報
| Tag | menu |
|---|---|
| Component Class | org.primefaces.component.menu.Menu |
| Component Type | org.primefaces.component.Menu |
| Component Family | org.primefaces.component |
| Renderer Type | org.primefaces.component.MenuRenderer |
| Renderer Class | org.primefaces.component.menu.MenuRenderer |
Primefacesメニュー-属性
| Name | Default | Type | Description |
|---|---|---|---|
| id | null | String | Unique identifier of the component. |
| rendered | true | Boolean | Boolean value to specify the rendering of the component, when set to false component will not be rendered. |
| binding | null | Object | An el expression that maps to a server side UIComponent instance in a backing bean. |
| widgetVar | null | String | Name of the client side widget. |
| model | null | MenuModel | A menu model instance to create menu programmatically. |
| trigger | null | String | Target component to attach the overlay menu. |
| my | null | String | Corner of menu to align with trigger element. |
| at | null | String | Corner of trigger to align with menu element. |
| overlay | false | Boolean | Defines positioning type of menu, either static or overlay. |
| style | null | String | Inline style of the main container element. |
| styleClass | null | String | Style class of the main container element. |
| triggerEvent | click | String | Event to show the dynamic positioned menu. |
Primefaces メニュー – スタートガイド
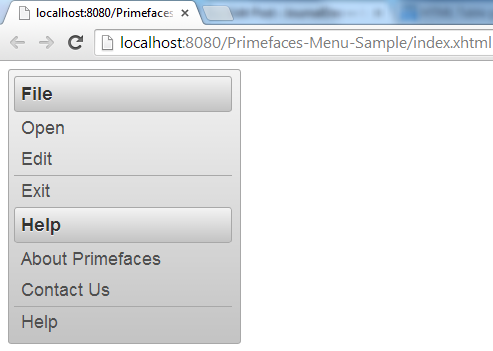
A menu is composed of submenus and menuitems. Submenus are used to group menuitems, while menuitems correspond to those actions required. Following example shows you the most simplest use of Menu component. index.xhtml
<html xmlns="https://www.w3.org/1999/xhtml"
	xmlns:ui="https://java.sun.com/jsf/facelets"
	xmlns:h="https://java.sun.com/jsf/html"
	xmlns:f="https://java.sun.com/jsf/core"
	xmlns:p="https://primefaces.org/ui">
<h:head>
	<script name="jquery/jquery.js" library="primefaces"></script>
</h:head>
<h:form>
	<p:menu>
		<p:submenu label="File">
			<p:menuitem value="Open"></p:menuitem>
			<p:menuitem value="Edit"></p:menuitem>
			<p:separator/>
			<p:menuitem value="Exit"></p:menuitem>
		</p:submenu>
		<p:submenu label="Help">
			<p:menuitem value="About Primefaces"></p:menuitem>
			<p:menuitem value="Contact Us"></p:menuitem>
			<p:separator/>
			<p:menuitem value="Help"></p:menuitem>
		</p:submenu>
	</p:menu>
</h:form>
</html>
Primefaces メニュー – オーバーレイメニュー
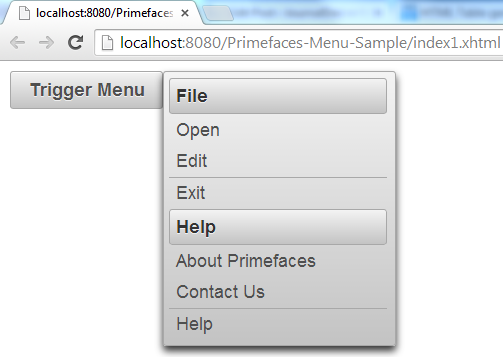
メニューは、静的またはダイナミックの2つの方法で配置できます。静的位置では、メニューは通常のページのフローにあります。対照的に、ダイナミックメニューはページの通常のフローにないため、他の要素をオーバーレイできます。メニューを動的に定義するには、以下の手順を実行する必要があります:
- メニューを通常に定義し、overlay属性をtrueに設定し、メニューのtrigger属性をトリガーアクションのidと関連付けます。
- myおよびatメニューの属性を調整して、メニューをトリガー要素に整列させるメニューのコーナーと、トリガーをメニュー要素に整列させるトリガーのコーナーを指定します。
- left、right、bottom、topのペアは、myおよびat属性に対して受け入れられる唯一の値です。
index1.xhtml
<html xmlns="https://www.w3.org/1999/xhtml"
	xmlns:ui="https://java.sun.com/jsf/facelets"
	xmlns:h="https://java.sun.com/jsf/html"
	xmlns:f="https://java.sun.com/jsf/core"
	xmlns:p="https://primefaces.org/ui">
<h:head>
	<script name="jquery/jquery.js" library="primefaces"></script>
</h:head>
<h:form>
	<p:menu overlay="true" trigger="triggerButton" my="left top" at="right top">
		<p:submenu label="File">
			<p:menuitem value="Open"></p:menuitem>
			<p:menuitem value="Edit"></p:menuitem>
			<p:separator/>
			<p:menuitem value="Exit"></p:menuitem>
		</p:submenu>
		<p:submenu label="Help">
			<p:menuitem value="About Primefaces"></p:menuitem>
			<p:menuitem value="Contact Us"></p:menuitem>
			<p:separator/>
			<p:menuitem value="Help"></p:menuitem>
		</p:submenu>
	</p:menu>
	<p:commandButton id="triggerButton" value="Trigger Menu"></p:commandButton>
</h:form>
</html>
- トリガーメニューアクションがアクティブ化されると、定義したメニューが表示されます。
Primefacesメニュー – Ajaxおよび非Ajaxアクション
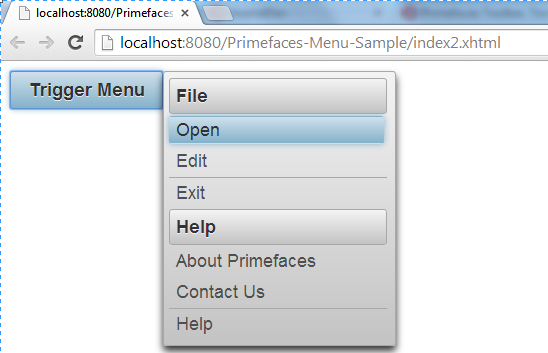
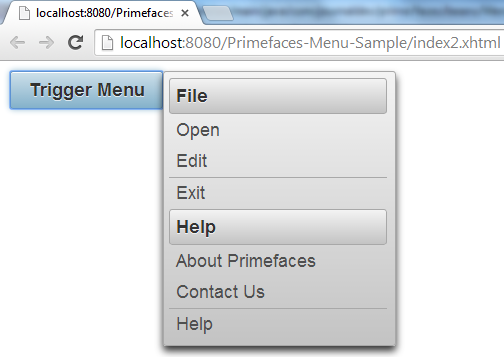
現在、単純な静的メニューとより複雑な動的メニューを開発しました。これらのメニューの両方には、メニューが提供する必要があるアクションに対応するmenuitemsが含まれています。これらのmenuitemsは実際にはp:commandButtonと同様のアクションですので、ajax化することもできます。 index2.xhtml
<html xmlns="https://www.w3.org/1999/xhtml"
	xmlns:ui="https://java.sun.com/jsf/facelets"
	xmlns:h="https://java.sun.com/jsf/html"
	xmlns:f="https://java.sun.com/jsf/core"
	xmlns:p="https://primefaces.org/ui">
<h:head>
	<script name="jquery/jquery.js" library="primefaces"></script>
</h:head>
<h:form>
	<p:growl id="message"></p:growl>
	<p:menu overlay="true" trigger="triggerButton" my="left top" at="right top">
		<p:submenu label="File">
			<p:menuitem value="Open" action="#{menuManagedBean.openAction}" update="message"></p:menuitem>
			<p:menuitem value="Edit"></p:menuitem>
			<p:separator/>
			<p:menuitem value="Exit"></p:menuitem>
		</p:submenu>
		<p:submenu label="Help">
			<p:menuitem value="About Primefaces"></p:menuitem>
			<p:menuitem value="Contact Us"></p:menuitem>
			<p:separator/>
			<p:menuitem value="Help"></p:menuitem>
		</p:submenu>
	</p:menu>
	<p:commandButton id="triggerButton" value="Trigger Menu"></p:commandButton>
</h:form>
</html>
MenuManagedBean.java
package com.journaldev.prime.faces.beans;

import javax.faces.application.FacesMessage;
import javax.faces.bean.ManagedBean;
import javax.faces.bean.SessionScoped;
import javax.faces.context.FacesContext;

@ManagedBean
@SessionScoped
public class MenuManagedBean {
	public String openAction(){
		FacesContext.getCurrentInstance().addMessage(null, new FacesMessage("Open action has activiated asynchrounsly !"));
		return "";
	}
}
Primefacesメニュー – 動的メニュー
メニューはプログラム上でも作成できます。これは、宣言的なアプローチと比べて柔軟性があります。 org.primefaces.model.MenuModel インスタンスを使用して、そのようなメニューを定義できます。 p:submenu、p:menuitem、および p:separator のようなコンポーネントには、プログラム上のメニューを定義するために使用されるデフォルトの実装もあります。次の例では、以前に開発した同じビジネスシナリオを示していますが、今回はメニューがプログラム上でレンダリングされます。 index3.xhtml
<html xmlns="https://www.w3.org/1999/xhtml"
	xmlns:ui="https://java.sun.com/jsf/facelets"
	xmlns:h="https://java.sun.com/jsf/html"
	xmlns:f="https://java.sun.com/jsf/core"
	xmlns:p="https://primefaces.org/ui">
<h:head>
	<script name="jquery/jquery.js" library="primefaces"></script>
</h:head>
<h:form>
	<p:growl id="message"></p:growl>
	<p:menu overlay="true" trigger="triggerButton" my="left top" at="right top" model="#{menuManagedBean.menu}">
	</p:menu>
	<p:commandButton id="triggerButton" value="Trigger Menu"></p:commandButton>
</h:form>
</html>
MenuManagedBean.java
package com.journaldev.prime.faces.beans;

import javax.faces.application.FacesMessage;
import javax.faces.bean.ManagedBean;
import javax.faces.bean.SessionScoped;
import javax.faces.context.FacesContext;

import org.primefaces.model.menu.DefaultMenuItem;
import org.primefaces.model.menu.DefaultMenuModel;
import org.primefaces.model.menu.DefaultSeparator;
import org.primefaces.model.menu.DefaultSubMenu;
import org.primefaces.model.menu.MenuModel;

@ManagedBean
@SessionScoped
public class MenuManagedBean {
	private MenuModel menu = new DefaultMenuModel();

	public MenuManagedBean(){
		// サブメニューを作成する
		DefaultSubMenu file = new DefaultSubMenu("File");
		// サブメニューを作成する
		DefaultSubMenu help = new DefaultSubMenu("Help");
		// メニューアイテムを作成する
		DefaultMenuItem open = new DefaultMenuItem("Open");
		// メニューアイテムを作成する
		DefaultMenuItem edit = new DefaultMenuItem("Edit");
		// メニューアイテムを作成する
		DefaultMenuItem exit = new DefaultMenuItem("Exit");

		// メニューアイテムを作成する
		DefaultMenuItem about = new DefaultMenuItem("About Primefaces");
		// メニューアイテムを作成する
		DefaultMenuItem contact = new DefaultMenuItem("Contact Us");
		// メニューアイテムを作成する
		DefaultMenuItem helpMenuItem = new DefaultMenuItem("Help");

		// メニューアイテムのアクションを決定する
		open.setCommand("#{menuManagedBean.openAction}");

		// メニューアイテムをサブメニューに関連付ける
		file.addElement(open);
		file.addElement(edit);
		file.addElement(new DefaultSeparator());
		file.addElement(exit);

		help.addElement(about);
		help.addElement(contact);
		help.addElement(new DefaultSeparator());
		help.addElement(helpMenuItem);

		// サブメニューをメニューに関連付ける
		menu.addElement(file);
		menu.addElement(help);
	}

	public MenuModel getMenu() {
		return menu;
	}

	public void setMenu(MenuModel menu) {
		this.menu = menu;
	}

	public String openAction(){
		FacesContext.getCurrentInstance().addMessage(null, new FacesMessage("Open action has activiated asynchrounsly !"));
		return "";
	}
}
Primefacesメニューバー – 基本情報
メニューバーは、水平ナビゲーションコンポーネントです。
| Tag | Menubar |
|---|---|
| Component Class | org.primefaces.component.menubar.Menubar |
| Component Type | org.primefaces.component.Menubar |
| Component Family | org.primefaces.component |
| Renderer Type | org.primefaces.component.MenubarRenderer |
| Renderer Class | org.primefaces.component.menubar.MenubarRenderer |
Primefacesメニューバー – 属性
| Name | Default | Type | Description |
|---|---|---|---|
| id | null | String | Unique identifier of the component. |
| rendered | true | Boolean | Boolean value to specify the rendering of the component, when set to false component will not be rendered. |
| binding | null | Object | An el expression that maps to a server side UIComponent instance in a backing bean. |
| widgetVar | null | String | Name of the client side widget |
| model | null | MenuModel | MenuModel instance to create menus |
| programmatically | |||
| style | null | String | Inline style of menubar |
| styleClass | null | String | Style class of menubar |
| autoDisplay | false | Boolean | Defines whether the first level of submenus will be displayed on mouseover or not. When set to false, click event is required to display. |
Primefacesメニューバー – 開始
メニューコンポーネントと同様に、メニューバーには、メニューバーを構成する子としてp:submenuとp:menuitemが必要です。
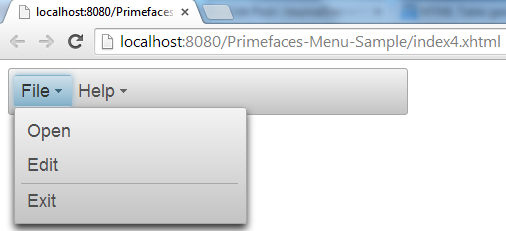

Primefacesメニューバー – ネストされたメニュー
メニューバーはネストされたメニューをサポートしており、これは別の親のサブメニュー内にサブメニューを提供することによって行われます。index5.xhtml
<html xmlns="https://www.w3.org/1999/xhtml"
	xmlns:ui="https://java.sun.com/jsf/facelets"
	xmlns:h="https://java.sun.com/jsf/html"
	xmlns:f="https://java.sun.com/jsf/core"
	xmlns:p="https://primefaces.org/ui">
<h:head>
	<script name="jquery/jquery.js" library="primefaces"></script>
</h:head>
<h:form style="width:400px;">
	<p:menubar>
		<p:submenu label="File">
			<p:submenu label="Open">
				<p:menuitem value="Open Excel File"></p:menuitem>
				<p:menuitem value="Open Word File"></p:menuitem>
				<p:menuitem value="Open Power Point File"></p:menuitem>
			</p:submenu>
			<p:menuitem value="Edit"></p:menuitem>
			<p:separator/>
			<p:menuitem value="Exit"></p:menuitem>
		</p:submenu>
		<p:submenu label="Help">
			<p:menuitem value="About JournalDev"></p:menuitem>
			<p:menuitem value="Contact Us"></p:menuitem>
			<p:separator/>
			<p:menuitem value="Help"></p:menuitem>
		</p:submenu>
	</p:menubar>
</h:form>
</html>
Primefacesメニューバー – ルートメニューアイテム
メニューバーは、ルートメニューアイテムもサポートしています。これは、p:menubar内の直接のp:menuitem子コンポーネントを提供することで実現されます。index6.xhtml
<html xmlns="https://www.w3.org/1999/xhtml"
	xmlns:ui="https://java.sun.com/jsf/facelets"
	xmlns:h="https://java.sun.com/jsf/html"
	xmlns:f="https://java.sun.com/jsf/core"
	xmlns:p="https://primefaces.org/ui">
<h:head>
	<script name="jquery/jquery.js" library="primefaces"></script>
</h:head>
<h:form style="width:400px;">
	<p:menubar>
		<p:menuitem value="Open"></p:menuitem>
	</p:menubar>
</h:form>
</html>
Primefacesメニューバー – Ajaxと非Ajaxアクション
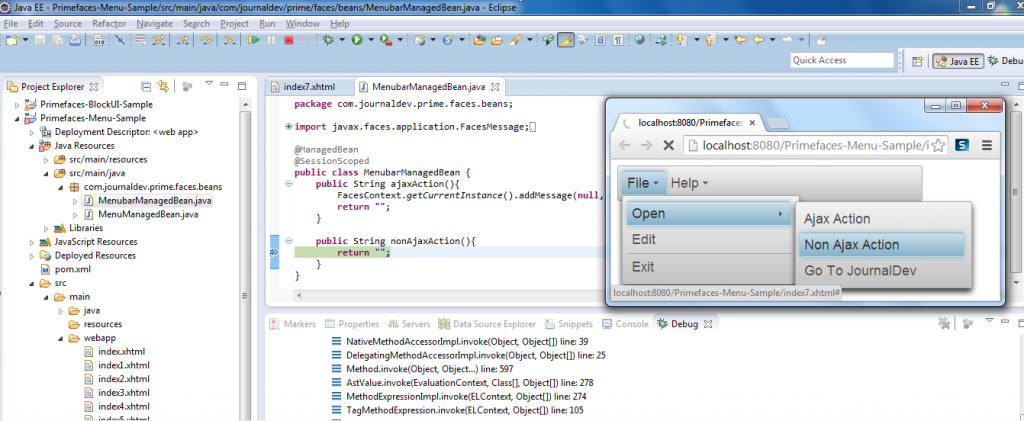
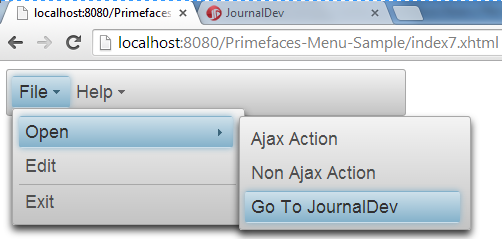
同様に、p:commandButtonコンポーネントのように、p:menuitemもアクションをAjax化することをサポートしています。すでにindex7.xhtml
<html xmlns="https://www.w3.org/1999/xhtml"
	xmlns:ui="https://java.sun.com/jsf/facelets"
	xmlns:h="https://java.sun.com/jsf/html"
	xmlns:f="https://java.sun.com/jsf/core"
	xmlns:p="https://primefaces.org/ui">
<h:head>
	<script name="jquery/jquery.js" library="primefaces"></script>
</h:head>
<h:form style="width:400px;">
<p:growl id="message"></p:growl>
	<p:menubar>
		<p:submenu label="File">
			<p:submenu label="Open">
				<p:menuitem value="Ajax Action" action="#{menubarManagedBean.ajaxAction}" update="message"></p:menuitem>
				<p:menuitem value="Non Ajax Action" action="#{menubarManagedBean.nonAjaxAction}" ajax="false"></p:menuitem>
				<p:menuitem value="Go To JournalDev" url="https://www.journaldev.com"></p:menuitem>
			</p:submenu>
			<p:menuitem value="Edit"></p:menuitem>
			<p:separator/>
			<p:menuitem value="Exit"></p:menuitem>
		</p:submenu>
		<p:submenu label="Help">
			<p:menuitem value="About JournalDev"></p:menuitem>
			<p:menuitem value="Contact Us"></p:menuitem>
			<p:separator/>
			<p:menuitem value="Help"></p:menuitem>
		</p:submenu>
	</p:menubar>
</h:form>
</html>
MenubarManagedBean.java
package com.journaldev.prime.faces.beans;

import javax.faces.application.FacesMessage;
import javax.faces.bean.ManagedBean;
import javax.faces.bean.SessionScoped;
import javax.faces.context.FacesContext;

@ManagedBean
@SessionScoped
public class MenubarManagedBean {
	public String ajaxAction(){
		FacesContext.getCurrentInstance().addMessage(null, new FacesMessage("Ajax Update"));
		return "";
	}

	public String nonAjaxAction(){
		return "";
	}
}
Primefaces Menubar – Dynamic Menus
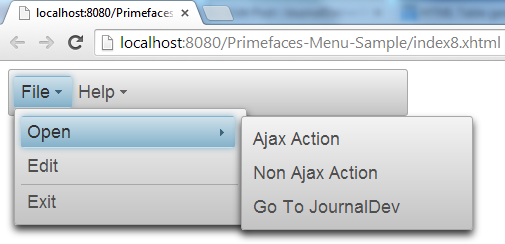
Menubarは、それ自体の動的な作成もサポートしています。Menubarをプログラムで作成し、Ajax、非Ajax、およびURLアクションをAjaxおよび非Ajaxアクションセクションで行ったのと同様に提供できます。 index8.xhtml
<html xmlns="https://www.w3.org/1999/xhtml"
	xmlns:ui="https://java.sun.com/jsf/facelets"
	xmlns:h="https://java.sun.com/jsf/html"
	xmlns:f="https://java.sun.com/jsf/core"
	xmlns:p="https://primefaces.org/ui">
<h:head>
	<script name="jquery/jquery.js" library="primefaces"></script>
</h:head>
<h:form style="width:400px;">
<p:growl id="message"></p:growl>
	<p:menubar model="#{menubarManagedBean.menubar}">
	</p:menubar>
</h:form>
</html>
MenubarManagedBean.java
package com.journaldev.prime.faces.beans;

import javax.faces.application.FacesMessage;
import javax.faces.bean.ManagedBean;
import javax.faces.bean.SessionScoped;
import javax.faces.context.FacesContext;

import org.primefaces.model.menu.DefaultMenuItem;
import org.primefaces.model.menu.DefaultMenuModel;
import org.primefaces.model.menu.DefaultSeparator;
import org.primefaces.model.menu.DefaultSubMenu;
import org.primefaces.model.menu.MenuModel;

@ManagedBean
@SessionScoped
public class MenubarManagedBean {

	private MenuModel menubar = new DefaultMenuModel();

	public MenubarManagedBean(){
		// 必要なサブメニューを作成します
		DefaultSubMenu file = new DefaultSubMenu("File");
		DefaultSubMenu open = new DefaultSubMenu("Open");
		DefaultSubMenu help = new DefaultSubMenu("Help");

		// 必要なメニューアイテムを作成します
		DefaultMenuItem edit = new DefaultMenuItem("Edit");
		DefaultMenuItem exit = new DefaultMenuItem("Exit");

		// 必要なメニューアイテムを作成します
		DefaultMenuItem ajaxAction = new DefaultMenuItem("Ajax Action");
		ajaxAction.setUpdate("message");
		ajaxAction.setCommand("#{menubarManagedBean.ajaxAction}");

		DefaultMenuItem nonAjaxAction = new DefaultMenuItem("Non Ajax Action");
		nonAjaxAction.setAjax(false);
		nonAjaxAction.setCommand("#{menubarManagedBean.nonAjaxAction}");

		DefaultMenuItem urlAction = new DefaultMenuItem("Go To JournalDev");
		urlAction.setUrl("https://www.journaldev.com");

		DefaultMenuItem about = new DefaultMenuItem("About JournalDev");
		DefaultMenuItem contactUs = new DefaultMenuItem("Contact Us");
		DefaultMenuItem helpMenuItem = new DefaultMenuItem("Help");

		// メニューアイテムを開いているサブメニューと関連付けます
		open.addElement(ajaxAction);
		open.addElement(nonAjaxAction);
		open.addElement(urlAction);

		// メニューアイテムをヘルプサブメニューに関連付けます
		help.addElement(about);
		help.addElement(contactUs);
		help.addElement(new DefaultSeparator());
		help.addElement(helpMenuItem);

		// 開いているサブメニューをファイルサブメニューに関連付けます
		file.addElement(open);
		file.addElement(edit);
		file.addElement(new DefaultSeparator());
		file.addElement(exit);

		// サブメニューをメニューバーに関連付けます
		this.menubar.addElement(file);
		this.menubar.addElement(help);

	}

	public MenuModel getMenubar() {
		return menubar;
	}

	public void setMenubar(MenuModel menubar) {
		this.menubar = menubar;
	}

	public String ajaxAction(){
		FacesContext.getCurrentInstance().addMessage(null, new FacesMessage("Ajax Update"));
		return "";
	}

	public String nonAjaxAction(){
		return "";
	}
}
Primefaces MenuButton – Basic Info
MenuButtonは、ポップアップメニューで異なるコマンドを表示します。
| Tag | menuButton |
|---|---|
| Component Class | org.primefaces.component.menubutton.MenuButton |
| Component Type | org.primefaces.component.MenuButton |
| Component Family | org.primefaces.component |
| Renderer Type | org.primefaces.component.MenuButtonRenderer |
| Renderer Class | org.primefaces.component.menubutton.MenuButtonRenderer |
Primefaces MenuButton – Attributes
| Name | Default | Type | Description |
|---|---|---|---|
| id | null | String | Unique identifier of the component. |
| rendered | true | Boolean | Boolean value to specify the rendering of the component, when set to false component will not be rendered. |
| binding | null | Object | An el expression that maps to a server side UIComponent instance in a backing bean. |
| value | null | String | Label of the button |
| style | null | String | Style of the main container element |
| styleClass | null | String | Style class of the main container element |
| widgetVar | null | String | Name of the client side widget |
| model | null | MenuModel | MenuModel instance to create menus programmatically |
| disabled | false | Boolean | Disables or enables the button. |
| iconPos | left | String | Position of the icon, valid values are left and right. |
| appendTo | null | String | Appends the overlay to the element defined by search expression. Defaults to document body. |
Primefaces MenuButton – スタートガイド
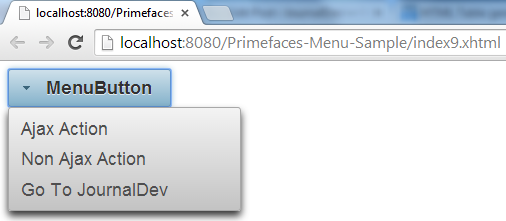
MenuButtonは1つ以上のメニューアイテムで構成されています。定義されるであろうメニューアイテムは、すでに使用されているものと同様の類似点を持っています。Ajax、非Ajax、およびナビゲーションアクションもサポートされています。index9.xhtml
<html xmlns="https://www.w3.org/1999/xhtml"
	xmlns:ui="https://java.sun.com/jsf/facelets"
	xmlns:h="https://java.sun.com/jsf/html"
	xmlns:f="https://java.sun.com/jsf/core"
	xmlns:p="https://primefaces.org/ui">
<h:head>
	<script name="jquery/jquery.js" library="primefaces"></script>
</h:head>
<h:form style="width:400px;">
	<p:growl id="message"></p:growl>
	<p:menuButton value="MenuButton">
		<p:menuitem value="Ajax Action" action="#{menuButtonManagedBean.ajaxAction}" update="message"></p:menuitem>
		<p:menuitem value="Non Ajax Action" action="#{menuButtonManagedBean.nonAjaxAction}" ajax="false"></p:menuitem>
		<p:menuitem value="Go To JournalDev" url="https://www.journaldev.com"></p:menuitem>
	</p:menuButton>
</h:form>
</html>
MenuButtonManagedBean.java
package com.journaldev.prime.faces.beans;

import javax.faces.application.FacesMessage;
import javax.faces.bean.ManagedBean;
import javax.faces.bean.SessionScoped;
import javax.faces.context.FacesContext;

import org.primefaces.model.menu.DefaultMenuItem;
import org.primefaces.model.menu.DefaultMenuModel;
import org.primefaces.model.menu.DefaultSeparator;
import org.primefaces.model.menu.DefaultSubMenu;
import org.primefaces.model.menu.MenuModel;

@ManagedBean(name="menuButtonManagedBean")
@SessionScoped
public class MenuButtonManagedBean {
	private MenuModel menuButton = new DefaultMenuModel();

	public MenuButtonManagedBean(){

	}

	public MenuModel getMenuButton() {
		return menuButton;
	}

	public void setMenuButton(MenuModel menuButton) {
		this.menuButton = menuButton;
	}

	public String ajaxAction(){
		FacesContext.getCurrentInstance().addMessage(null, new FacesMessage("Ajax Update"));
		return "";
	}

	public String nonAjaxAction(){
		return "";
	}
}
Primefaces MenuButton – ダイナミックメニュー
MenuButtonはプログラムで作成することもできます。前のセクションで提供されたMenuButtonの同じ例は、プログラム的な方法論を使用して以下に実装されています。index10.xhtml
<html xmlns="https://www.w3.org/1999/xhtml"
	xmlns:ui="https://java.sun.com/jsf/facelets"
	xmlns:h="https://java.sun.com/jsf/html"
	xmlns:f="https://java.sun.com/jsf/core"
	xmlns:p="https://primefaces.org/ui">
<h:head>
	<script name="jquery/jquery.js" library="primefaces"></script>
</h:head>
<h:form style="width:400px;">
	<p:growl id="message"></p:growl>
	<p:menuButton value="MenuButton" model="#{menuButtonManagedBean.menuButton}">
	</p:menuButton>
</h:form>
</html>
MenuButtonManagedBean.java
package com.journaldev.prime.faces.beans;

import javax.faces.application.FacesMessage;
import javax.faces.bean.ManagedBean;
import javax.faces.bean.SessionScoped;
import javax.faces.context.FacesContext;

import org.primefaces.model.menu.DefaultMenuItem;
import org.primefaces.model.menu.DefaultMenuModel;
import org.primefaces.model.menu.MenuModel;

@ManagedBean(name="menuButtonManagedBean")
@SessionScoped
public class MenuButtonManagedBean {
	private MenuModel menuButton = new DefaultMenuModel();

	public MenuButtonManagedBean(){

		// 必要なメニューアイテムを作成します
		DefaultMenuItem ajaxAction = new DefaultMenuItem("Ajax Action");
		ajaxAction.setUpdate("message");
		ajaxAction.setCommand("#{menubarManagedBean.ajaxAction}");

		DefaultMenuItem nonAjaxAction = new DefaultMenuItem("Non Ajax Action");
		nonAjaxAction.setAjax(false);
		nonAjaxAction.setCommand("#{menubarManagedBean.nonAjaxAction}");

		DefaultMenuItem urlAction = new DefaultMenuItem("Go To JournalDev");
		urlAction.setUrl("https://www.journaldev.com");

		this.menuButton.addElement(ajaxAction);
		this.menuButton.addElement(nonAjaxAction);
		this.menuButton.addElement(urlAction);

	}

	public MenuModel getMenuButton() {
		return menuButton;
	}

	public void setMenuButton(MenuModel menuButton) {
		this.menuButton = menuButton;
	}

	public String ajaxAction(){
		FacesContext.getCurrentInstance().addMessage(null, new FacesMessage("Ajax Update"));
		return "";
	}

	public String nonAjaxAction(){
		return "";
	}
}
Primefaces TieredMenu – 基本情報
TieredMenuは、オーバーレイを使用して入れ子のサブメニューを表示するために使用されます。
| Tag | TieredMenu |
|---|---|
| Component Class | org.primefaces.component.tieredmenu.TieredMenu |
| Component Type | org.primefaces.component.TieredMenu |
| Component Family | org.primefaces.component |
| Renderer Type | org.primefaces.component.TieredMenuRenderer |
| Renderer Class | org.primefaces.component.tieredmenu.TieredMenuRenderer |
Primefaces TieredMenu – 属性
| Name | Default | Type | Description |
|---|---|---|---|
| id | null | String | Unique identifier of the component |
| rendered | true | Boolean | Boolean value to specify the rendering of the component, when set to false component will not be rendered. |
| binding | null | Object | An el expression that maps to a server side UIComponent instance in a backing bean |
| widgetVar | null | String | Name of the client side widget. |
| model | null | MenuModel | MenuModel instance for programmatic menu. |
| style | null | String | Inline style of the component. |
| styleClass | null | String | Style class of the component. |
| autoDisplay | true | Boolean | Defines whether the first level of submenus will be displayed on mouseover or not. When set to false, click event is required to display. |
| trigger | null | String | Id of the component whose triggerEvent will show the dynamic positioned menu. |
| my | null | String | Corner of menu to align with trigger element. |
| at | null | String | Corner of trigger to align with menu element. |
| overlay | false | Boolean | Defines positioning, when enabled menu is displayed with absolute position relative to the trigger. Default is false, meaning static positioning. |
| triggerEvent | click | String | Event name of trigger that will show the dynamic positioned menu. |
Primefaces TieredMenu – 初めての使用
TieredMenuにはサブメニューとメニューアイテムが含まれており、サブメニューはネストされることができ、各ネストされたサブメニューはオーバーレイで表示されます。p:tieredMenuコンポーネント内で使用されるこれらのメニューアイテムは、以前に使用されたすべてのメニューアイテムのように、Ajax、非Ajax、およびナビゲーションアクションの対象となります。次の例は、最も単純なp:tieredMenuの適用例を示しています。混合アクションのセットを含みます。index11.xhtml
<html xmlns="https://www.w3.org/1999/xhtml"
	xmlns:ui="https://java.sun.com/jsf/facelets"
	xmlns:h="https://java.sun.com/jsf/html"
	xmlns:f="https://java.sun.com/jsf/core"
	xmlns:p="https://primefaces.org/ui">
<h:head>
	<script name="jquery/jquery.js" library="primefaces"></script>
</h:head>
<h:form style="width:400px;">
	<p:growl id="message"></p:growl>
	<p:tieredMenu>
		<p:submenu label="Ajax Menuitem">
			<p:menuitem value="Ajax Action" action="#{tieredMenuManagedBean.ajaxAction}" update="message"></p:menuitem>
		</p:submenu>
		<p:submenu label="Non Ajax Menuitem">
			<p:menuitem value="Non Ajax Action" action="#{tieredMenuManagedBean.nonAjaxAction}"></p:menuitem>
		</p:submenu>
		<p:separator/>
		<p:submenu label="Navigations">
			<p:submenu label="Primefaces links">
				<p:menuitem value="Prime" url="https://www.prime.com.tr"></p:menuitem>
				<p:menuitem value="Primefaces" url="https://www.primefaces.org"></p:menuitem>
			</p:submenu>
			<p:submenu label="Prime Blogs">
				<p:menuitem value="JournalDev" url="https://www.journaldev.com"></p:menuitem>
			</p:submenu>
		</p:submenu>
	</p:tieredMenu>
</h:form>
</html>
TieredMenuManagedBean.java
package com.journaldev.prime.faces.beans;

import javax.faces.application.FacesMessage;
import javax.faces.bean.ManagedBean;
import javax.faces.bean.SessionScoped;
import javax.faces.context.FacesContext;

@ManagedBean
@SessionScoped
public class TieredMenuManagedBean {
	public String ajaxAction(){
		FacesContext.getCurrentInstance().addMessage(null, new FacesMessage("Ajax Update"));
		return "";
	}

	public String nonAjaxAction(){
		return "";
	}
}
Primefaces TieredMenu – AutoDisplay
デフォルトでは、ルートメニューアイテムにマウスが重なるとサブメニューが表示されます。 autoDisplay を false に設定すると、自動表示モードを有効にするにはルートメニューアイテムをクリックする必要があります。 同じ例が、p:tieredMenu コンポーネントに対して autoDisplay を false に設定するために使用されます。 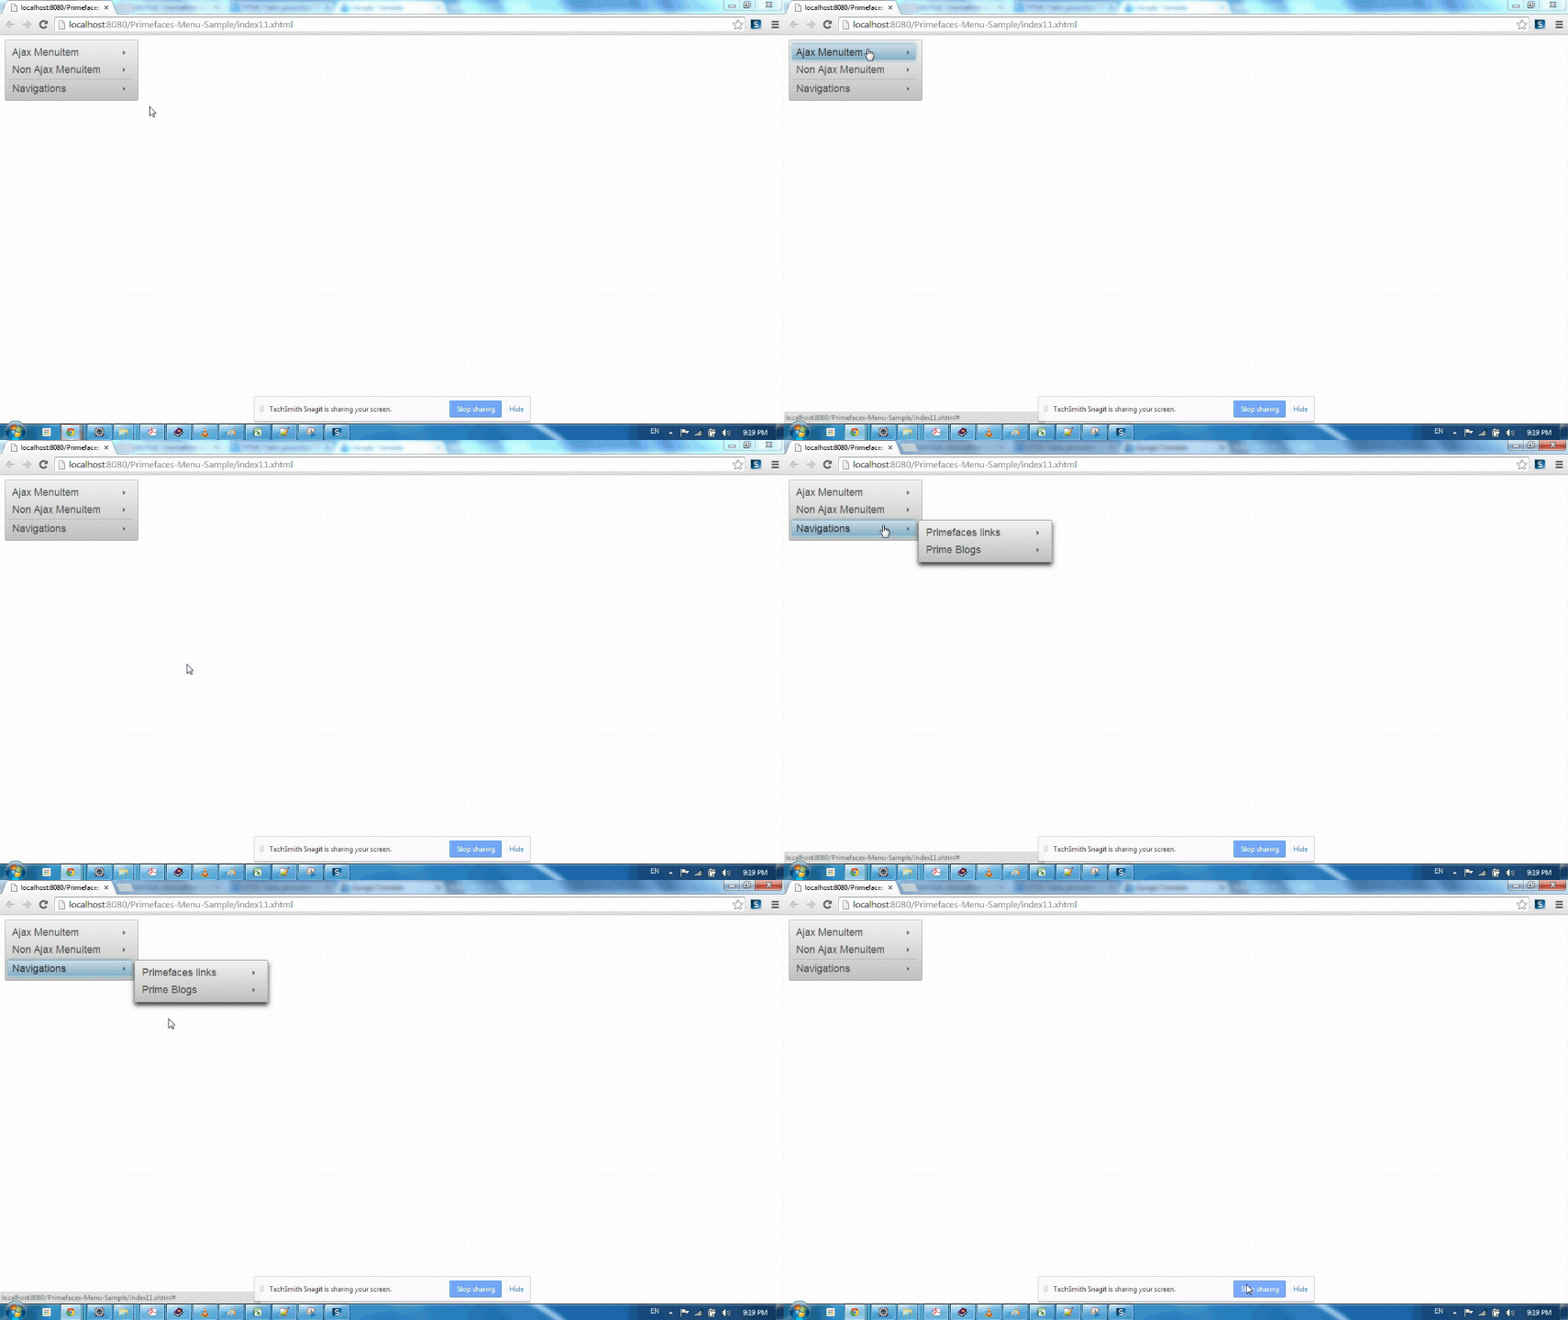
Primefaces TieredMenu – Overlay
同様に、Menu コンポーネントと同じ方法で TieredMenu もオーバーレイできます(Menu オーバーレイを参照)。 index11.xhtml
<html xmlns="https://www.w3.org/1999/xhtml"
	xmlns:ui="https://java.sun.com/jsf/facelets"
	xmlns:h="https://java.sun.com/jsf/html"
	xmlns:f="https://java.sun.com/jsf/core"
	xmlns:p="https://primefaces.org/ui">
<h:head>
	<script name="jquery/jquery.js" library="primefaces"></script>
</h:head>
<h:form style="width:400px;">
	<p:growl id="message"></p:growl>
	<p:tieredMenu autoDisplay="false" trigger="triggerBtn" overlay="true" my="left top" at="right top">
		<p:submenu label="Ajax Menuitem">
			<p:menuitem value="Ajax Action" action="#{tieredMenuManagedBean.ajaxAction}" update="message"></p:menuitem>
		</p:submenu>
		<p:submenu label="Non Ajax Menuitem">
			<p:menuitem value="Non Ajax Action" action="#{tieredMenuManagedBean.nonAjaxAction}"></p:menuitem>
		</p:submenu>
		<p:separator/>
		<p:submenu label="Navigations">
			<p:submenu label="Primefaces links">
				<p:menuitem value="Prime" url="https://www.prime.com.tr"></p:menuitem>
				<p:menuitem value="Primefaces" url="https://www.primefaces.org"></p:menuitem>
			</p:submenu>
			<p:submenu label="Prime Blogs">
				<p:menuitem value="JournalDev" url="https://www.journaldev.com"></p:menuitem>
			</p:submenu>
		</p:submenu>
	</p:tieredMenu>
	<p:commandButton value="Show Menu" id="triggerBtn"></p:commandButton>
</h:form>
</html>
Primefaces TieredMenu – Client Side API
Primefaces のクライアントサイド API を使用して TieredMenu コンポーネントを制御することも可能です。
| Method | Params | Return Type | Description |
|---|---|---|---|
| show() | – | void | Shows overlay menu. |
| hide() | – | void | Hides overlay menu. |
| align() | – | void | Aligns overlay menu with trigger. |
index11.xhtml
<html xmlns="https://www.w3.org/1999/xhtml"
	xmlns:ui="https://java.sun.com/jsf/facelets"
	xmlns:h="https://java.sun.com/jsf/html"
	xmlns:f="https://java.sun.com/jsf/core"
	xmlns:p="https://primefaces.org/ui">
<h:head>
	<script name="jquery/jquery.js" library="primefaces"></script>
	<script>
		function showMenu(){
			PF('tieredMenu').show();
		}
		function hideMenu(){
			PF('tieredMenu').hide();
		}
	</script>
</h:head>
<h:form style="width:400px;">
	<p:growl id="message"></p:growl>
	<p:tieredMenu autoDisplay="false" trigger="triggerBtn" overlay="true" my="left top" at="right top" widgetVar="tieredMenu">
		<p:submenu label="Ajax Menuitem">
			<p:menuitem value="Ajax Action" action="#{tieredMenuManagedBean.ajaxAction}" update="message"></p:menuitem>
		</p:submenu>
		<p:submenu label="Non Ajax Menuitem">
			<p:menuitem value="Non Ajax Action" action="#{tieredMenuManagedBean.nonAjaxAction}"></p:menuitem>
		</p:submenu>
		<p:separator/>
		<p:submenu label="Navigations">
			<p:submenu label="Primefaces links">
				<p:menuitem value="Prime" url="https://www.prime.com.tr"></p:menuitem>
				<p:menuitem value="Primefaces" url="https://www.primefaces.org"></p:menuitem>
			</p:submenu>
			<p:submenu label="Prime Blogs">
				<p:menuitem value="JournalDev" url="https://www.journaldev.com"></p:menuitem>
			</p:submenu>
		</p:submenu>
	</p:tieredMenu>
	<p:commandButton value="Show Menu - Normal Trigger" id="triggerBtn"></p:commandButton>
	<p:commandButton value="Show Menu - JavaScript function" onclick="showMenu()"></p:commandButton>
	<p:commandButton value="Hide Menu - JavaScript function" onclick="hideMenu()"></p:commandButton>
</h:form>
</html>
Primefaces SlideMenu – 基本情報
SlideMenuは、スライドアニメーションを使用してネストされたサブメニューを表示するために使用されます。
| Tag | slideMenu |
|---|---|
| Component Class | org.primefaces.component.slidemenu.SlideMenu |
| Component Type | org.primefaces.component.SlideMenu |
| Component Family | org.primefaces.component |
| Renderer Type | org.primefaces.component.SlideMenuRenderer |
| Renderer Class | org.primefaces.component.slidemenu.SlideMenuRenderer |
Primefaces Slide Menu – 属性
| Name | Default | Type | Description |
|---|---|---|---|
| id | null | String | Unique identifier of the component |
| rendered | true | Boolean | Boolean value to specify the rendering of the component, when set to false component will not be rendered. |
| binding | null | Object | An el expression that maps to a server side UIComponent instance in a backing bean |
| widgetVar | null | String | Name of the client side widget. |
| model | null | MenuModel | MenuModel instance for programmatic menu. |
| style | null | String | Inline style of the component. |
| styleClass | null | String | Style class of the component. |
| backLabel | Back | String | Text for back link. |
| trigger | null | String | Id of the component whose triggerEvent will show the dynamic positioned menu. |
| my | null | String | Corner of menu to align with trigger element. |
| at | null | String | Corner of trigger to align with menu element. |
| overlay | false | Boolean | Defines positioning, when enabled menu is displayed with absolute position relative to the trigger. Default is false, meaning static positioning. |
| triggerEvent | click | String | Event name of trigger that will show the dynamic positioned menu. |
Primefaces Slide Menu – 開始方法 – オーバーレイ&クライアントサイドAPI
SlideMenuにはサブメニューとメニューアイテムが含まれており、サブメニューはネストされることができ、各ネストされたサブメニューはスライドアニメーションで表示されます。 SlideMenuの機能は、前のセクションで説明されたTieredMenuに定義されているものと類似しています。 index12.xhtml
<html xmlns="https://www.w3.org/1999/xhtml"
	xmlns:ui="https://java.sun.com/jsf/facelets"
	xmlns:h="https://java.sun.com/jsf/html"
	xmlns:f="https://java.sun.com/jsf/core"
	xmlns:p="https://primefaces.org/ui">
<h:head>
	<script name="jquery/jquery.js" library="primefaces"></script>
	<script>
		function showMenu(){
			PF('tieredMenu').show();
		}
		function hideMenu(){
			PF('tieredMenu').hide();
		}
	</script>
</h:head>
<h:form style="width:400px;">
	<p:growl id="message"></p:growl>
	<p:slideMenu autoDisplay="false" trigger="triggerBtn" overlay="true" my="left top" at="right top" widgetVar="tieredMenu">
		<p:submenu label="Ajax Menuitem">
			<p:menuitem value="Ajax Action" action="#{slideMenuManagedBean.ajaxAction}" update="message"></p:menuitem>
		</p:submenu>
		<p:submenu label="Non Ajax Menuitem">
			<p:menuitem value="Non Ajax Action" action="#{slideMenuManagedBean.nonAjaxAction}"></p:menuitem>
		</p:submenu>
		<p:separator/>
		<p:submenu label="Navigations">
			<p:submenu label="Primefaces links">
				<p:menuitem value="Prime" url="https://www.prime.com.tr"></p:menuitem>
				<p:menuitem value="Primefaces" url="https://www.primefaces.org"></p:menuitem>
			</p:submenu>
			<p:submenu label="Prime Blogs">
				<p:menuitem value="JournalDev" url="https://www.journaldev.com"></p:menuitem>
			</p:submenu>
		</p:submenu>
	</p:slideMenu>
	<p:commandButton value="Show Menu - Normal Trigger" id="triggerBtn"></p:commandButton>
	<p:commandButton value="Show Menu - JavaScript function" onclick="showMenu()"></p:commandButton>
	<p:commandButton value="Hide Menu - JavaScript function" onclick="hideMenu()"></p:commandButton>
</h:form>
</html>
SlideMenuManagedBean.java
package com.journaldev.prime.faces.beans;

import javax.faces.application.FacesMessage;
import javax.faces.bean.ManagedBean;
import javax.faces.bean.SessionScoped;
import javax.faces.context.FacesContext;

@ManagedBean
@SessionScoped
public class SlideMenuManagedBean {
	public String ajaxAction(){
		FacesContext.getCurrentInstance().addMessage(null, new FacesMessage("Ajax Update"));
		return "";
	}

	public String nonAjaxAction(){
		return "";
	}
}
サマリー
Primefacesは、開発者が選択できる興味深いコレクションの前に開発者を置く多くのPrimefacesのUIメニューコンポーネントを提供しています。このチュートリアルは、これらのメニュータイプの一部を明確にすることを意図しています。以下にコメントして貢献し、このチュートリアルのソースコードを見つけてください。


