


L’annotazione Controller di Spring è una specializzazione dell’annotazione @Component. L’annotazione Controller di Spring viene tipicamente utilizzata in combinazione con i metodi handler annotati basati sull’annotazione RequestMapping.
L’annotazione Controller di Spring
L’annotazione Controller di Spring può essere applicata solo alle classi. Viene utilizzata per contrassegnare una classe come gestore delle richieste web. Viene utilizzata principalmente con applicazioni Spring MVC.
RestController di Spring
Il RestController di Spring è un’annotazione di comodità che è a sua volta annotata con @Controller e @ResponseBody. Questa annotazione viene utilizzata per contrassegnare una classe come gestore delle richieste per i servizi web RESTful.
Esempio di controller Spring
Creiamo una semplice applicazione Spring in cui implementeremo un controller MVC standard e un controller REST. Crea un “Dynamic Web Project” in Eclipse e poi convertilo in un progetto Maven. Questo ci fornirà una struttura di applicazione web basata su Maven e potremo costruire la nostra applicazione su di essa. L’immagine qui sotto mostra la struttura finale del nostro progetto di applicazione Spring MVC. 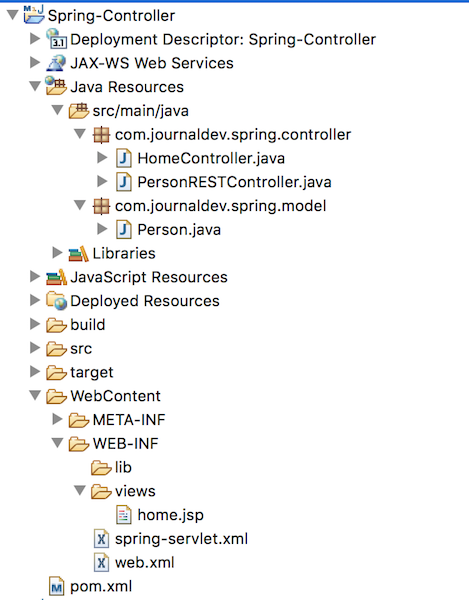 Avremo bisogno delle seguenti dipendenze per la nostra applicazione.
<dependency>
	<groupId>org.springframework</groupId>
	<artifactId>spring-webmvc</artifactId>
	<version>5.0.7.RELEASE</version>
</dependency>
<dependency>
	<groupId>org.springframework</groupId>
	<artifactId>spring-web</artifactId>
	<version>5.0.7.RELEASE</version>
</dependency>

<!-- Jackson for REST -->
<dependency>
	<groupId>com.fasterxml.jackson.core</groupId>
	<artifactId>jackson-databind</artifactId>
	<version>2.9.6</version>
</dependency>
Esaminiamo il descrittore di distribuzione (web.xml) dove configureremo la servlet DispatcherServlet come controller front-end.
<?xml version="1.0" encoding="UTF-8"?>
<web-app xmlns:xsi="https://www.w3.org/2001/XMLSchema-instance" xmlns="https://xmlns.jcp.org/xml/ns/javaee"
 xsi:schemaLocation="https://xmlns.jcp.org/xml/ns/javaee https://xmlns.jcp.org/xml/ns/javaee/web-app_3_1.xsd" id="WebApp_ID" version="3.1">
  <display-name>Spring-Controller</display-name>
  <!-- Add Spring MVC DispatcherServlet as front controller -->
	<servlet>
        <servlet-name>spring</servlet-name>
        <servlet-class>
                org.springframework.web.servlet.DispatcherServlet
        </servlet-class>
        <init-param>
       		<param-name>contextConfigLocation</param-name>
       		<param-value>/WEB-INF/spring-servlet.xml</param-value>
    		</init-param>
        <load-on-startup>1</load-on-startup>
    </servlet>

    <servlet-mapping>
        <servlet-name>spring</servlet-name>
        <url-pattern>/</url-pattern>
    </servlet-mapping>
</web-app>
Infine, abbiamo il seguente file di contesto Spring. Qui stiamo configurando la nostra applicazione in base alle annotazioni e forniamo il pacchetto radice per la scansione dei componenti Spring. Stiamo anche configurando il bean InternalResourceViewResolver e forniamo i dettagli delle pagine di visualizzazione.
<?xml version="1.0" encoding="UTF-8"?>
<beans:beans xmlns="https://www.springframework.org/schema/mvc"
	xmlns:xsi="https://www.w3.org/2001/XMLSchema-instance" xmlns:beans="https://www.springframework.org/schema/beans"
	xmlns:context="https://www.springframework.org/schema/context"
	xsi:schemaLocation="https://www.springframework.org/schema/mvc https://www.springframework.org/schema/mvc/spring-mvc.xsd
		https://www.springframework.org/schema/beans https://www.springframework.org/schema/beans/spring-beans.xsd
		https://www.springframework.org/schema/context https://www.springframework.org/schema/context/spring-context.xsd">

	<!-- Enables the Spring MVC @Controller programming model -->
	<annotation-driven />

	<context:component-scan base-package="com.journaldev.spring" />

	<!-- Resolves views selected for rendering by @Controllers to JSP resources
		in the /WEB-INF/views directory -->
	<beans:bean
		class="org.springframework.web.servlet.view.InternalResourceViewResolver">
		<beans:property name="prefix" value="/WEB-INF/views/" />
		<beans:property name="suffix" value=".jsp" />
	</beans:bean>

</beans:beans>
I nostri file di configurazione XML sono pronti, passiamo ora alla classe Controller.
package com.journaldev.spring.controller;

import java.text.DateFormat;
import java.util.Date;
import java.util.Locale;

import org.springframework.stereotype.Controller;
import org.springframework.ui.Model;
import org.springframework.web.bind.annotation.GetMapping;

@Controller
public class HomeController {

	@GetMapping("/hello")
	public String home(Locale locale, Model model) {
		Date date = new Date();
		DateFormat dateFormat = DateFormat.getDateTimeInstance(DateFormat.LONG, DateFormat.LONG, locale);
		String formattedDate = dateFormat.format(date);
		model.addAttribute("serverTime", formattedDate);
		return "home";
	}

}
Abbiamo definito un singolo metodo di gestione delle richieste, accetta richieste GET con URI “/hello” e restituisce la pagina “home.jsp” come risposta. Nota che stiamo impostando un attributo al modello, che verrà utilizzato nella pagina home.jsp. Ecco il nostro codice semplice per la pagina home.jsp.
<%@ page language="java" contentType="text/html; charset=UTF-8"
	pageEncoding="UTF-8"%>
<html>
<head>
<title>Home</title>
</head>
<body>
	<h1>Hello world!</h1>

	<p>The time on the server is ${serverTime}.</p>

</body>
</html>
Test del Controller Spring MVC
La nostra applicazione Spring MVC basata su servlet con un controller semplice è pronta, basta esportarla come file WAR e distribuirla su Tomcat o su qualsiasi altro contenitore di servlet. Quindi vai all’URL https://localhost:8080/Spring-Controller/hello e dovresti vedere la seguente schermata come output. 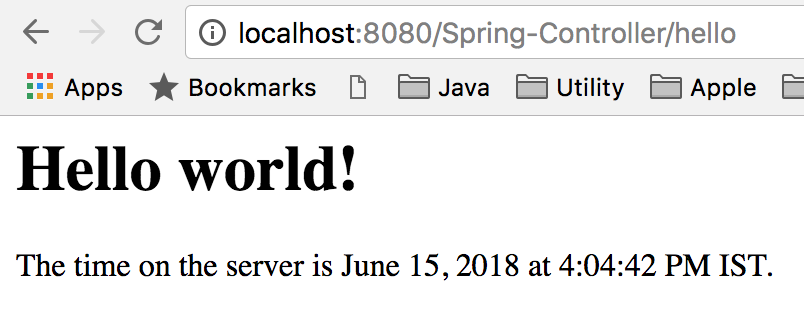
Esempio di RestController Spring
Ora estendiamo la nostra applicazione per esporre anche API REST. Crea una classe di modello che verrà inviata come risposta JSON.
package com.journaldev.spring.model;

public class Person {

	private String name;

	public String getName() {
		return name;
	}

	public void setName(String name) {
		this.name = name;
	}

}
Ecco la nostra semplice classe di controller REST.
package com.journaldev.spring.controller;

import org.springframework.web.bind.annotation.RequestMapping;
import org.springframework.web.bind.annotation.RequestParam;
import org.springframework.web.bind.annotation.RestController;

import com.journaldev.spring.model.Person;

@RestController
public class PersonRESTController {

	@RequestMapping("/rest")
	public String healthCheck() {
		return "OK";
	}

	@RequestMapping("/rest/person/get")
	public Person getPerson(@RequestParam(name = "name", required = false, defaultValue = "Unknown") String name) {
		Person person = new Person();
		person.setName(name);
		return person;
	}

}
Ridistribuisci nuovamente l’applicazione per testare le nostre API REST.
Test del Controller REST Spring
Vai all’URL https://localhost:8080/Spring-Controller/rest e dovresti ottenere il seguente output. 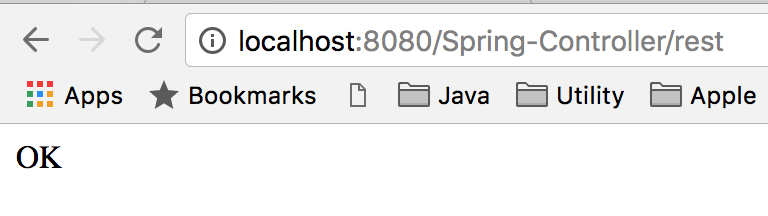 Vai all’URL
 https://localhost:8080/Spring-Controller/rest/person/get e otterrai la seguente risposta JSON: 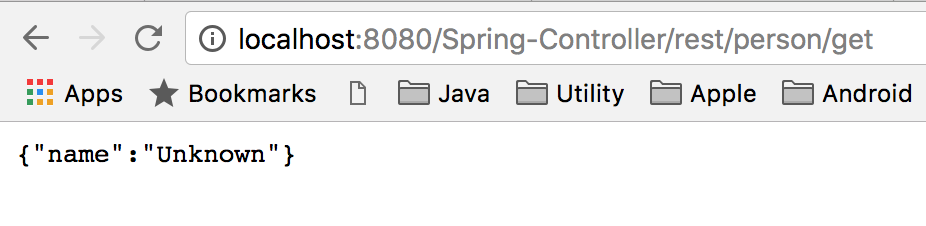 Ora forniamo il valore del parametro nome nell’URL, vai a
 https://localhost:8080/Spring-Controller/rest/person/get?name=Pankaj e otterrai la seguente risposta JSON. 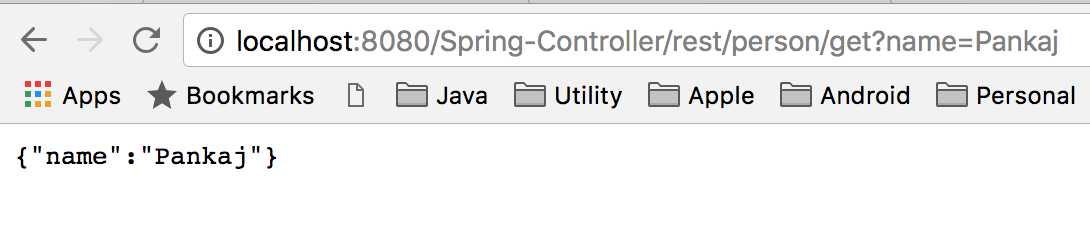
Riepilogo
Il controller di Spring è il pilastro delle applicazioni Spring MVC. Qui inizia la nostra logica di business. Inoltre, RestController ci aiuta a creare facilmente servizi web basati su REST.
Puoi scaricare il codice del progetto di esempio dal nostro Repository GitHub.
Source:
https://www.digitalocean.com/community/tutorials/spring-controller-spring-mvc-controller