


Recently I bought a new desktop system and installed Windows 7 Ultimate 64-bit on it. Being a Java Developer, the first thing I did after the regular setup is to download and install JDK.
I was using Windows XP, Solaris, or Mac OS for my development purpose till now. I was installing Java for the first time on Windows 7 64-bit OS.
Install Java on Windows 7
Here I am providing steps to download, install, and configure Java in Windows 7 64-bit operating system.
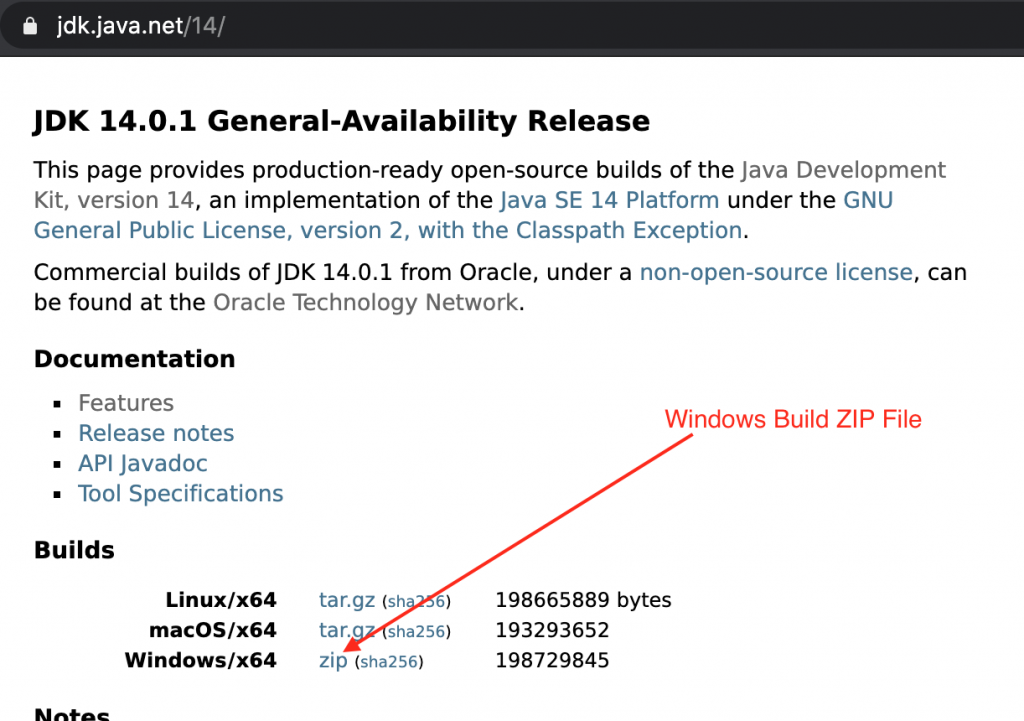
Step 1: Go to JDK 14 Release Page. Download the zip file for the “Windows/x64” build.
Step 2: Unzip the downloaded ZIP file (jdk-14.0.1) and copy it to the program files folder.
Step 3: Setting up environment variables so that we can execute java commands from the command prompt.
For this, go to Control Panel > System > Advanced system settings. In the “System Properties” pop up, go to the Advanced tab and click on the “Environment Variables” button.
In the System Variables section, we have to set JAVA_HOME and edit the Path variable. Variable name and values are:
JAVA_HOME=C:\Program Files\jdk-14.0.1
Add “;%JAVA_HOME%\bin” to the Path variable. Click on the Ok button to save it.
Step 4: Now we can run java commands from the command prompt. You can check it by executing the “java -version” command. It will print the current Java version.
Important Points
- From JDK 12 onwards, Oracle JDK requires a license to use in production and commercial applications. So, if you want to use Java free of cost, use OpenJDK.
- If you need paid support, then you can use OracleJDK and opt for their paid license.
Source:
https://www.digitalocean.com/community/tutorials/installing-java-on-windows-7-ultimate-64-bit