


במדריך זה, נדבר על חלונות ההתראה ונממש אותם באפליקציית ה-Android שלנו באמצעות Kotlin.
חלונות ההתראה
חלון ההתראה הוא חלון שקופץ על המסך. כללית, הם מציגים מידע ומבקשים פעולה מהמשתמש. יש שלושה רכיבים יסודיים שבונים את חלון ההתראה.
- טקסט כותרת
- טקסט הודעה
- כפתורים – יש שלושה סוגים של כפתורים: חיובי, שלילי ונייטרלי
כדי ליצור AlertDialog, אנו משתמשים ב-class הפנימית AlertDialog.Builder.
val alertDialogBuilder = AlertDialog.Builder(this)
אנו מעבירים את ההקשר בתוך הבנאי. אופציונלית, נוכל להעביר פרמטר נוסף, את סגנון חלון ההתראה.
שיטות חלון ההתראה
חלק מהשיטות שניתן להשתמש בהן על AlertDialog.
- setTitle
- setMessage
- setIcon
- setCustomTitle – כאן ניתן להעביר תצוגה מותאמת אישית שתופיע במקום חלק הכותרת בחלון ההתראה.
- setPositiveButton – אנו מעבירים את שם המחרוזת, וגם את שיטת הקריאה ללחיצה על הכפתור כאן.
- setView – משמש להוספת תצוגה מותאמת אישית בתוך חלון ההתראה.
- setList – משמש להגדיר מערך של מחרוזות שיתצוגף בצורת רשימה.
- setMultiChoiceList – שוב, ניתן להגדיר מערך, אך הפעם ניתן לבחור פריטים מרובים מהרשימה באמצעות תיקופות (CheckBox).
- setPositiveButtonIcon – מגדיר סמל לצד הכפתור.
- show() – משמש להצגת חלון התראה (AlertDialog).
- setDismissListener – באמצעות זה, ניתן להגדיר את הלוגיקה שתתורגש כאשר חלון ההתראה נסגר.
- setShowListener – מגדיר את הלוגיקה שתתורגש כאשר חלון ההתראה מוצג.
- setCancelable – דורש ערך בוליאני. כל חלונות ההתראה ברירת המחדל ניתנים לביטול בלחיצה על כפתור או למגע מחוץ לחלון. אם המתודה הזו מוגדרת ל־false, עליך לבטל את הדיאלוג באופן פעיל באמצעות dialog.cancel().
קוד דיאלוג התראה ב-Kotlin
כדי להשתמש בדיאלוג התראה בפרויקט שלך ב-Android Studio, יש לייבא את המחלקה הבאה.
import android.support.v7.app.AlertDialog;
הקוד ב-Kotlin הבא משמש ליצירת דיאלוג התראה פשוט.
val builder = AlertDialog.Builder(this)
builder.setTitle("Androidly Alert")
builder.setMessage("We have a message")
//builder.setPositiveButton("אוקי", DialogInterface.OnClickListener(function = x))

builder.setPositiveButton(android.R.string.yes) { dialog, which ->
    Toast.makeText(applicationContext,
            android.R.string.yes, Toast.LENGTH_SHORT).show()
}

builder.setNegativeButton(android.R.string.no) { dialog, which ->
    Toast.makeText(applicationContext,
            android.R.string.no, Toast.LENGTH_SHORT).show()
}

builder.setNeutralButton("Maybe") { dialog, which ->
    Toast.makeText(applicationContext,
            "Maybe", Toast.LENGTH_SHORT).show()
}
builder.show()
ה־builder.show() מציג את חלון ההתראה במסך. בתוך פונקציית setPositiveButton, אנו מעבירים את טקסט הכפתור יחד עם פונקציית Kotlin שמופעלת כאשר הכפתור לוחץ. הפונקציה היא חלק מממשק ה-DialogInterface.OnClickListener(). סוג הפונקציה הוא (DialogInterface, Int) -> Unit. DialogInterface הוא מופע של הדיאלוג ו-Int הוא ה- id של הכפתור שנלחץ. בקוד לעיל, יצגנו את הפונקציה הזו כפונקציה קוטלין גבוהה סדר. ה־dialog ו־which מייצגים את שני הארגומנטים. אנו יכולים לשפר את הפונקציה על ידי מעבר של _ אם הארגומנטים אינם בשימוש. הפונקציות ייראו כך:
builder.setPositiveButton(android.R.string.yes) { _,_ ->
            Toast.makeText(applicationContext,
                    android.R.string.yes, Toast.LENGTH_SHORT).show()
        }
באופן אלטרנטיבי, אנו יכולים גם להציג את חלון ההתראה דרך מופע של כיתת AlertDialog. נחליף את ה־builder.show() ב:
val alertDialog = builder.create()
alertDialog.show()
במקום להגדיר את פונקציות מאזינת לחיצה עבור כל אחד מהכפתורים, אנו יכולים גם להגדיר את הפונקציות הסדר גבוה בנפרד.
val positiveButtonClick = { dialog: DialogInterface, which: Int ->
    Toast.makeText(applicationContext,
            android.R.string.no, Toast.LENGTH_SHORT).show()
}
עכשיו נקבע את המאפיין val הזה בתוך פונקציית Kotlin של setPositiveButton כך:
builder.setPositiveButton("OK", DialogInterface.OnClickListener(function = positiveButtonClick))
//or
builder.setPositiveButton(android.R.string.yes, positiveButtonClick)
האחרון מקל על הקוד והופך אותו לקצר יותר. הנה צילום מסך מהכיתה הפעילות שלנו עם הפונקציה למעלה מופעלת עבור כל אחד מהכפתורים. 
ניתן להעביר את הערך null במקום הפונקציה אם אין לך כוונה לשמור על כל פעולה בלחיצת הכפתור.
קוטלין עוד יכולה להציע כלים נוספים לשיפור קריאות הקוד לעיל.
קוד קודם למסך התראה פשוט ב-Kotlin
על ידי שימוש בפונקציית with, אנו יכולים לשפר את קריאות הקוד של Kotlin כדי ליצור מסך התראה.
fun basicAlert(view: View){

        val builder = AlertDialog.Builder(this)

        with(builder)
        {
            setTitle("Androidly Alert")
            setMessage("We have a message")
            setPositiveButton("OK", DialogInterface.OnClickListener(function = positiveButtonClick))
            setNegativeButton(android.R.string.no, negativeButtonClick)
            setNeutralButton("Maybe", neutralButtonClick)
            show()
        }


    }
במחברת הבאה ניצור את היישום שלנו עבור אנדרואיד, בו נטמיע את התכונות הבאות במסך התראה שלנו.
- מסך התראה פשוט
- מסך התראה עם סמל והתאמת כפתור
- מסך התראה עם רשימה
- מסך התראה עם רשימת בחירה מרובה
- מסך התראה עם סגנון
- מסך התראה עם סגנון מותאם אישית
- מסך התראה עם תיבת טקסט
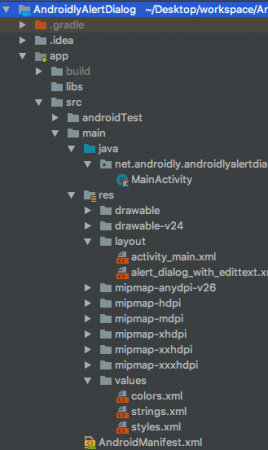
מבנה פרויקט ב-Android Studio
1. קוד תצורת XML
הקוד עבור תצורת ה-XML של activity_main.xml ניתן להלן.
<?xml version="1.0" encoding="utf-8"?>
<LinearLayout xmlns:android="http://schemas.android.com/apk/res/android"
    xmlns:tools="http://schemas.android.com/tools"
    android:layout_width="match_parent"
    android:layout_height="match_parent"
    android:gravity="center"
    android:orientation="vertical"
    tools:context=".MainActivity">

    <Button
        android:id="@+id/btnBasicAlert"
        android:layout_width="wrap_content"
        android:onClick="basicAlert"
        android:layout_height="wrap_content"
        android:text="BASIC ALERT DIALOG" />


    <Button
        android:id="@+id/btnAlertWithIconsAndCustomize"
        android:layout_width="wrap_content"
        android:onClick="withIconAndCustomise"
        android:layout_height="wrap_content"
        android:text="WITH ICON AND CUSTOMIZATION" />

    <Button
        android:id="@+id/btnAlertWithItems"
        android:layout_width="wrap_content"
        android:layout_height="wrap_content"
        android:onClick="withItems"
        android:text="WITH ITEMS" />

    <Button
        android:id="@+id/btnAlertWithMultiChoiceList"
        android:layout_width="wrap_content"
        android:layout_height="wrap_content"
        android:onClick="withMultiChoiceList"
        android:text="WITH MULTI CHOICE LIST" />

    <Button
        android:id="@+id/btnAlertWithStyle"
        android:layout_width="wrap_content"
        android:layout_height="wrap_content"
        android:onClick="withStyle"
        android:text="WITH STYLE" />


    <Button
        android:id="@+id/btnAlertWithCustomStyle"
        android:layout_width="wrap_content"
        android:layout_height="wrap_content"
        android:onClick="withCustomStyle"
        android:text="WITH CUSTOM STYLE" />

    <Button
        android:id="@+id/btnAlertWithButtonCentered"
        android:layout_width="wrap_content"
        android:layout_height="wrap_content"
        android:onClick="withButtonCentered"
        android:text="WITH BUTTON CENTERED" />

    <Button
        android:id="@+id/btnAlertWithEditText"
        android:layout_width="wrap_content"
        android:layout_height="wrap_content"
        android:onClick="withEditText"
        android:text="WITH EDIT TEXT" />


</LinearLayout>
עבור כל אחד מהכפתורים הגדרנו מאפיין android:onClick עם שם הפונקציה. פונקציות אלו ב-Kotlin תתבצענה במחלקת MainActivity.kt. נדון בכל אחת מהן לפי סדרן.
2. קוד פעילות ראשית של Kotlin
כבר יצרנו את תיבת הדו-שיח הראשונה למעלה. בואו נראה איך נראה MainActivity.kt עם זה.
package net.androidly.androidlyalertdialog

import android.content.DialogInterface
import android.support.v7.app.AppCompatActivity
import android.os.Bundle
import android.support.v7.app.AlertDialog
import android.view.View
import android.widget.Toast

class MainActivity : AppCompatActivity() {

    val positiveButtonClick = { dialog: DialogInterface, which: Int ->
        Toast.makeText(applicationContext,
                android.R.string.yes, Toast.LENGTH_SHORT).show()
    }
    val negativeButtonClick = { dialog: DialogInterface, which: Int ->
        Toast.makeText(applicationContext,
                android.R.string.no, Toast.LENGTH_SHORT).show()
    }
    val neutralButtonClick = { dialog: DialogInterface, which: Int ->
        Toast.makeText(applicationContext,
                "Maybe", Toast.LENGTH_SHORT).show()
    }

    override fun onCreate(savedInstanceState: Bundle?) {
        super.onCreate(savedInstanceState)
        setContentView(R.layout.activity_main)
    }

    fun basicAlert(view: View){

        val builder = AlertDialog.Builder(this)

        with(builder)
        {
            setTitle("Androidly Alert")
            setMessage("We have a message")
            setPositiveButton("OK", DialogInterface.OnClickListener(function = positiveButtonClick))
            setNegativeButton(android.R.string.no, negativeButtonClick)
            setNeutralButton("Maybe", neutralButtonClick)
            show()
        }


    }
}
3. תיבת דו-שיח עם סמלים והתאמה אישית
val builder = AlertDialog.Builder(this)
        with(builder) {
            setTitle("Icon and Button Color")
            setMessage("We have a message")
            setPositiveButton("OK", null)
            setNegativeButton("CANCEL", null)
            setNeutralButton("NEUTRAL", null)
            setPositiveButtonIcon(resources.getDrawable(android.R.drawable.ic_menu_call, theme))
            setIcon(resources.getDrawable(android.R.drawable.ic_dialog_alert, theme))
        }
        val alertDialog = builder.create()
        alertDialog.show()

        val button = alertDialog.getButton(DialogInterface.BUTTON_POSITIVE)
        with(button) {
            setBackgroundColor(Color.BLACK)
            setPadding(0, 0, 20, 0)
            setTextColor(Color.WHITE)
        }
באמצעות ה־getButton, אנו יכולים לקבל כל אחת מהכפתורים על ידי הגדרת הקבועה המתאימה שלהם. לאחר שהכפתור נמצא, אנו יכולים להתאים אותו כפי שנעשה למעלה.
4. תיבת דו-שיח עם פריטים
fun withItems(view: View) {

        val items = arrayOf("Red", "Orange", "Yellow", "Blue")
        val builder = AlertDialog.Builder(this)
        with(builder)
        {
            setTitle("List of Items")
            setItems(items) { dialog, which ->
                Toast.makeText(applicationContext, items[which] + " is clicked", Toast.LENGTH_SHORT).show()
            }

            setPositiveButton("OK", positiveButtonClick)
            show()
        }
    }
בתוך ה־setItems אנו מעבירים את מערך ה־Kotlin. הארגומנט which מייצג את האינדקס של האיבר שנלחץ ברשימה.
5. תיבת דו-שיח עם רשימה בחירה מרובה
fun withMultiChoiceList(view: View) {

        val items = arrayOf("Microsoft", "Apple", "Amazon", "Google")
        val selectedList = ArrayList<Int>()
        val builder = AlertDialog.Builder(this)

        builder.setTitle("This is list choice dialog box")
        builder.setMultiChoiceItems(items, null
        ) { dialog, which, isChecked ->
            if (isChecked) {
                selectedList.add(which)
            } else if (selectedList.contains(which)) {
                selectedList.remove(Integer.valueOf(which))
            }
        }

        builder.setPositiveButton("DONE") { dialogInterface, i ->
            val selectedStrings = ArrayList<string>()

            for (j in selectedList.indices) {
                selectedStrings.add(items[selectedList[j]])
            }

            Toast.makeText(applicationContext, "Items selected are: " + Arrays.toString(selectedStrings.toTypedArray()), Toast.LENGTH_SHORT).show()
        }

        builder.show()

    }
בקוד למעלה, אנו שומרים את הבחירות ברשימת מספרים ומשיגים אותם שוב כדי להציגם בהודעת Toast.
6. תיק עם סגנון
fun withStyle(view: View) {

        val builder = AlertDialog.Builder(ContextThemeWrapper(this, android.R.style.Holo_SegmentedButton))

        with(builder)
        {
            setTitle("Androidly Alert")
            setMessage("We have a message")
            setPositiveButton("OK", DialogInterface.OnClickListener(function = positiveButtonClick))
            setNegativeButton(android.R.string.no, negativeButtonClick)
            setNeutralButton("Maybe", neutralButtonClick)
            show()
        }
    }
אם לא תשתמש ב-ContextThemeWrapper, תיק ההתראה יוצג במסך מלא.
7. תיק עם סגנון מותאם אישית
הוסף את הקוד הבא בקובץ styles.xml:
<style name="AlertDialogCustom" parent="@android:style/Theme.Material.Dialog">
        <item name="android:textColor">@android:color/white</item>
        <item name="android:textStyle">bold</item>
        <item name="android:headerDividersEnabled">true</item>
        <item name="android:background">@android:color/holo_blue_dark</item>
    </style>
הפונקציה ב-Kotlin היא כדלקמן:
fun withCustomStyle(view: View) {

        val builder = AlertDialog.Builder(ContextThemeWrapper(this, R.style.AlertDialogCustom))

        with(builder)
        {
            setTitle("Androidly Alert")
            setMessage("We have a message")
            setPositiveButton("OK", DialogInterface.OnClickListener(function = positiveButtonClick))
            setNegativeButton(android.R.string.no, negativeButtonClick)
            setNeutralButton("Maybe", neutralButtonClick)
            show()
        }

    }
8. תיק עם לחצן ממורכז
fun withButtonCentered(view: View) {

        val alertDialog = AlertDialog.Builder(this).create()
        alertDialog.setTitle("Title")
        alertDialog.setMessage("Message")

        alertDialog.setButton(AlertDialog.BUTTON_POSITIVE, "Yes"
        ) { dialog, which -> dialog.dismiss() }

        alertDialog.setButton(AlertDialog.BUTTON_NEGATIVE, "No"
        ) { dialog, which -> dialog.dismiss() }
        alertDialog.show()

        val btnPositive = alertDialog.getButton(AlertDialog.BUTTON_POSITIVE)
        val btnNegative = alertDialog.getButton(AlertDialog.BUTTON_NEGATIVE)

        val layoutParams = btnPositive.layoutParams as LinearLayout.LayoutParams
        layoutParams.weight = 10f
        btnPositive.layoutParams = layoutParams
        btnNegative.layoutParams = layoutParams
    }
9. תיק עם שדה טקסט
קוד ה-XML לממשק מותאם אישית בשם alert_dialog_with_edittext.xml כמתואר למטה:
<?xml version="1.0" encoding="utf-8"?>
<LinearLayout xmlns:android="http://schemas.android.com/apk/res/android"
    android:orientation="vertical"
    android:layout_width="match_parent"
    android:layout_height="match_parent">

    <EditText
        android:id="@+id/editText"
        android:layout_width="match_parent"
        android:layout_height="wrap_content"
        android:hint="Enter the text here"/>

</LinearLayout>
fun withEditText(view: View) {
        val builder = AlertDialog.Builder(this)
        val inflater = layoutInflater
        builder.setTitle("With EditText")
        val dialogLayout = inflater.inflate(R.layout.alert_dialog_with_edittext, null)
        val editText  = dialogLayout.findViewById<EditText>(R.id.editText)
        builder.setView(dialogLayout)
        builder.setPositiveButton("OK") { dialogInterface, i -> Toast.makeText(applicationContext, "EditText is " + editText.text.toString(), Toast.LENGTH_SHORT).show() }
        builder.show()
    }
הפלט של היישום הנ"ל מוצג למטה: 
הורד את פרויקט אנדרואיד סטודיו: AndroidlyAlertDialog
Source:
https://www.digitalocean.com/community/tutorials/android-alert-dialog-using-kotlin