אנה סימון @Async ב- Spring מאפשר לנו ליצור שיטות אסינכרוניות ב- Spring. בואו נחקור את @Async במדריך זה על הספרייה של Spring. בקצרה, כאשר אנו סימנו שיטה של ביין ב- @Async, Spring יפעיל אותה בפועל בתהליך שונה thread והקורא של השיטה לא יחכה עד שהשיטה תושלם. נגדיר שירות משלנו ונשתמש ב- Spring Boot 2 בדוגמה זו. בואו נתחיל!
Spring @Async דוגמה
נשתמש ב- Maven כדי ליצור פרויקט דוגמה להדגמה. כדי ליצור את הפרויקט, בצע את הפקודה הבאה בתיקייה שתשתמש כמקום עבודה:
mvn archetype:generate -DgroupId=com.journaldev.asynchmethods -DartifactId=JD-SpringBoot-AsyncMethods -DarchetypeArtifactId=maven-archetype-quickstart -DinteractiveMode=false
אם אתה מריץ את Maven לפעם הראשונה, זה ייקח מספר שניות עד שהפקודה generate תושלם מאחר ו־Maven צריך להוריד את כל התוספות והארטיפקטים הדרושים כדי לבצע את משימת היצירה. הנה כיצד נראית יצירת הפרויקט: יצירת פרויקט עם Maven לאחר שיצרת את הפרויקט, תרגיש חופשי לפתוח אותו בסביבת הפיתוח האהובה עליך. השלב הבא הוא להוסיף תלותים מתאימות של Maven לפרויקט. הנה קובץ pom.xml עם התלותים המתאימות:
<parent>
    <groupId>org.springframework.boot</groupId>
    <artifactId>spring-boot-starter-parent</artifactId>
    <version>2.0.1.RELEASE</version>
    <relativePath/> <!-- lookup parent from repository -->
</parent>

<dependencies>

    <dependency>
        <groupId>org.springframework.boot</groupId>
        <artifactId>spring-boot-starter-web</artifactId>
    </dependency>

    <dependency>
        <groupId>org.springframework.boot</groupId>
        <artifactId>spring-boot-starter-test</artifactId>
        <scope>test</scope>
    </dependency>

</dependencies>

<build>
    <plugins>
        <plugin>
            <groupId>org.springframework.boot</groupId>
            <artifactId>spring-boot-maven-plugin</artifactId>
        </plugin>
    </plugins>
</build>
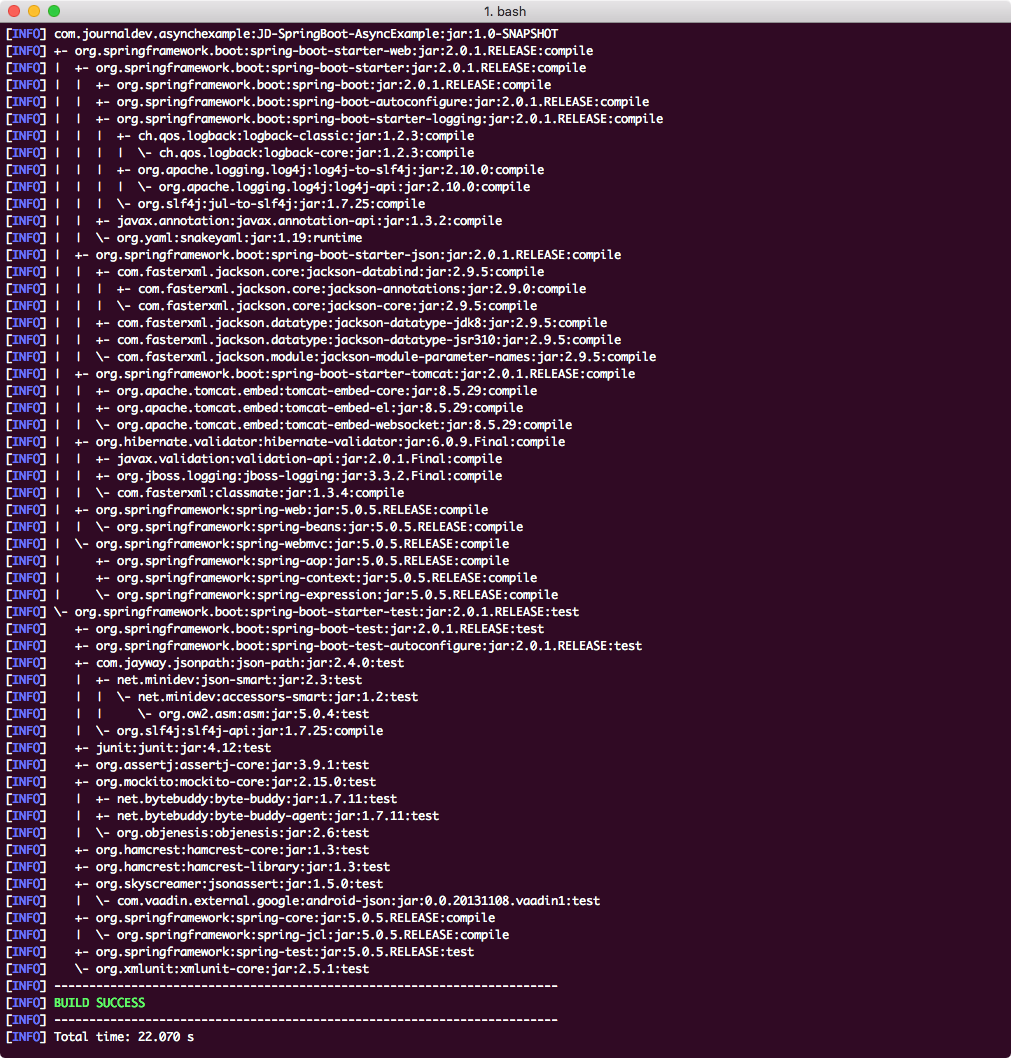
לבסוף, כדי להבין את כל ה־JARs שנוספים לפרויקט כאשר אנו מוסיפים את התלות הזו, אנו יכולים להפעיל פקודת Maven פשוטה שמאפשרת לנו לראות עץ תלות מלא עבור פרויקט כאשר אנו מוסיפים תלותים מסוימים אליו. הנה פקודה שאנו יכולים להשתמש בה:
mvn dependency:tree
כאשר אנו מפעילים את הפקודה הזו, היא תציג לנו את העץ הבא של תלותים: 
אפשרות הפעלה אסינכרונית
הפעלת תמיכה ב-Async היא גם כן, עניין של אנוטציה יחידה. מלבד הפעלת ביצוע Async, אנו גם נעשה שימוש ב-Executor שמאפשר לנו להגדיר מגבלות של תהליכים גם. נדבר על זה יותר פרטית כאשר נכתוב את הקוד:
package com.journaldev.asynchexample;

import org.springframework.boot.SpringApplication;
import org.springframework.boot.autoconfigure.SpringBootApplication;
import org.springframework.context.annotation.Bean;
import org.springframework.scheduling.annotation.EnableAsync;
import org.springframework.scheduling.concurrent.ThreadPoolTaskExecutor;

import java.util.concurrent.Executor;

@SpringBootApplication
@EnableAsync
public class AsyncApp {
    ...
}
כאן עשינו שימוש ב-@EnableAsync אנוטציה שמאפשרת ל-Spring להריץ שיטות אסינכרוניות בבקשה בפועל. לאחר מכן, אנו מוסיפים את ה-Executor המוזכר:
@Bean
public Executor asyncExecutor() {
    ThreadPoolTaskExecutor executor = new ThreadPoolTaskExecutor();
    executor.setCorePoolSize(2);
    executor.setMaxPoolSize(2);
    executor.setQueueCapacity(500);
    executor.setThreadNamePrefix("JDAsync-");
    executor.initialize();
    return executor;
}
כאן, אנו מגדירים שמקסימום של 2 תהליכים ירוצו באופן סקרני וגודל התור נקבע כ-500. הנה הקוד המלא של המחלקה עם הצהרות import:
package com.journaldev.asynchexample;

import org.springframework.boot.SpringApplication;
import org.springframework.boot.autoconfigure.SpringBootApplication;
import org.springframework.context.annotation.Bean;
import org.springframework.scheduling.annotation.EnableAsync;
import org.springframework.scheduling.concurrent.ThreadPoolTaskExecutor;

import java.util.concurrent.Executor;

@SpringBootApplication
@EnableAsync
public class AsyncApp {

    public static void main(String[] args) {
        SpringApplication.run(AsyncApp.class, args).close();
    }

    @Bean
    public Executor asyncExecutor() {
        ThreadPoolTaskExecutor executor = new ThreadPoolTaskExecutor();
        executor.setCorePoolSize(2);
        executor.setMaxPoolSize(2);
        executor.setQueueCapacity(500);
        executor.setThreadNamePrefix("JDAsync-");
        executor.initialize();
        return executor;
    }
}
בשלב הבא ניצור שירות שמבצע באמת ביצועי Thread.
יצירת מודל
נעשה שימוש ב-API הסרטים הציבורי שמחזיר פשוט נתוני סרט. אנו נגדיר את המודל שלנו עבור אותו דבר:
package com.journaldev.asynchexample;

import com.fasterxml.jackson.annotation.JsonIgnoreProperties;

@JsonIgnoreProperties(ignoreUnknown = true)
public class MovieModel {

    private String title;
    private String producer;

    // getters ו-setters סטנדרטיים

    @Override
    public String toString() {
        return String.format("MovieModel{title='%s', producer='%s'}", title, producer);
    }
}
השתמשנו ב-@JsonIgnoreProperties כדי שאם יש יותר מאפיונים בתגובה, יהיה אפשר להתעלם מהם בבטחה על ידי Spring.
יצירת השירות
זה הזמן שנגדיר את השירות שלנו אשר יקרא ל- API של הסרטים המוזכר. נשתמש ב- RestTemplate פשוט כדי להכות ב- API GET ולקבל תוצאות אסינכרוניות. בואו נסתכל על הקוד לדוגמה שאנו משתמשים בו:
package com.journaldev.asynchexample;

import org.slf4j.Logger;
import org.slf4j.LoggerFactory;
import org.springframework.boot.web.client.RestTemplateBuilder;
import org.springframework.scheduling.annotation.Async;
import org.springframework.stereotype.Service;
import org.springframework.web.client.RestTemplate;

import java.util.concurrent.CompletableFuture;

@Service
public class MovieService {

    private static final Logger LOG = LoggerFactory.getLogger(MovieService.class);

    private final RestTemplate restTemplate;

    public MovieService(RestTemplateBuilder restTemplateBuilder) {
        this.restTemplate = restTemplateBuilder.build();
    }

    @Async
    public CompletableFuture lookForMovie(String movieId) throws InterruptedException {
        LOG.info("Looking up Movie ID: {}", movieId);
        String url = String.format("https://ghibliapi.herokuapp.com/films/%s", movieId);
        MovieModel results = restTemplate.getForObject(url, MovieModel.class);
        // השהייה מלאכותית של שנייה אחת לצורך הדגמה
        Thread.sleep(1000L);
        return CompletableFuture.completedFuture(results);
    }
}
כיתה זו היא @Service שמכשילה אותה לסורק רכיבי Spring. סוג ההחזר של שיטת lookForMovie הוא CompletableFuture שהוא דרישה עבור כל שירות אסינכרוני. מכיוון שהזמן עבור ה- API עשוי להשתנות, הוספנו השהייה של 2 שניות לצורך הדגמה.
יצירת CommandLine Runner
נפעיל את האפליקציה שלנו באמצעות CommandLineRunner שהוא הדרך הקלה ביותר לבדוק את האפליקציה שלנו. CommandLineRunner רץ מייד לאחר שכל ה- beans של האפליקציה כבר הופעלו. בואו נראה את הקוד ל- CommandLineRunner:
package com.journaldev.asynchexample;

import org.slf4j.Logger;
import org.slf4j.LoggerFactory;
import org.springframework.boot.CommandLineRunner;
import org.springframework.stereotype.Component;

import java.util.concurrent.CompletableFuture;

@Component
public class ApplicationRunner implements CommandLineRunner {

    private static final Logger LOG = LoggerFactory.getLogger(ApplicationRunner.class);

    private final MovieService movieService;

    public ApplicationRunner(MovieService movieService) {
        this.movieService = movieService;
    }


    @Override
    public void run(String... args) throws Exception {
        // התחל את השעון
        long start = System.currentTimeMillis();

        // התחלת מרץ מרובה, חיפושי אסינכרוניים
        CompletableFuture page1 = movieService.lookForMovie("58611129-2dbc-4a81-a72f-77ddfc1b1b49");
        CompletableFuture page2 = movieService.lookForMovie("2baf70d1-42bb-4437-b551-e5fed5a87abe");
        CompletableFuture page3 = movieService.lookForMovie("4e236f34-b981-41c3-8c65-f8c9000b94e7");

        // שולב את כל התהליכים כך שנוכל לחכות עד שכולם יסיימו
        CompletableFuture.allOf(page1, page2, page3).join();

        // הדפס תוצאות, כולל זמן עבר
        LOG.info("Elapsed time: " + (System.currentTimeMillis() - start));
        LOG.info("--> " + page1.get());
        LOG.info("--> " + page2.get());
        LOG.info("--> " + page3.get());
    }
}
פשוט השתמשנו ב- RestTemplate כדי להכות ב- API של הדוגמה שהשתמשנו בו עם מספרי זיהוי של סרטים שנבחרו באופן אקראי. נפעיל את האפליקציה שלנו כדי לראות אילו פלטים היא מציגה.
הפעלת היישום
כאשר אנו מפעילים את היישום, נראה את הפלט הבא:
2018-04-13  INFO 17868 --- [JDAsync-1] c.j.a.MovieService  : Looking up Movie ID: 58611129-2dbc-4a81-a72f-77ddfc1b1b49
2018-04-13 08:00:09.518  INFO 17868 --- [JDAsync-2] c.j.a.MovieService  : Looking up Movie ID: 2baf70d1-42bb-4437-b551-e5fed5a87abe
2018-04-13 08:00:12.254  INFO 17868 --- [JDAsync-1] c.j.a.MovieService  : Looking up Movie ID: 4e236f34-b981-41c3-8c65-f8c9000b94e7
2018-04-13 08:00:13.565  INFO 17868 --- [main] c.j.a.ApplicationRunner  : Elapsed time: 4056
2018-04-13 08:00:13.565  INFO 17868 --- [main] c.j.a.ApplicationRunner  : --> MovieModel{title='My Neighbor Totoro', producer='Hayao Miyazaki'}
2018-04-13 08:00:13.565  INFO 17868 --- [main] c.j.a.ApplicationRunner  : --> MovieModel{title='Castle in the Sky', producer='Isao Takahata'}
2018-04-13 08:00:13.566  INFO 17868 --- [main] c.j.a.ApplicationRunner  : --> MovieModel{title='Only Yesterday', producer='Toshio Suzuki'}
אם נשים לב היטב, רק שני תהליכים נוצרו להרצת היישום, כלומר JDAsync-1 ו־JDAsync-2.
מסקנה
בשיעור זה, למדנו כיצד ניתן להשתמש ביכולות האסינכרוניות של Spring עם Spring Boot 2. לקריאת פוסטים נוספים בנושא Spring ניתן ללחוץ כאן.
להורדת קוד המקור
Source:
https://www.digitalocean.com/community/tutorials/spring-async-annotation


