


היום אנו נלמד על דוגמא להתחברות באמצעות Spring Security. לפני שתתחיל לקרוא את הפוסט הזה, אנא עבור דרך הפוסט הקודם שלי בכתובת "מבוא לאבטחת Spring 4" כדי להבין כמה יסודות.
דוגמא להתחברות והתנתקות באמצעות Spring Security
בפוסט זה, אנו הולכים לפתח יישום אינטרנטי באמצעות Spring 4 MVC Security כדי לספק אפשרויות התחברות והתנתקות באמצעות האפשרות לאחסן בזיכרון. בדוגמא זו, אנו משתמשים בתצורת Java של Spring עם הסימונים של Spring, וזה אומר שאנו לא משתמשים ב-web.xml ובתצורת XML של Spring (בסגנון הישן). אם אתה לא מכיר במודול אבטחת Spring 3.x, אנא עבור דרך הפוסטים הבאים תחילה כדי לטעום את מתכון האבטחה של Spring Security.
- דוגמא לאבטחת Spring MVC באמצעות זיכרון, UserDetailsService ואימות JDBC
- אבטחת Spring באפליקציה רשת סרוולט באמצעות DAO, JDBC, אימות בזיכרון
מודול אבטחת Spring 4 תומך באפשרויות הבאות לאחסון וניהול של פרטי הכניסה של המשתמש:
- אחסון בזיכרון
- מסדי נתונים יחסיים (RDBMS)
- אחסון נתונים ללא SQL
- LDAP
נשתמש באפשרות "In-Memory Store" בדוגמה זו. נדבר על אפשרויות אחרות בפוסטים הבאים שלי. אנו מתכוונים להשתמש ב-Spring 4.0.2.RELEASE, Spring STS 3.7 Suite IDE, Spring TC Server 3.1 עם Java 1.8 ובכלי הבנייה Maven כדי לפתח את הדוגמה הזו.
דוגמה להתחברות באמצעות Spring Security
אנו מתכוונים לפתח לוגיקת התחברות והתנתקות באמצעות תכונות האבטחה של Spring 4. המטרה העיקרית של היישום הזה היא לפתח אפליקציה מבלי להשתמש ב-"web.xml" ומבלי לכתוב שורה אחת של הגדרת Spring XML Beans. זה אומר שנשתמש בתכונת Spring Java Config עם הסימונים של Spring. אנו נפתח את היישום הזה עם התכונות הבאות:
- עמוד ברוך הבא
- עמוד התחברות
- עמוד הבית
- תכונת התנתקות
אנא השתמש בשלבים הבאים כדי לפתח ולחקור את דוגמת ההתחברות הפשוטה של Spring 4 Security.
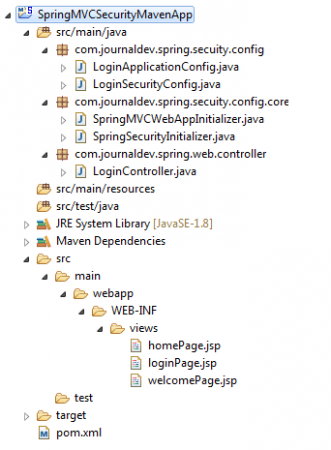
- צור "Simple Spring Web Maven" פרויקט ב-Spring STS Suite עם הפרטים הבאים
Project Name : SpringMVCSecruityMavenApp
- עדכן את ה-pom.xml עם התוכן הבא
<?xml version="1.0" encoding="UTF-8"?>
<project
   xsi:schemaLocation="https://maven.apache.org/POM/4.0.0
   https://maven.apache.org/xsd/maven-4.0.0.xsd"
   xmlns="https://maven.apache.org/POM/4.0.0"
   xmlns:xsi="https://www.w3.org/2001/XMLSchema-instance">

	<modelVersion>4.0.0</modelVersion>
	<groupId>com.journaldev</groupId>
	<artifactId>SpringMVCSecruityMavenApp</artifactId>
	<packaging>war</packaging>
	<version>1.0</version>

	<properties>
	    <java.version>1.8</java.version>
	    <spring.version>4.0.2.RELEASE</spring.version>
	    <spring.security.version>4.0.2.RELEASE</spring.security.version>
	    <servlet.api.version>3.1.0</servlet.api.version>
	    <jsp.api.version>2.2</jsp.api.version>
	    <jstl.version>1.2</jstl.version>
	</properties>

	<dependencies>
		<dependency>
			<groupId>org.springframework</groupId>
			<artifactId>spring-core</artifactId>
			<version>${spring.version}</version>
		</dependency>
		<dependency>
			<groupId>org.springframework</groupId>
			<artifactId>spring-web</artifactId>
			<version>${spring.version}</version>
		</dependency>
		<dependency>
			<groupId>org.springframework</groupId>
			<artifactId>spring-webmvc</artifactId>
			<version>${spring.version}</version>
		</dependency>
		<dependency>
			<groupId>org.springframework.security</groupId>
			<artifactId>spring-security-web</artifactId>
			<version>${spring.security.version}</version>
		</dependency>
		<dependency>
			<groupId>org.springframework.security</groupId>
			<artifactId>spring-security-config</artifactId>
			<version>${spring.security.version}</version>
		</dependency>
		<dependency>
			<groupId>javax.servlet</groupId>
			<artifactId>javax.servlet-api</artifactId>
			<version>${servlet.api.version}</version>
		</dependency>
		<dependency>
			<groupId>javax.servlet.jsp</groupId>
			<artifactId>jsp-api</artifactId>
			<version>${jsp.api.version}</version>
		</dependency>
		<dependency>
			<groupId>jstl</groupId>
			<artifactId>jstl</artifactId>
			<version>${jstl.version}</version>
		</dependency>
	</dependencies>

	<build>
	    <finalName>SpringMVCSecruityMavenApp</finalName>
	    <plugins>
		<plugin>
		     <groupId>org.apache.maven.plugins</groupId>
		     <artifactId>maven-compiler-plugin</artifactId>
		     <version>3.1</version>
		     <configuration>
			<source>${java.version}</source>
			<target>${java.version}</target>
		     </configuration>
		</plugin>
		<plugin>
	           <groupId>org.apache.maven.plugins</groupId>
	           <artifactId>maven-war-plugin</artifactId>
	           <configuration>
	              <failOnMissingWebXml>false</failOnMissingWebXml>
	           </configuration>
        	</plugin>
	    </plugins>
	</build>
</project>
הערה:- אם אינך מודע לדגל "<failOnMissingWebXml>", אנא קרא בסוף הפוסט כדי להבין באופן טוב את שימושו ברכיב זה.- ראשית, פתח בקר התחברות באמצעות הסימון @Controller של Spring.
LoginController.java
package com.journaldev.spring.web.controller;

import org.springframework.stereotype.Controller;
import org.springframework.web.bind.annotation.RequestMapping;
import org.springframework.web.bind.annotation.RequestMethod;
import org.springframework.web.bind.annotation.RequestParam;
import org.springframework.web.servlet.ModelAndView;

@Controller
public class LoginController {

	@RequestMapping(value = { "/"}, method = RequestMethod.GET)
	public ModelAndView welcomePage() {
		ModelAndView model = new ModelAndView();
		model.setViewName("welcomePage");
		return model;
	}

	@RequestMapping(value = { "/homePage"}, method = RequestMethod.GET)
	public ModelAndView homePage() {
		ModelAndView model = new ModelAndView();
		model.setViewName("homePage");
		return model;
	}

	@RequestMapping(value = "/loginPage", method = RequestMethod.GET)
	public ModelAndView loginPage(@RequestParam(value = "error",required = false) String error,
	@RequestParam(value = "logout",	required = false) String logout) {

		ModelAndView model = new ModelAndView();
		if (error != null) {
			model.addObject("error", "Invalid Credentials provided.");
		}

		if (logout != null) {
			model.addObject("message", "Logged out from JournalDEV successfully.");
		}

		model.setViewName("loginPage");
		return model;
	}

}
הסבר על הקוד:- הגדרנו שלושה שיטות ב-"LoginController" לטיפול בשלושה סוגים שונים של בקשות מלקוחות
- welcomePage() תטפל בכל הבקשות מלקוחות שמשתמשים ב-URI "/".
- homePage() תטפל בכל הבקשות מלקוחות שמשתמשים ב-URI "/homePage".
- loginPage() תטפל בכל הבקשות מלקוחות שמשתמשים ב-URI "/loginPage".
- ב-loginPage(), טיפלנו בטיפול בשגיאות ובהודעות התנתקות.
- לאחר מכן, פיתחנו קובץ "LoginSecurityConfig" לספק יכולות אבטחת כניסה ויציאה באמצעות Spring 4 Security API.
LoginSecurityConfig.java
package com.journaldev.spring.secuity.config;

import org.springframework.beans.factory.annotation.Autowired;
import org.springframework.context.annotation.Configuration;
import org.springframework.security.config.annotation.authentication.builders.AuthenticationManagerBuilder;
import org.springframework.security.config.annotation.web.builders.HttpSecurity;
import org.springframework.security.config.annotation.web.configuration.EnableWebSecurity;
import org.springframework.security.config.annotation.web.configuration.WebSecurityConfigurerAdapter;

@Configuration
@EnableWebSecurity
public class LoginSecurityConfig extends WebSecurityConfigurerAdapter {

	@Autowired
	public void configureGlobal(AuthenticationManagerBuilder authenticationMgr) throws Exception {
		authenticationMgr.inMemoryAuthentication()
			.withUser("journaldev")
			.password("jd@123")
			.authorities("ROLE_USER");
	}

	@Override
	protected void configure(HttpSecurity http) throws Exception {
		http.authorizeRequests()
			.antMatchers("/homePage").access("hasRole('ROLE_USER')")
			.and()
				.formLogin().loginPage("/loginPage")
				.defaultSuccessUrl("/homePage")
				.failureUrl("/loginPage?error")
				.usernameParameter("username").passwordParameter("password")
			.and()
				.logout().logoutSuccessUrl("/loginPage?logout");

	}
}
הסבר על הקוד:- הגדרנו שתי שיטות ב-"LoginSecurityConfig" לאחסון וניהול של פרטי משתמש וטיפול ביכולות אבטחת כניסה ויציאה.
- @EnableWebSecurity הוא האנוטציה המשמשת לאפשר אבטחת רשת בכל אפליקציה רשת.
- האנוטציה @EnableWebMVCSecurity משמשת לאפשר בטיחות ברשת באפליקציית האינטרנט המבוססת על Spring MVC.
הערה:- @EnableWebSecurity = @EnableWebMVCSecurity + תכונות נוספות. לכן האנוטציה @EnableWebMVCSecurity הוחלפה ב- Spring 4.x Framework.4. דרך התכנון "LoginSecurityConfig" או כל מחלקה אחרת שמיועדת להגדיר את אבטחת ה-Spring, צריכה להרחיב את מחלקת "WebSecurityConfigurerAdapter" או ליישם את הממשק הקשור. - שיטת configureGlobal() משמשת לאחסון וניהול אישורי המשתמש.
- בשיטת configureGlobal() ניתן להשתמש בשיטת authorities() כדי להגדיר את תפקידי האפליקציה שלנו כמו "ROLE_USER". ניתן גם להשתמש בשיטת roles() לאותו מטרה.
- ההבדל בין שיטות authorities() ו-roles():
- authorities() דורשת שם תפקיד מלא כמו "ROLE_USER" roles() דורשת שם תפקיד כמו "USER". זה יוסיף אוטומטית את הערך "ROLE_" לשם התפקיד "USER" הזה. הערה:- נפתח דוגמה נוספת כדי להדגים תפקידים כמו "USER", "ADMIN" בפוסטים הבאים שלי.
- השיטה החשובה לטיפול באבטחת הכניסה והיציאה היא configure(HttpSecurity http)
- הקוד הבא משמש למניעת גישה לא מורשית ל- "/homePage". אם תנסו לגשת לדף זה ישירות, תופנו באופן אוטומטי לדף "/loginPage".
.antMatchers("/homePage").access("hasRole('ROLE_USER')")
אם נסיר את קריאת שיטת access("hasRole('ROLE_USER')"), אז נוכל לגשת לדף זה בלי להתחבר ליישום שלנו. 13. הגדרנו תכונות התחברות והתנתקות באמצעות שימוש בשיטות formLogin() ו- logout().
- אפשרות הפעלת הגדרות Spring MVC
LoginApplicationConfig.java
package com.journaldev.spring.secuity.config;

import org.springframework.context.annotation.Bean;
import org.springframework.context.annotation.ComponentScan;
import org.springframework.context.annotation.Configuration;
import org.springframework.context.annotation.Import;
import org.springframework.web.servlet.config.annotation.EnableWebMvc;
import org.springframework.web.servlet.view.InternalResourceViewResolver;
import org.springframework.web.servlet.view.JstlView;

@EnableWebMvc
@Configuration
@ComponentScan({ "com.journaldev.spring.*" })
@Import(value = { LoginSecurityConfig.class })
public class LoginApplicationConfig {
	@Bean
	public InternalResourceViewResolver viewResolver() {
		InternalResourceViewResolver viewResolver = new InternalResourceViewResolver();
		viewResolver.setViewClass(JstlView.class);
		viewResolver.setPrefix("/WEB-INF/views/");
		viewResolver.setSuffix(".jsp");
		return viewResolver;
	}

}
הסבר על הקוד:- אנו משתמשים במחלקת "LoginApplicationConfig" כדי להגדיר מפענחי תצורת Spring MVC כדי למנוע כתיבה של קובץ "web.xml".
- @EnableWebMvc האנוטציה משמשת לאפשר תכונות אפליקציית Spring Web MVC במסגרת Spring Framework
- @Import האנוטציה משמשת לייבוא מחלקת הגדרת אבטחת Spring לתוך מחלקה זו.
- @ComponentScan האנוטציה משמשת לסריקת רכיבים בחבילה המסוימת. זה שווה ל- "context:component-scan" בתצורת XML של Spring.
- אתחול אבטחת Spring
package com.journaldev.spring.secuity.config.core;

import org.springframework.security.web.context.AbstractSecurityWebApplicationInitializer;

public class SpringSecurityInitializer extends AbstractSecurityWebApplicationInitializer {

}
"SpringSecurityInitializer" משמש לרישום את DelegatingFilterProxy לשימוש ב- springSecurityFilterChain. זה ממנע כתיבת הגדרות מסננים בקובץ web.xml.- אתחול אפליקציית Spring MVC
מחלקת "SpringMVCWebAppInitializer" משמשת לאתחול "DispatcherServlet" בלי קובץ web.xml בתצורה המבוססת על אנוטציות. SpringMVCWebAppInitializer.java
package com.journaldev.spring.secuity.config.core;

import org.springframework.web.servlet.support.AbstractAnnotationConfigDispatcherServletInitializer;
import com.journaldev.spring.secuity.config.LoginApplicationConfig;

public class SpringMVCWebAppInitializer extends AbstractAnnotationConfigDispatcherServletInitializer {

	@Override
	protected Class<?>[] getRootConfigClasses() {
		return new Class[] { LoginApplicationConfig.class };
	}

	@Override
	protected Class<?>[] getServletConfigClasses() {
		return null;
	}

	@Override
	protected String[] getServletMappings() {
		return new String[] { "/" };
	}

}
הערה:-
- כאשר אנו גושבים על היישום שלנו, כללית פעילה של SpringMVCWebAppInitializer getServletMappings() תאפשר לגשת לכתובת ה-URL הבסיסית: "/". אנו יכולים לדרוס זאת כדי להפנות לכתובת URL שונה.
- צוות Spring או Pivotal עובד על פתרון לבעיה זו כדי למנוע שימוש רב בקוד Java על ידי הכנסת הערות. ניתן לבדוק זאת ב- https://jira.spring.io/browse/SPR-10359.
- פתח קובץ welcomePage.jsp
<h3>Welcome to JournalDEV Tutorials</h3>
<a href="${pageContext.request.contextPath}/loginPage">Login to Journal</a>
- פתח קובץ loginPage.jsp
<%@ taglib prefix="c" uri="https://java.sun.com/jsp/jstl/core"%>
<html>
<body onload='document.loginForm.username.focus();'>
	<h3>JournalDEV Tutorials</h3>

	<c:if test="${not empty error}"><div>${error}</div></c:if>
	<c:if test="${not empty message}"><div>${message}</div></c:if>

	<form name='login' action="<c:url value='/loginPage' />" method='POST'>
		<table>
			<tr>
				<td>UserName:</td>
				<td><input type='text' name='username' value=''></td>
			</tr>
			<tr>
				<td>Password:</td>
				<td><input type='password' name='password' /></td>
			</tr>
			<tr>
				<td colspan='2'><input name="submit" type="submit" value="submit" /></td>
			</tr>
		</table>
		<input type="hidden" name="${_csrf.parameterName}" value="${_csrf.token}" />
	</form>
</body>
</html>
- פתח קובץ homepage.jsp
<%@taglib prefix="c" uri="https://java.sun.com/jsp/jstl/core"%>
<h3>Welcome to JournalDEV Tutorials</h3>
<ul>
	<li>Java 8 tutorial</li>
	<li>Spring tutorial</li>
	<li>Gradle tutorial</li>
	<li>BigData tutorial</li>
</ul>

<c:url value="/logout" var="logoutUrl" />
<form id="logout" action="${logoutUrl}" method="post" >
  <input type="hidden" name="${_csrf.parameterName}" value="${_csrf.token}" />
</form>
<c:if test="${pageContext.request.userPrincipal.name != null}">
	<a href="javascript:document.getElementById('logout').submit()">Logout</a>
</c:if>
- מבנה פרויקט הסופי ייראה כך:

הפעל את מבנה התחברות והתנתקות של Spring Security MVC
כדי להפעיל את אפליקציית האינטרנט של Spring זו, נדרשת מכלול רשת התמיכה ב-Spring 4 ובסביבת Java 8 עם Servlet Container בגרסה 3.1.0.
- התקן והפעל על Spring TC Server ב-Spring STS Suite
- זה גורם באופן אוטומטי לגישה לכתובת ה-URL של דף הבית של היישום שלנו, כפי שמוצג למטה.
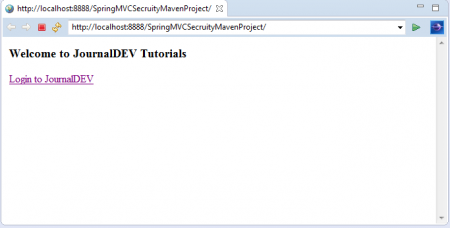 – לחץ על קישור "כניסה ל-JournalDEV" כדי לגשת לדף הכניסה.
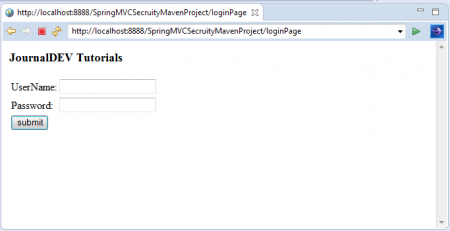 – עכשיו, ספק פרטי כניסה שגויים ולחץ על הכפתור "כניסה".
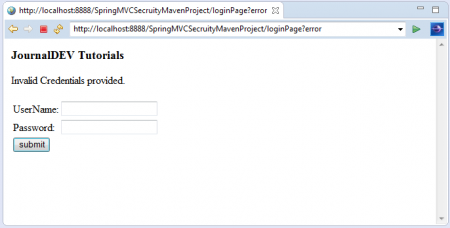 כאן אנו יכולים לראות את הודעת השגיאה הזו: "סיפקת פרטי כניסה לא תקינים."- עכשיו, ספק פרטי כניסה נכונים שהוגדרו במחלקת "LoginSecurityConfig".
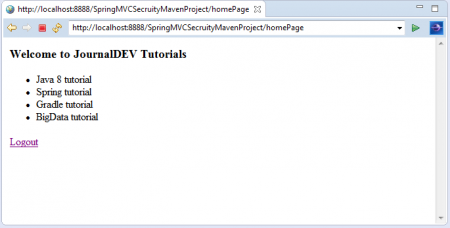 לאחר התחברות מוצלחת ליישום שלנו, אנו יכולים לראות את דף הבית של היישום שלנו עם הקישור "התנתקות".- לחץ על הקישור "התנתקות" כדי להתנתק מהיישום.
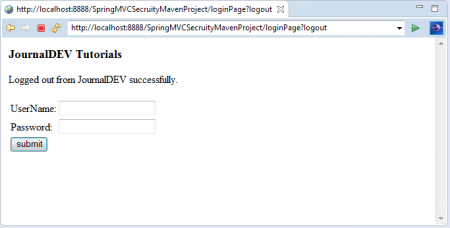 כאן אנו יכולים לראות כי התנתקנו מהיישום שלנו בהצלחה והופנינו מחדש לדף הכניסה. אנו יכולים לראות הודעת התנתקות מוצלחת מסוימת בדף זה של הכניסה.


הערה: – אם נצפה על דוגמה זו, אנו לא משתמשים בקובץ web.xml כראוי. מאחר ומדובר ביישום אינטרנטי, Maven מחפש את קובץ web.xml ויוצר שגיאות אם הוא לא נמצא ביישום. כדי למנוע בעיות הקשורות ל-Maven, עלינו להגדיר את הדגל "<failOnMissingWebXml>" בקובץ pom.xml. זו הכול על Spring 4 Security Module Simple Example. נפתח עוד דוגמאות שימושיות בזמן אמת בפוסטים הבאים שלי, כגון: ניהול תפקידים, תכונת זכור אותי, אבטחת WebSocket, ועוד. אנא השאירו לי תגובה אם אהבתם את הפוסט או יש לכם בעיות/הצעות.
Source:
https://www.digitalocean.com/community/tutorials/spring-4-security-mvc-login-logout-example