


In this tutorial we’ll discuss and implement various forms of Android Snackbar widget in our application.
Android Snackbar
Snackbar in android is a new widget introduced with the Material Design library as a replacement of a Toast. Android Snackbar is light-weight widget and they are used to show messages in the bottom of the application with swiping enabled. Snackbar android widget may contain an optional action button.
Difference between Toast and Snackbar
- A Toast messages can be customised and printed anywhere on the screen, but a Snackbar can be only showed in the bottom of the screen
- A Toast message don’t have action button, but Snackbar may have action button optionally. Though, A Snackbar shouldn’t have more than one action button
- Toast message cannot be off until the time limit finish, but Snackbar can be swiped off before the time limit
Note: Toast message and Snackbar have display length property in common. A code snippet to display a basic android Snackbar is shown below.
Snackbar snackbar = Snackbar
        .make(coordinatorLayout, "www.journaldev.com", Snackbar.LENGTH_LONG);
snackbar.show();
In the above snippet make() method accepts three parameters:
- coordinatorLayout : It is the root layout of the activity
- www.journaldev.com : This is the message to be appear on snackbar, and we can customise it with our own message
- Snackbar.LENGH_LONG : This is last parameter which is the time limit how long snackbar to be displayed
show() method is used to display the Snackbar on the screen.
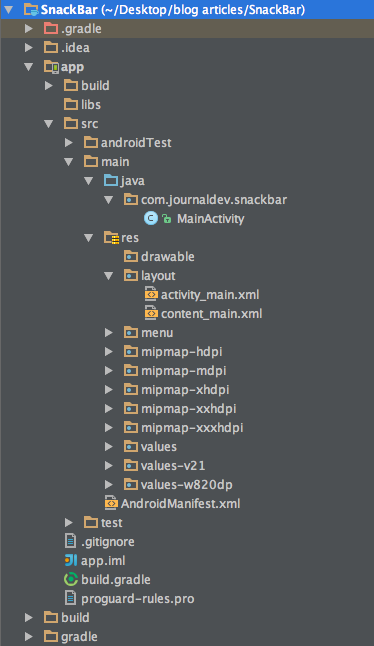
Android Snackbar Example Project Structure
Android Snackbar Example Code
No changes in the activity_main.xml code which contains the CoordinatorLayout. The content_main.xml consists of three buttons. One for each type of Snackbar that we’ll be discussing.
<?xml version="1.0" encoding="utf-8"?>
<RelativeLayout xmlns:android="https://schemas.android.com/apk/res/android"
    xmlns:app="https://schemas.android.com/apk/res-auto"
    xmlns:tools="https://schemas.android.com/tools"
    android:layout_width="match_parent"
    android:layout_height="match_parent"
    android:paddingBottom="@dimen/activity_vertical_margin"
    android:paddingLeft="@dimen/activity_horizontal_margin"
    android:paddingRight="@dimen/activity_horizontal_margin"
    android:paddingTop="@dimen/activity_vertical_margin"
    app:layout_behavior="@string/appbar_scrolling_view_behavior"
    tools:context="com.journaldev.snackbar.MainActivity"
    tools:showIn="@layout/activity_main">

    <Button
        android:layout_width="wrap_content"
        android:layout_height="wrap_content"
        android:text="DEFAULT SNACKBAR"
        android:id="@+id/button"
        android:layout_alignParentTop="true"
        android:layout_centerHorizontal="true" />

    <Button
        android:layout_width="wrap_content"
        android:layout_height="wrap_content"
        android:text="ACTION CALL SNACKBAR"
        android:id="@+id/button2"
        android:layout_below="@+id/button"
        android:layout_centerHorizontal="true" />

    <Button
        android:layout_width="wrap_content"
        android:layout_height="wrap_content"
        android:text="CUSTOM VIEW SNACKBAR"
        android:id="@+id/button3"
        android:layout_below="@+id/button2"
        android:layout_centerHorizontal="true" />
</RelativeLayout>
The code snippet for Action Call Snackbar button is given below:
two.setOnClickListener(new View.OnClickListener() {
            @Override
            public void onClick(View v) {
                Snackbar snackbar = Snackbar
                        .make(coordinatorLayout, "Message is deleted", Snackbar.LENGTH_LONG)
                        .setAction("UNDO", new View.OnClickListener() {
                            @Override
                            public void onClick(View view) {
                                Snackbar snackbar1 = Snackbar.make(coordinatorLayout, "Message is restored!", Snackbar.LENGTH_SHORT);
                                snackbar1.show();
                            }
                        });

                snackbar.show();
            }

        });
In the above code a new onClickListener method is invoked on clicking the action button with the respective Snackbar being displayed in it. The code snippet for Custom Snackbar that’s invoked on the second button is given below:
three.setOnClickListener(new View.OnClickListener() {
            @Override
            public void onClick(View v) {
                Snackbar snackbar = Snackbar
                        .make(coordinatorLayout, "Try again!", Snackbar.LENGTH_LONG)
                        .setAction("RETRY", new View.OnClickListener() {
                            @Override
                            public void onClick(View view) {
                            }
                        });
                snackbar.setActionTextColor(Color.RED);
                View sbView = snackbar.getView();
                TextView textView = (TextView) sbView.findViewById(android.support.design.R.id.snackbar_text);
                textView.setTextColor(Color.YELLOW);
                snackbar.show();
            }
        });
The MainActivity.java is given below.
package com.journaldev.snackbar;

import android.graphics.Color;
import android.os.Bundle;
import android.support.design.widget.CoordinatorLayout;
import android.support.design.widget.FloatingActionButton;
import android.support.design.widget.Snackbar;
import android.support.v7.app.AppCompatActivity;
import android.support.v7.widget.Toolbar;
import android.view.View;
import android.view.Menu;
import android.view.MenuItem;
import android.widget.Button;
import android.widget.TextView;

public class MainActivity extends AppCompatActivity {

    CoordinatorLayout coordinatorLayout;
    private Button one, two, three;

    @Override
    protected void onCreate(Bundle savedInstanceState) {
        super.onCreate(savedInstanceState);
        setContentView(R.layout.activity_main);
        Toolbar toolbar = (Toolbar) findViewById(R.id.toolbar);
        setSupportActionBar(toolbar);

        FloatingActionButton fab = (FloatingActionButton) findViewById(R.id.fab);
        fab.setOnClickListener(new View.OnClickListener() {
            @Override
            public void onClick(View view) {
                Snackbar.make(view, "FloatingActionButton is clicked", Snackbar.LENGTH_LONG)
                        .setAction("Action", null).show();
            }
        });

        coordinatorLayout = (CoordinatorLayout) findViewById(R.id.coordinatorLayout);

        View layout= findViewById(R.id.layout);

        one=(Button)layout.findViewById(R.id.button);
        two=(Button)layout.findViewById(R.id.button2);
        three=(Button)layout.findViewById(R.id.button3);


        one.setOnClickListener(new View.OnClickListener() {
            @Override
            public void onClick(View v) {
                Snackbar snackbar = Snackbar
                        .make(coordinatorLayout, "www.journaldev.com", Snackbar.LENGTH_LONG);
                snackbar.show();
            }
        });

        two.setOnClickListener(new View.OnClickListener() {
            @Override
            public void onClick(View v) {
                Snackbar snackbar = Snackbar
                        .make(coordinatorLayout, "Message is deleted", Snackbar.LENGTH_LONG)
                        .setAction("UNDO", new View.OnClickListener() {
                            @Override
                            public void onClick(View view) {
                                Snackbar snackbar1 = Snackbar.make(coordinatorLayout, "Message is restored!", Snackbar.LENGTH_SHORT);
                                snackbar1.show();
                            }
                        });

                snackbar.show();
            }

        });

        three.setOnClickListener(new View.OnClickListener() {
            @Override
            public void onClick(View v) {
                Snackbar snackbar = Snackbar
                        .make(coordinatorLayout, "Try again!", Snackbar.LENGTH_LONG)
                        .setAction("RETRY", new View.OnClickListener() {
                            @Override
                            public void onClick(View view) {
                            }
                        });
                snackbar.setActionTextColor(Color.RED);
                View sbView = snackbar.getView();
                TextView textView = (TextView) sbView.findViewById(android.support.design.R.id.snackbar_text);
                textView.setTextColor(Color.YELLOW);
                snackbar.show();
            }
        });


    }

    @Override
    public boolean onCreateOptionsMenu(Menu menu) {
        // Inflate the menu; this adds items to the action bar if it is present.
        getMenuInflater().inflate(R.menu.menu_main, menu);
        return true;
    }

    @Override
    public boolean onOptionsItemSelected(MenuItem item) {
        // Handle action bar item clicks here. The action bar will
        // automatically handle clicks on the Home/Up button, so long
        // as you specify a parent activity in AndroidManifest.xml.
        int id = item.getItemId();

        //noinspection SimplifiableIfStatement
        if (id == R.id.action_settings) {
            return true;
        }

        return super.onOptionsItemSelected(item);
    }
}
The activity_main.xml is unchanged. The output of the snackbar android app in action is shown below.  This brings an end to this tutorial. You can download the final Android Snackbar project from the link below.
Download Android SnackBar Example Project
Reference: Android Developer Doc
Source:
https://www.digitalocean.com/community/tutorials/android-snackbar-example-tutorial